Tuesday, March 31, 2009

The Monthly Bake : Chocolate Chip Oatmeal Cookies


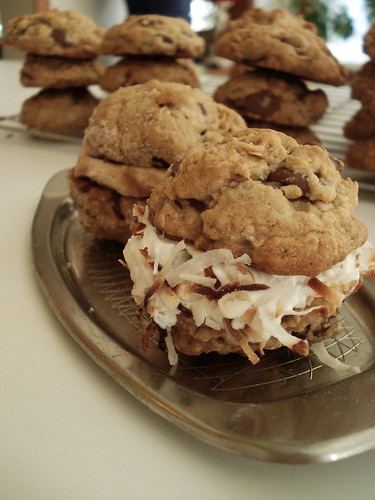
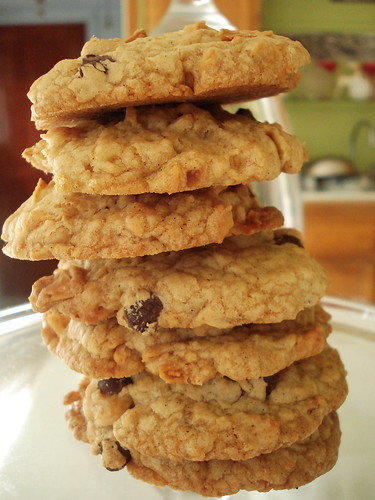
Front and Center, originally uploaded by miss.mallory.


I've been out of the the (food blogging event) loop for a little over a year now. A lot of my life was shaken up by enrolling in college, especially the blogging part. It has taken me quite some time to get back in the swing of things, some areas still need attention, but I'm beginning to adjust and really find a routine in my 'new' life (although, it's not so new anymore).

Food blogging events are so satisfying. I love them for the same reason I love my cooking/dinner group; they inspire one to get in the kitchen and get creative. They may not always be recipes, or ingredients you haven't worked with in the past, but sometimes I find that even more exciting. How do you take something you've made (sometimes a hundred times) and make it different, thrilling, and new?

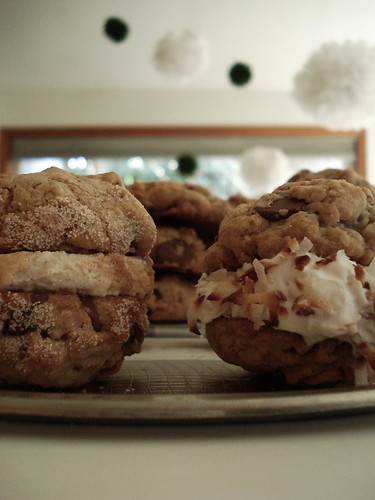
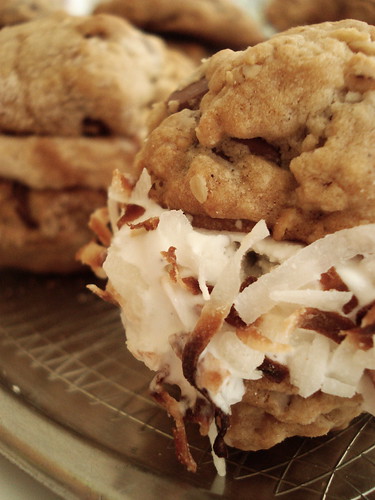
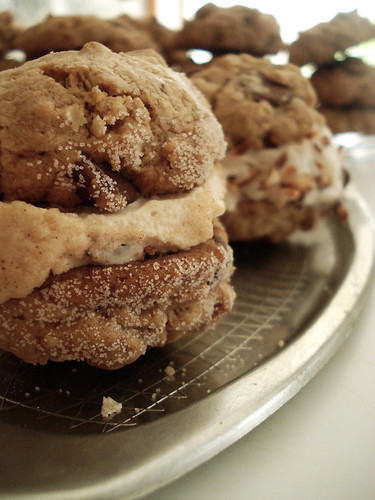
Rosie and Maria over at sweet and simple bakes gave food bloggers the opportunity to do just that, with their baking challenge this month. I didn't get it together in time to participate in their cherry bakewll tart challenge last month, but I knew I could whip up a batch of their oatmeal and chocolate chip cookies no problem. Which got me thinking, 'how can I take my chocolate chip oatmeal cookies to the next level so they may stand out among the pack'. After our cooking clubs dinner on Saturday, our dessert left a pint of an amazing vegan vanilla ice cream made with coconut milk. It's so rich and dreamy. It got me thinking about my favorite ice creams, one being ben and jerry's oatmeal. A cinnamon sweet cream ice cream with chunks of oatmeal cookie and chocolate. *ding* lightbulb *ding*. That was it. Oatmeal chocolate cookies, with oatmeal chocolate chip cookie ice cream. So I set off to the grocery store, to buy a bag of ghirardelli chocolate chips and a pint of ben and jerry's. I didn't want to make the lovely coconut ice cream feel bad either, so I used both (in separate sandwiches of course). The result was divinity. Cookies, ice cream, plenty of oats, sugar and chocolate with some toasted coconut and cinnamon sugar tossed in? Yum!

So thank you to Rosie and Maria for this great challenge, I sure had a lot of fun with it!


Sifting., originally uploaded by miss.mallory.


Recipe : Oatmeal Chocolate Chip Cookies

Ingredients
110g (4oz) butter, softened
110g (4oz) caster sugar
110g (4oz) soft brown sugar
1 egg
2 tbsp water
1 tsp vanilla extract
250g (9oz) porridge oats (rolled oats)
110g (4oz) self-raising flour
1 level tsp salt
110g (4oz) chocolate chips, raisins or chopped nuts
1 pint of your favorite ice cream (I used Bliss Vanilla Vegan Ice Cream and Ben and Jerry's Oatmeal Cookie Ice Cream)


Directions:

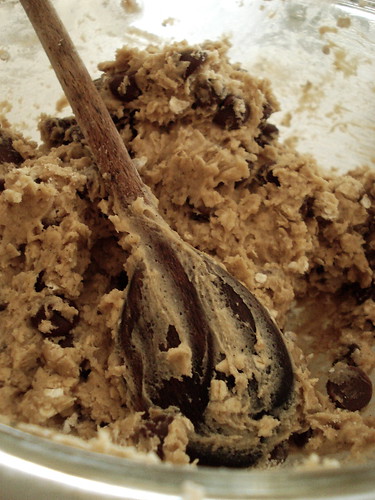
Preheat the oven to 350 F. Cream the butter in a large bowl or in an electric food mixer until soft. Add the sugars and beat until the mixture is light and fluffy. Add the egg, water and vanilla extract while still beating. Reduce the speed and gently mix in the oats, flour, salt and raisins to form a dough. Using your hands, roll the dough into walnut sized balls and place slightly apart on two baking trays. Bake in the oven for 12-25 minutes or until light golden brown but still slightly soft in the centre. Allow to cool on the trays for a minute before transferring to a wire rack to cool.

With a small scoop place a generous tablespoon of ice cream between the bottom of two cookies, sandwich together and garnish edges (I used cinnamon sugar on the oatmeal cookie ice cream and toasted coconut on the vegan ice cream).
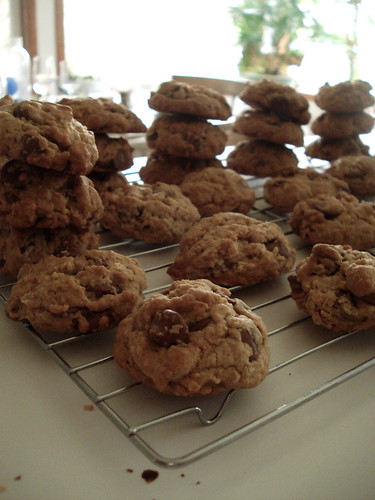

Fresh from the oven., originally uploaded by miss.mallory.


These little gems would be perfect for a warm spring or summer treat.
Enjoy!

P.S. I'm posting a few more pics than usual. Clearly, I was excited about these cookies!


A view from the frontlines., originally uploaded by miss.mallory.


Oozing., originally uploaded by miss.mallory.

Monday, March 30, 2009

Deconstructed.


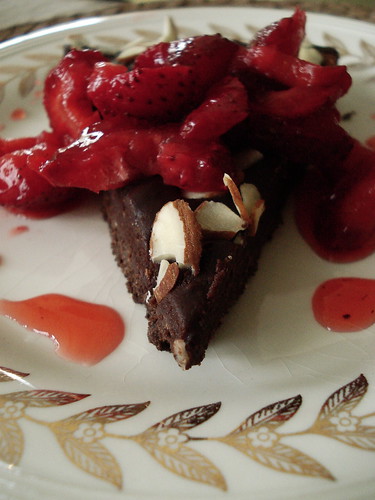
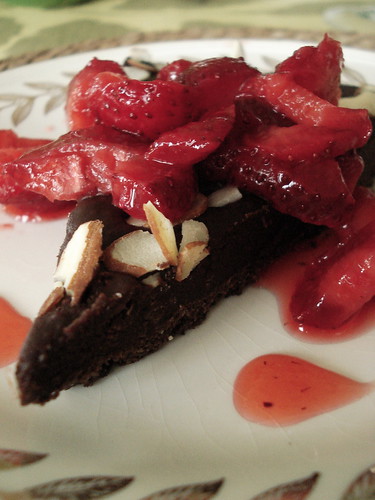
Yesterday I headed over to my moms house. It was a surprisingly warm and gorgeously sunny day here in Bellingham on Sunday. There were only a few clouds in the sky. It was a welcome taste of what's to come in the coming months. After over three hours in working on her five acres, chopping down trees and tearing at blackberries, I was so tired (and sore) that I decided to stay for dinner. After a scrumptious sunday dinner consisting of flank steak, fresh peas, and twice baked potatoes I was surprised to hear there was dessert, homemade nonetheless! Kevin had made a bittersweet chocolate tart that they'd seen Giada make earlier that weekend. For whatever reason, they'd decided to top this already delicious tart with fresh strawberries. Honestly, I wasn't sure I'd like it, when in fact, I was so incredibly excited about not only the tart, but the pairing, that I immediately knew I had to blog about it. It was like an incredible inside out (or as I dubbed it; deconstructed) chocolate covered strawberries. Amazing. A little more work than simply dipping a piece of fruit, but well worth it.

Recipe: Chocolate Ganache Tart with Honey and Almonds
Adapted from Giada De Laurentis

1/2 stick (2 ounces) unsalted butter, cut into 1/2-inch pieces, at room temperature, plus extra for coating the pan
9 chocolate graham crackers, 5 1/2-ounces total
2 tablespoons slivered almonds
3/4 cup heavy cream
1/4 cup honey
12 ounces semisweet chocolate chips
Directions
Preheat the oven to 350 degrees F.

Butter the bottom and sides of a 9-inch springform pan.

Place the graham crackers and almonds in the bowl of a food processor. Process until the mixture forms fine crumbs, about 15 to 20 seconds. Add the butter and pulse until incorporated. Press the crumb mixture into the bottom of the prepared pan. Bake for 12 minutes. Cool to room temperature, about 20 minutes.

In a small saucepan, whisk the cream and honey together over low heat until the honey has dissolved. Increase the heat to medium and bring the mixture to just below a boil. Place the chocolate chips in a medium bowl. Pour the hot cream over the chocolate and stir until the mixture is smooth. Pour the chocolate filling over the prepared crust, sprinkle with additional slivered almonds. Refrigerate for at least 5 hours or preferably overnight.

Loosen the tart from the sides of the pan by running a thin metal spatula around the edge. Unmold the tart and transfer to a serving plate. Cut into wedges and serve with fresh strawberries.


Tuesday, March 24, 2009

Little Devils


Les Deviled Eggs, originally uploaded by miss.mallory.


I love eggs.

I don't take part in debates about the almighty egg; good or bad for your health? I say, good, period. Just like many things in life, eggs must be enjoyed in moderation, but they are oh so good for your body, your brain and your tastebuds.

So, when my fridge and pantry are sparce, but I need a quick lunch or satisfying breakfast I turn to the egg. Since I'm so fond of baking I generally have plenty of eggs on hand. One of my favorite egg recipes is the deviled egg. Simple, quick, filling, and just a tad decadent. They're so darn easy to make, that in a hunger pinch I can have them on my plate and in my mouth in under 20 minutes, tops. I thought I'd share my really simple, but trust me, delicious recipe, since they are incredibly popular during this spring-time of year.

Recipe : Deviled Eggs : Serves 8 (don't eat this many for one, of course)

Ingredients:

4 eggs
3 Tablespoons mayo
1 tsp dijon mustard
Hungarian Paprika to garnish

Directions:

1. Place eggs in a saucepan, cover with cold water and saucepan lid.
2. Set heat on medium/high, boil eggs for 5 minutes.
3. Let eggs stand another 8 minutes, remove and put in ice bath.
4. Place mayo and dijon in a small bowl.
5. Peel shells from eggs and cut in half, remove yolks and place in bowl with condiments
6. Thoroughly mix yolks and mayo
7. Spoon about 1 tablespoon of yolk mixture back into yolk crevice on egg white
8. Sprinkle with the sweet hungarian paprika
9. Enjoy!

Monday, March 23, 2009

Katie's Cupcakes : A Taste Test


Well folks, it finally happened. Little ol' Bellingham has received it's very own cupcake shop, and it's in my neighborhood. The stickers of two cupcakes holding hands has been pasted up on the windows for what seems like forever, and last week the pink paper hiding the work going on inside was taken down and the doors opened. I didn't rush down immediately, partially because I'm bitter (yes, in some wonderland world in my head I always hoped I would somehow accomplish the feat of opening Bhams first cupcakes store), but mostly because it was finals week and I had my first dentist appointment in years (I suspected overdosing on sugar before that was a really bad idea). So after a long, fabulous weekend in Victoria BC, I came home and headed down to the new shop; Katie's Cupcakes with the ever lovely Rachelle. I knew if I was being un-necessarily critical based on my own jealousies that she would bring me down to Earth. I want to assure you that I did go in there with a completely open mind and an open heart. I desperately wanted to hate Trophy as well, but Jennifer hooked me at my first chocolate-y bite. I don't think my tastebuds would allow me to lie to myself, no matter how much I might want them to.

So, how was it? Honestly?
It was okay. Just okay.

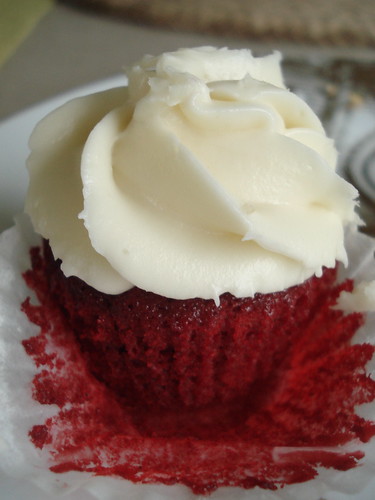
I really liked the mini-red velvet (pictured below). Good flavor, the chocolate really came through (although some people do prefer their velvet cakes to lack a prominent chocolate taste, I like it). Plus, if you can't make a decent cream cheese frosting, you really don't have any business opening up a cake shop. No complaints here about their cream cheese frosting.

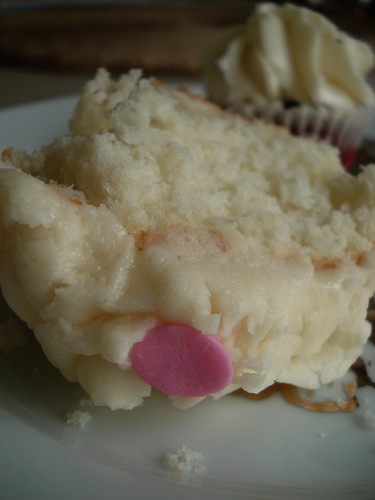
The 'normal' sized vanilla on vanilla was not very memorable. Bases are key when it comes to cake. You must have your bases covered. In my three or four years of baking cake nearly every weekend I have yet to find a chocolate cake that makes my soul melt into a puddle at my feet. But vanilla, I got that down pat almost straight away. Maybe my cupcake was just the result of an off batch? Glitches in the first few days of business? The bottom had a large pocket of slightly gooey (uncooked) batter. Um, no thank you. Rachelle and I were both put off by the texture. It was dense, but not in a moist way. The crumb was really tight, almost as if the batter had been over-worked after the flour was added. I wouldn't label it light or moist. I liked the flavor alright I suppose. The other thing I really didn't like was the buttercream. It was a tad too sweet for me. The texture was slightly grainy, which I've experienced when I don't whip my frosting enough or I've added just a tad too much powdered sugar. Plus it was uber buttery. I liked the mini-chocolate, they picked a good chocolate base, it was moist, but was topped with the same buttercream. Overall, I prefer the cupcakes sold at the downtown market at "Icing on the Cake". The buttercream is light, white, tall and fluffy and the cakes are a bit more creative and moist.

One must keep in mind while reading this that I am in every sense of the phrase a (cup)cake connoisseur. Not only have I spent an unheard of (and likely quite ridiculous) amount of time baking in the kitchen over the last four or five years, I was raised around a baker. I don't have 'normal' standards when it comes to matters of cake. Things I might pick up on, most of the populace could care less about. I can be a bit of a snob. I admit this.

Beyond taste, Katie's is decorated for little girls. Light pink, green, polka dots, etc. It's a bit sparce in my opinion. I've gotten used to Trophy; shelves packed with shiny cake related baubles for adults and kids alike, a decor palate that is more gender and age friendly, just a tad more whimsical and sophisticated but not stuffy.

I will say that Katie's was nearly sold out of cupcakes and it was only 3 o' clock. But, they have been open less than a week and in order to succeed beyond the year mark I believe they will have to find a way to break out of being a fun commodity. I can rarely resist a trip to Trophy when in Seattle. It won't be too much of a challenge to resist Katie's for me and they are only a few blocks away from home. I might opt to stay in and bake my ricotta lemon cupcakes or a few chocolate matcha cupcakes. That's not to say they won't find wild success here in the ham, because as I said, I'm picky and not a child. Katie's will make their money catering to kids, and they are clearly already doing a decent job of marketing to that demographic.

So, I say welcome to the neighborhood Katie's. There's no doubt about it, a cupcake shop in Bellingham has been long overdue!


P.S. I really want to see this place have fun with frosting and decorating cupcakes too! Tall spirals of frosting, more than just store bought sprinkles. Cupcakes are so special because they can be so beautiful with a wide variety of accoutrements.

Tuesday, March 17, 2009

Top O' The Evenin' To Ya!

Guinness & Baileys Happy St. Patty's day everyone!
I hope you've enjoyed pitchers full of guinness and stuffed your face full of irish inspired food!

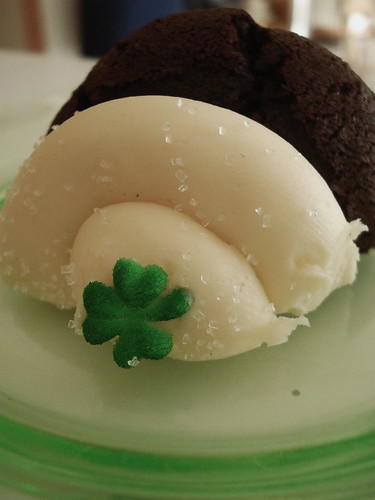
I received the sweetest (quite literally as well as metaphorically) surprise on Sunday night. The lovely Rachelle brought me a cupcake from Trophy; guinness chocolate cake with baileys irish cream frosting. It was such an amazing end to a wonderful weekend! Thank you again sweetness!

Sunday, March 15, 2009

Everything but the kitchen sink.

I'm a cookie monster. I hate to say it, but cookies might be my favorite sweet treat. If it's not my all time favorite, it's definitely in the top three. There's just something so incredibly satisfying about a tall, cold glass of milk and a perfect cookie. In my humble opinion, a cookie must be a delicate balance of crunchy and chewy. Mmmm, just writing about it is making me crave cookies and milk, I swear I have next to no willpower when it comes to that classic combo.

After making my desserts for the auction I had a bunch of leftover, random ingredients, laying haphazardly all over my kitchen counter. Half a bag of white chocolate chips, some bittersweet, a large bowl of flaked toasted coconut. And although I'd been baking for 24 hours straight for the auction, I had no dessert left for myself. So, come wednesday I was ready to remedy this, and get rid of these random bags and bowls of leftover ingredients. So, I made cookies of course. I used my favorite chocolate chip cookie dough as a base, and threw whatever I had lying around in the bowl. The result was unsurprisingly delicious. Perfectly chewy with a perfectly crunchy crust. Just so, so good. Now, if only we hadn't chowen them all down. . .

Kitchen Sink Cookies

2 cups all-purpose flour
1/2 teaspoon baking soda
1/2 teaspoon salt
3/4 cup unsalted butter, melted
1 cup packed brown sugar
1/2 cup white sugar
1 tablespoon vanilla extract
1 egg
1 egg yolk
Whatever you want, I used:
toasted coconut
white chocolate
bittersweet chocolate
wheaties (yes, wheaties, gives the cookies an incredible texture)

Preheat the oven to 325 degrees F (165 degrees C). Grease cookie sheets or line with parchment paper.

Sift together the flour, baking soda and salt; set aside.

In a medium bowl, cream together the melted butter, brown sugar and white sugar until well blended. Beat in the vanilla, egg, and egg yolk until light and creamy. Mix in the sifted ingredients until just blended. Stir in the kitchen sink ingredients. Drop cookie dough 1 heaping Tablespoon at a time onto the prepared cookie sheets. Cookies should be appx. 3 inches apart.

Bake for 14 to 18 minutes in the preheated oven, or until the edges are golden brown. Cool on baking sheets for a few minutes then transfer to wire racks to cool.


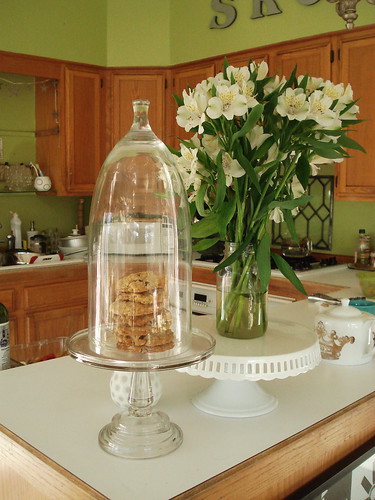
Cloched Cookies

Friday, March 13, 2009

After A Long Day.


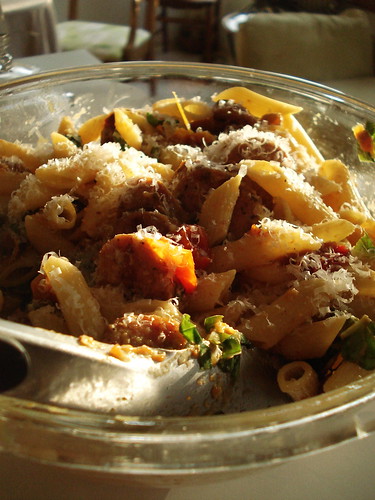
Light Italian Penne, originally uploaded by miss.mallory.
Working in the yard, on a chilly, but stunningly sunny day, calls for something hearty, delicious and simple for dinner. My yard is a disaster, I mean that as solemnly and seriously as you can imagine. The woman who designed it had no idea what she was doing. When the plants were babies they were cute, but now, years later, they've grown (way too much) and our front yard looks like an overgrown jungle (I'm not exaggerating). Plus, she paid someone to weed and manage it, little old college student me can't afford that. Sooo, I've been out there for the last couple of days taking advantage of the nice weather we've been having. And I'm proud to say that I've made some real progress. To someone who hadn't inspected the yard before hand may not be under the impression that our front yard looks at all decent, but I'm thrilled. I can officially see the potential. I know that my goals are attainable. I'm thrilled!

So, after a couple of hours of hardcore yardwork on thursday I went inside and whipped up a quick and delicious dinner, I was desperate to get off my feet, the endless squat, stand and scoot of pulling weeds caused my flat feet and my thighs to burn. The last thing I wanted to do was stand in the kitchen for an hour. So I threw together an easy, tasty, very italian bowl of pasta. Bowl some of your favorite noodles, and here's what I threw in:

1/2 cup of oven roasted baby heirloom tomatoes
4 cloves roasted garlic
5 fresh basil leaves, roughly chopped
3 isernios chicken italian chicken sausage
drizzle of olive oil
sprinkle of sea salt
dash of fresh italian parsley

Toss with your pasta, and viola!
A gourmet meal quick, giving you more time to enjoy the sunshine (and perhaps your yard!)

Thursday, March 12, 2009

Faux Fried Rice


Healthy 'Fried Rice', originally uploaded by miss.mallory.
Recently I put the household on a strict budget, which includes only eating out twice during a pay period. This means we're eating in 12 out of the 14 days. Therefore, I've expanded my grocery list and my recipe options. This has forced me (and I don't say that as a bad thing) to really break out of the box, keep dinners changing and balanced. I love eating dinners from different regions, cultures, and roots every evening. My dinner plate must be free of monotony.

I've never made 'real' fried rice, nor do I ever order when I'm dining out. Maybe I'm just not attracted to a greasy bowl of rice sprinkled with what appears to be frozen peas and corn with bits of chicken strewn throughout. It's just not my bag. If I'm going to consume a vat of calories when I'm having Chinese or Thai I definitely go for some noodle rich dish full of spices. So, greasy rice, not so much. However, I love brown rice. Once a week I top a scoop of short grain brown rice with stir fried veggies. So to break out of my box, I sought out a healthy recipe where rice was the star. Cooking light led me to a surprisingly easy recipe which turned out to be insanely delicious. It might not be traditional, it's low in fat and calories, I don't use meat or egg in it, but you could if you wanted to. It's simple, delectable and so fresh. The crunchy cool cucumber, and acidic tomato balance well with the hot, salty and spicy rice. It's just so well balanced! It's become a go to recipe for sure.

Ingredients
2 teaspoons canola oil
1/3 cup minced shallots (about 3)
1 to 2 tablespoons minced serrano chile
1 tablespoon sambal oelek (chile paste with garlic)
2 teaspoons fish sauce
2 teaspoons low-sodium soy sauce
1/4 teaspoon salt
4 garlic cloves, minced
2 cups diced cooked chicken breast
2 cups diced cooked shrimp (about 12 ounces)
3 cups cooked rice
1/2 cup diced cucumber
1/2 cup diced tomato

Preparation
Heat canola oil in a large nonstick skillet over medium-high heat. Add shallots and chile to pan; sauté 2 minutes or until the shallots are lightly browned. Add chile paste, fish sauce, soy sauce, salt, and garlic to the pan; cook for 1 minute or until the sauce becomes fragrant. Add diced chicken, shrimp, and rice to the pan, stirring to coat with sauce. Cook for 2 minutes or until thoroughly heated, stirring occasionally. Place about 1 1/2 cups rice on each of 4 plates, and sprinkle each serving with 2 tablespoons cucumber and 2 tablespoons tomato.

Saturday, March 07, 2009

Butterfly Wings.


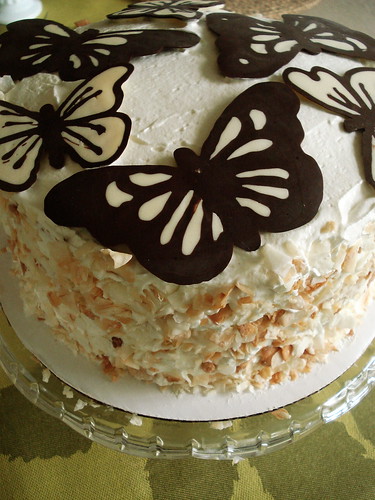
This afternoon I dropped off two desserts for a dessert auction. One was the Samoa Cheese Tart, the second was this gorgeous little cake. The recipe was featured on the blog here in cupcake form. To make this cake I simply doubled that recipe and topped it off with chocolate transfer butterflies. For a step by step guide to creating your own chocolate transfers, check out my article here . Let's hope those at the dinner are bidding big bucks on this beauty!! Enjoy the pictures!!


Monday, March 02, 2009

The Girl Scouts Cometh


Salted Caramel Samoa Tart, originally uploaded by miss.mallory.

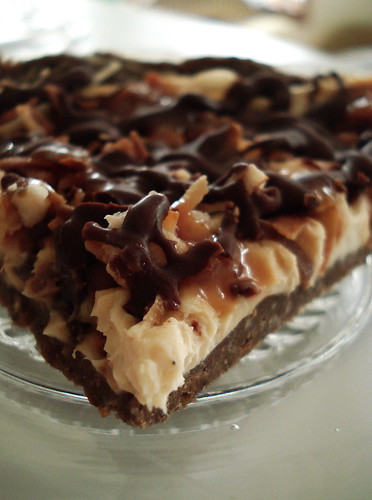
It's that time of year again. You know what I'm talking about, that time of year when on your way out of the grocery store you're bombarded with sweet young faces, vested outfits and most importantly boxes upon boxes of cookies. Oh, yes, the girl scouts are in full force. For the sake of my waistline and to spare seeing their disappointment when I say 'no thank you', I generally avoid them and make a beeline for the quickest exit with the least likelyhood that I'll be spotted. This year, however, I was anticipating their arrival. Not a day after I had wondered when they would show, there they were, standing outside of Haggen last Friday afternoon. I almost squealed with excitement. It's not that I was truly all that excited for their arrival, because while I do appreciate and enjoy girl-scout cookies, I am more than fully aware of how bad they are for me, and how little self control I have when it comes to the ultimate in cookie creation; the samoa. However, I have been asked to submit a few desserts for a dessert auction this weekend. I knew I was going to make an impressive layer cake, but I wondered what else? I also knew I wanted both desserts to be the ultimate crave worthy in appearance and flavor (the better looking the dessert, the more money it will bring in). I knew my cake was going to take a deal of attention and care, so I also wanted my second dessert to be less intensive. I also knew it had to be chocolate, because the layer cake has a vanilla base. After all, one must have balance in life, even desserts! That's when I came across Sticky, Gooey, Creamy, Chewy recipe for her Samoa Cheese Tart. Angels sang when I saw that post. The holy grail. This was it, this was the dessert I was destined to make. There was just one problem, I'd seen no girl scouts, and the addition of making homemade samoas for the crust turned an easy tart into a production tart. Alas, the girl-scout gods answered my prayers and all but a day after the recipes discovery, there were the girls, happily selling cookies. My other obstacle was that I had not tasted the recipe. I wasn't about to submit a tart I'd never experienced myself. I knew that it had to be good, after all it's from one of my favorite dessert sites, but I knew I was going to make a few minor adjustments and that I wanted to have tasted it myself before expecting others to bid and enjoy it.

This tart is going to make a lot of money. I know it. Not only is it one of the most visually appealing and drool-worthy tarts I've ever made, it tastes just as delicious, if not better. Thomas exclaimed it was the best dessert he'd ever tasted and tortured Ollie with his moans of taste bud delight. Since it's conception yesterday, only two pieces remain (Thomas went a little tart crazy). It's no bake, which I'm unfamiliar with and was a bit weary of. Though, not baking it makes the crust a chocolate-y layer with bits of coconut and cookie that's so satisfyingly chewy. The original recipe uses dulce de leche in the cheese layer and drizzled on top. I substituted dulce de leche for homemade salted caramel. The cool, tangy cheesiness plays of the salty sweet of the drizzle and the overwhelming sweetness of the crust so well. It really is like a party in your mouth! It's so well balanced and impossible to resist. I also made my tart paper thin by halving the cheese layer. The original recipe can be found over at Sticky, Gooey, Creamy, Chewy, right here in fact, below is my adaptation.

Salted Caramel Samoa Tart

Ingredients:

1 box of girl scout samoa cookies
3 Tablespoons of unsalted butter
4 oz. cream cheese
4 oz. mascarpone
1/2 cup of salted caramel
2 oz. melted semi-sweet chocolate
1/2 cup of toasted coconut

Directions:

1. Throw all of the cookies in a food processor and blend until you've got a fine crumb
2. Mix crumbs and melted butter in a bowl and mix thoroughly
3. Press crumb mixture into 9 inch tart pan with removable bottom
4. Refrigerate for at least 1/2 hour
5. Blend cream cheese, mascarpone and little over 1/4 cup of salted caramel together until smooth
6. Spread cheese over cookie crust, top with toasted coconut and drizzle with chocolate and caramel.
7. Eat and swoon.

Salted Caramel

3/4 sugar
1/4 water
pinch cream of tartar
1/2 cup hot milk
1 Tablespoon Butter
Splash of vanilla
1 teaspoon fleur de sel

Directions:

1. Heat sugar, tartar and water over high heat until sugar dissolves, stirring occasionally.
2. Reduce heat to medium and cook without stirring until liquid turns deep amber in color
3. Remove from heat and pour in hot milk, butter, vanilla and fleur de sel and stir until combined with a wooden spoon. Allow to cool.