Gingerbread Chalet, originally uploaded by miss.mallory.
The December 2009 Daring Bakers’ challenge was brought to you by Anna of Very Small Anna and Y of Lemonpi. They chose to challenge Daring Bakers’ everywhere to bake and assemble a gingerbread house from scratch. They chose recipes from Good Housekeeping and from The Great Scandinavian Baking Book as the challenge recipes.
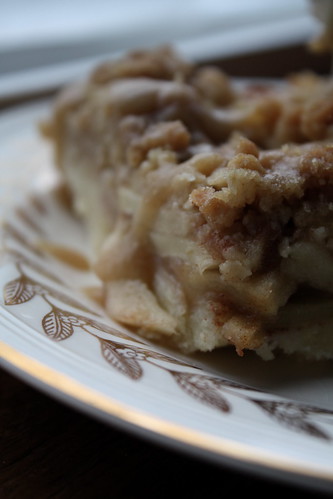
I absolutely loved this months challenge. Every December I host a gingerbread making party, complete with frosting 'glue', lots of candy, christmas punch, and a cheeseball (for eating, of course). So, this challenge was right up my Holiday alley. I actually made two houses this year. This A-Frame, and a tall london tower-esque house, whose roof wouldn't stay put, so, in the garbage it went. The A-frame appealed to me because the roof went from sky to floor, no sliding, holding in place for long periods of time, or any gingerbread acrobatics in general. This little house could probably be much fancier than it currently is, but I was in very simple, minimalistic mood the morning I glued it all together. I encourage you to check out the other Daring Bakers gingerbread homes, there are many spectacular structures among them!
Gingerbread house making may be over in your household, with the end of the holiday season usually comes the end of holiday projects and treats, but if you're still up for a little confection making and you haven't tackled the almighty gingerbread house, whether it be an A-frame, a cottage, a barn, or a tower, I suggest you take a little time before the new year and get a buildin'!
Anna's Recipe:
Spicy Gingerbread Dough (from Good Housekeeping)
2 1/2 cups (500g) packed dark brown sugar
1 1/2 cups (360mL) heavy cream or whipping cream
1 1/4 cups (425g) molasses
9 1/2 cups (1663g) all-purpose flour
2 tablespoon(s) baking soda
1 tablespoon(s) ground ginger
Directions
1. In very large bowl, with wire whisk (or with an electric mixer), beat brown sugar, cream, and molasses until sugar lumps dissolve and mixture is smooth. In medium bowl, combine flour, baking soda, and ginger. With spoon, stir flour mixture into cream mixture in 3 additions until dough is too stiff to stir, then knead with hands until flour is incorporated and dough is smooth.
2. Divide dough into 4 equal portions; flatten each into a disk to speed chilling. Wrap each disk well with plastic wrap and refrigerate at least 4 hours or overnight, until dough is firm enough to roll.
3. Grease and flour large cookie sheets (17-inch by 14-inch/43x36cm)
4. Roll out dough, 1 disk at a time on each cookie sheet to about 3/16-inch thickness. (Placing 3/16-inch dowels or rulers on either side of dough to use as a guide will help roll dough to uniform thickness.)
5. Trim excess dough from cookie sheet; wrap and reserve in refrigerator. Chill rolled dough on cookie sheet in refrigerator or freezer at least 10 minutes or until firm enough to cut easily.
6. Preheat oven to 300 degrees F (149C)
7. Use chilled rolled dough, floured poster board patterns, and sharp paring knife to cut all house pieces on cookie sheet, making sure to leave at least 1 1/4 inches between pieces because dough will expand slightly during baking. Wrap and reserve trimmings in refrigerator. Combine and use trimmings as necessary to complete house and other decorative pieces. Cut and bake large pieces and small pieces separately.
8. Chill for 10 minutes before baking if the dough seems really soft after you cut it. This will discourage too much spreading/warping of the shapes you cut.
9. Bake 25 to 30 minutes, until pieces are firm to the touch. Do not overbake; pieces will be too crisp to trim to proper size.
10. Remove cookie sheet from oven. While house pieces are still warm, place poster-board patterns on top and use them as guides to trim shapes to match if necessary. Cool pieces completely before attempting to assemble the house.

Gingerbread Chalet, originally uploaded by miss.mallory.
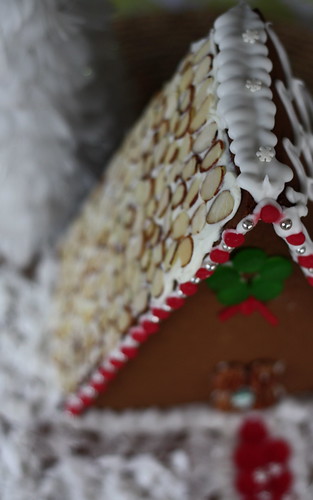
Gingerbread Chalet, originally uploaded by miss.mallory.
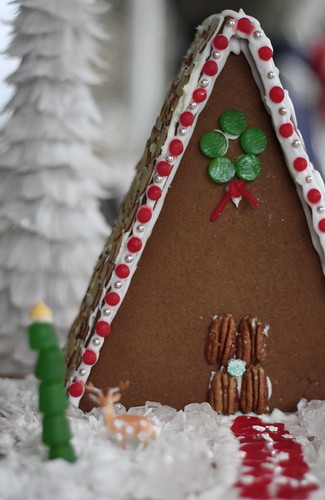
Gingerbread Chalet, originally uploaded by miss.mallory.