Monday, December 22, 2008

Red, White & Peppermint


Chocolate Peppermint Cookies, originally uploaded by miss.mallory.


This recipe was adapted from the cookie featured in the back of Martha Stewart Living Magazine in the month of December (the regular mag, not any of the numerous special holiday rags she puts out). I have a thing for chocolate and peppermint, and an even bigger thing for cookies with any trace amount of chocolate. I've been snowed in for over a week now, I haven't been able to drive, I'm like a teenager without a license again, in order to get anywhere I've been relying on my mother, my friends with snow tires, the bus and my own two feet. I think I'd be more inclined to go out and about in general, if it weren't 23 degrees outside. That's preventative of my adventuring out into the world. So, instead, I've locked myself in the house and baked cookies. For nearly a week straight. Perhaps we'll be lucky enough this year to have white christmas, I hope it will stick around a few days longer.

These cookies were a big hit. Light, thin, and crunchy. Kind of like a little oreo. Instead of dipping them entirely in peppermint white chocolate like martha, I drizzled it on top. Also, she adds peppermint to her chocolate batter, I did not. The reason being; Thomas loathes the chocolate and peppermint duo. So in order for him to enjoy them, I made some cookies with peppermint in the white chocolate and some without. Those with peppermint received a light dusting of red sugar. Suffice to say, I think he actually snuck a few peppermint cookies, I couldn't have possibly eaten all of them on my own. They're not the easiest cookie, a lot of rolling, cutting, freezing, and repeating. Odd to me. But, give them a whirl, they're pretty good!

Recipe: Chocolate Peppermint Flowers


Ingredients:

Makes 6 dozen
1 cup all-purpose flour, plus more for surface
1/2 cup unsweetened Dutch-process cocoa powder
1/2 teaspoon baking soda
1/2 teaspoon baking powder
1/2 teaspoon salt
2 1/2 ounces (5 tablespoons) unsalted butter, softened
3/4 cup sugar
1 large egg
1 large egg yolk
3/4 teaspoon pure peppermint extract
8 large candy canes or 30 peppermint candies, crushed
2 pounds white chocolate, coarsely chopped

Directions:

Preheat oven to 325 degrees.

1. Sift flour, cocoa powder, baking soda, baking powder, and salt into a bowl.
2. Beat butter and sugar with a mixer on medium-high speed for 1 minute.
3. Reduce speed to medium-low, and add egg, then yolk, beating well after each addition.
4. Beat in peppermint extract. Slowly add flour mixture, and beat until just incorporated.
5. Shape dough into 2 disks, wrap each in plastic, and refrigerate until firm, at least 1 hour (or up to 2 days).
6. Roll out 1 disk of dough on a lightly floured surface to 1/8-inch thickness.
7. Freeze until firm, about 15 minutes. Using a 2-inch round cutter, cut out circles, and place 1 inch apart on parchment-lined baking sheets.
8. Roll and cut scraps once. Freeze cookies until firm, about 15 minutes. Repeat with remaining disk.
9. Bake until cookies are dry to the touch, about 12 minutes. Transfer parchment, with cookies, to wire racks, and let cool. (Undecorated cookies will keep, covered, for up to 3 days.)

Drizzle with melted white chocolate.

Enjoy!

A Well Dressed Table


Holiday Tabletop, originally uploaded by miss.mallory.


I've come to a realization. I don't just love cooking, or baking but I truly love the art of entertaining. I adore all the lovely ideas out there. From runners, to place settings, to mats, cards, lights, dishes, etc. For me it's not just about making good food, it's about creating an unforgettable atmosphere too. Especially when it comes to a special event, like a birthday, baby or bridal shower or holiday. Making a fabulous meal for someone is a wonderful way to show your love or adoration, but creating something just for them, or for an event, in my humble opinion, makes everyone feel warm, welcome and considered. Creating an unforgettable space sets the the tone for an evening. The lovelier the space, the happier the guests and the more memorable the event. Listen to me, go on and on like an excited child!

This is the "table" I created for our cooking clubs holiday dinner. And conveniently, since it's got an underlying christmas/jul/holiday theme I intend to keep it up through Christmas. I'll layout the table in steps below.

1. Bottom Layer: Classic Linen Tablecloth. I've seen this same pattern of linen tablecloth at restoration hardware/pottery barn/martha stewart collection. Many run between $45 and $75. I found this baby at target for $20 in the Fall.

2. Runner: First layer of the runner is a strand of red lights and a fun strand of red tinsel garland (Michaels has some neat red tinsel ball garland for 70% off). On top of that I laid 2 yards of red tulle ($1.29 at JoAnn Fabrics).

3. Placemats: I didn't want to spend $20+ on a set of red or christmas placemats. And then it hit me, an amazing epiphany, why not use wrapping paper? It's cheap, disposable, and comes in many different cool patterns and colors! Viola, $4 later I had enough paper for placemats and a gaggle of presents.

4. Candles: I purchased the red candles with glitter on the bottom for about $2.50 a piece at JoAnns. You can do it yourself though if you've got a few candles lying around by painting the bottoms with egg white or mod podge and rolling in glitter or sugar.

5. For above the table I made red and white poufs of different sizes. These are easy to make (and Martha Steward doesn't offer anything but pink or yellow, plus she charges $20 and all these were made for under $10). For a quick tutorial see my Inspired Wednesday : Be Entertaining post below.

The rest of the stuff on the table are a part of my collection. Rosanna kings road plates and number goblets, roost antler candle holders, antique tea cups (for serving soup, a fun alternative to bowls), vintage pitcher and glasses. Adding your own pieces will create a personal flair.


Holiday Table Closer, originally uploaded by miss.mallory.


Holiday Table Setting, originally uploaded by miss.mallory.


God Jul!
Happy Entertaining!

I'm Certain of One Thing. . .


Are they russian or mexican?, originally uploaded by miss.mallory.


No matter what you may call them though, both titles include the "cake" moniker. I'm a flip flopper. I call these cookies both mexican wedding cakes and russian tea cakes. Although, in all honesty, I'd have to disagree with the "cake" title. These cookies are definitely not cakes. They're light, crisp, little medallions. Maybe a few hundred years ago when cakes were inherently crisp and dry would these tasty treats passed as cakes, but not anymore. They are officially in the cookie category. I do admit though that mexican wedding cookie, or russian tea cookie is not as charming as cake.

This recipe is courtesy of Emril Lagasse. Delicious, a perfect russian/mexican, cookie/cake. A holiday crowd pleaser as well. In fact, the first thing Thomas said to me yesterday morning was "bring me cookies!". He's in love (a man who doesn't love sweets has become hooked on these nutty little cookies). They're too easy. No eggs, just butter, sugar, vanilla and a bit of flour. Easy and delicious?! This is a must make cookie for this holiday season.

Recipe: Russian/Mexican Wedding/Tea Cookies/Cakes

Ingredients:
1 cup butter, at room temperature
2 teaspoons vanilla extract
1/2 cup sifted confectioners’ sugar, plus more for rolling cookies
2 cups flour
1/4 teaspoon salt
1 cup finely chopped pecans or walnuts


Directions:

Preheat the oven to 325 degrees F.

1. Cream butter in a large mixing bowl.
2. Add the vanilla then gradually add the 1/2 cup confectioners' sugar, beating until light and fluffy.
3. Sift the flour, measure, then sift again with the salt.
4. Add gradually to the butter mixture. Add the pecans and mix well.
5. Shape the dough into 1-inch balls and place 2 inches apart on ungreased baking sheets.
6. Flatten slightly using the bottom of a glass, then bake for 20 minutes, or until edges are very lightly browned.
7. Remove the cookies from the baking sheets and roll in powdered sugar while still hot.
8. Cool on wire racks and roll cookies again in powdered sugar before serving.

Once they are completely cooled, cookies may be stored in airtight containers for up to 1 week.

Yum! Enjoy!

Oooozing Evil Cake.


Oooozing Evil Cake., originally uploaded by miss.mallory.


Unfortunately, I didn't take too many pictures of food at our cooking clubs holiday dinner. Sadly, I only have two to offer. It has nothing to do with the meal, because it was stunning (I did a lovely job of hosting if I do say so myself). There are two major reasons no pictures were captured; One, because I hate low-light photography. I don't like the way food looks under artificial (and in my homes case, low wattage) lights. The food always has a bit of a yellow tinge to it. I much prefer the daylight when taking photographs of delicious dishes. And two, I may have gone with the yellow pictures if I'd ended up taking a picture of the main dish I'd prepared. But, we were all so hungry by the time it came out of the oven they were devoured (or picked over) in quick order. To start the evening I offered pear and pomegranate martinis that featured freshly juiced fruits (thanks to Ashleys nifty difty juicer, I need to get myself one of those!), Absolut Pear vodka, and a jolly rancher candied rim. Needless to say, it was a mighty delicious cocktail. The other dish I was responsible for was the main. Whoever hosts the dinner makes the entree, mostly because imagining having to pack up and cart around a main dish for 6-8 people doesn't sound like a chore too many want to attempt. I made mini beef wellingtons with filet mignon. Each pocket was stuffed with sauteed shitake mushrooms, caramelized shallots, and french gorgonzola. It was delightfully delicious (and I don't eat or cook beef often).

We also had mashed potatoes, onion gravy, stuffed pears, roasted red pepper soup, homemade sun dried tomato and mozzarella bread, creamy (heavenly, delicious, mind blowing) brussel sprouts, and to finish it off we had homemade cider and a truly decadent (beyond belief, pictured below) chocolate peppermint cake. This cake not only had four or five layers of moist chocolate cake, it also features layers of chocolate ganache, peppermint pastry cream, and a homemade marshmallow peppermint frosting, all topped off with shaved chocolate and crushed canes. It was surely a meal to remember.

For the recipes pictured here (brussel sprouts and devilish cake) check out roses and lemonade a lovely little blog by fellow (fabulous) cooking clubber ms. rachelle. On her blog you can find both of the recipes and her feelings on both dishes and our evening.

Enjoy!


Heavenly Sprouts of Brussel


Brussels Sprouts From Heaven, originally uploaded by miss.mallory.

Wednesday, December 10, 2008

Inspired Wednesdays : Be Entertaining


Be Entertaining by missmallory

We'll see if I stick with this inspiration board on Wednesday thing. On the one hand I don't feel it's completely food bloggy. Yet, on the other, it adds a weekly flair of my style from many different places from entertaining ideas, decor, food, fashion etc. And lends a little something different to the blog. So, we'll see.

On Friday I'm hosting my cooking clubs holiday dinner (look for a long post this weekend featuring our fun and dishes). I'm hoping to go all out and create not only a mouth watering main dish as well as a killer cocktail, but, I also plan to create a stunning atmosphere that just screams "the holidays have arrived".

I present you with my holiday inspiration board.

1.) Martha Stewarts Tissue Balls : These are available for purchase at Michaels craft stores for about $19.99. While they don't come in red, they can be made by hand. Simply accordian fold about 8 pieces of tissue (like you would a fan), then cut the edges jaggedly or rounded. Secure the middle with floral wire, include a loop to tie your fishing line to. Then pull the the two ends into each other, so your piece makes what looks like a flat circle. From here you delicately pull the layers up and apart, and fluff it. Like a tissue flower. I'm creating about 9 of these in red and white to hang above my table, like a faux chandelier. This is an fairly easy and inexpensive way to add a big wow factor to your entertaining decor.

2.) Am I a little obsessed with Rossanna Inc. or what? In fact, I went down to Seattle this last weekend for their warehouse sale. They open their doors but only twice a year. The "Four Calling Bird" dishes have completely sold out, there are none available through the company but if you search online you can find them. I found a set at Cooking.com . Love the bird motif, perfect for entertaining during the Holidays.

3.) Another Martha idea. This carnation christmas tree would make a fun centerpiece. It also has a lovely vintage flare to it. Fun and a little funky. What's better? Complete Martha directions here.

4.) I wish I had a lovely buffet. Instead, I've sacrificed the extra room in my kitchen to a sofa, which takes precedence over a buffet. This gorgeous little crafty canvas doesn't need to be perched upon a buffet, it would add some sparkle to any room. Simply puncture holes in a plain (or painted) canvas and slip petit white christmas lights through the holes. To create a "burst" cluster punctures closer to each other in the center and create a more spuratic pattern around the main center cluster. You could use any color canvas or lights that you like. A pretty make it yourself art piece that would be pretty year round!

5.) I'll admit it, I'm a little old fashioned and I love, I repeat LOVE, hostess aprons. It's a beyond fabulous addition to your entertaining outfit, especially for the holidays. Heavenly Hostess has an amazing selection of fabulous aprons not for slathering food on, but for entertaining in. Simply lovely!

6. Want to create an amazing and simple holiday cocktail? Easy! In a medium saucepan over medium-high heat, dissolve 1/2 cup sugar into 1 1/2 cups water. Add 1 cup of fresh cranberries and simmer for 5 minutes, or until softened. Remove from heat and let cool. Strain, discard liquid, and place cranberries on a tray in the freezer for at least 2 hours. For each cocktail chill 1 ounce of grapefruit vodka, 2 ounces of champagne, and 1 ounce cranberry juice. Mix these in a champagne glass. Garnish with skewer of 4 or 5 frozen candied cranberries.

7. I've always adored this fancy plastic flatware. Some may think it's tacky, but I love it. It reminds me of some beautiful lucite creation from the 1950's, yet harkens back to Marie Antoinette. Not for everyday, but perfect for entertaining. Check out Charles and Marie for a wide selection from sassy hot pink to classy and clear.

8. I have a set of laser cut felt placemats I bought from target over a year ago that I adore. Since then I've been on the hunt for more. There's something so modern, yet so different and alluring about these placemats. Plus, grey is the new black right? Perfectly pairs with just about any color palette, Christmas colors too. Kikkerland s has these pretty grey placemats for only $6 a pop. Good value for a unique table piece.

9. Not only does this candelabra match the fun plastic flatware, it will reflect christmas lights beautiful. Can't you just see the different colors bouncing through this pretty candle stand? Search spiegel for this fun accent piece.

10. I like placecards, I don't love them, I like them. I think they have their place, and a holiday party is a great place for them. Sit people by others they may not know so well, this will get everyone talking and out of their comfort zones. After one or two champagne cocktails the it will likely be hard to quiet your guests down! These gems, perfect for the holidays and our lovely red theme can be found at Crate and Barrel.

11.) Like many women, I have a thing for shoes. I have a few too many shoes that just sit around a look pretty, unlike many women, I don't wear my heels on a daily basis. I mainly use them when I throw parties. Piperlime has an amazing selection of shoes from many different companies. My boyfriend is a manager at the Gap and I came upon Piperlime via the Gap website (although I'm still unclear the relationship or affiliation, I assume they're owned by Gap as well). Check them out at Piper Lime for a wide selection of pretty shoes for your pretty feet!

Entertaining is an essential aspect of the Holidays for me. I love not only getting creative over the stove or in the oven, but it gives me an opportunity to go decor crazy. I hope you have fun throwing holiday parties this year and I hope that I got some of those creative hostess juices flowing.

Tuesday, December 09, 2008

Gumpaste A-Go Go.


Gumpaste Yellow Poppy Macro., originally uploaded by miss.mallory.

As some of you might know, I took about 6 months worth of cake decorating classes. Granted I repeated a few of the beginning courses (so that Ashley and I could do our own thing, in the "classroom" setting), which all culminated with a gumpaste course, something we'd dabbled with in our previous classes, but not devoted a serious amount of time on.

Frankly, it's a lot easier than it might look. The only really hard part is attaching the darn petals to the wire "stem", I truly loathe that step. The amazing thing about gumpaste is, that when fresh, it can be manipulated in various ways. Pulled, feathered, painted, twisted, molded, the possibilities are nearly endless. And once you've done that and allowed your pieces to dry they can be coated and painted with layers of shades, and may truly end up resembling what you've set out to create. In this case, I am posting the stargazer lilly, and yellow poppy that I made. While they may be a little campier than the living versions, I was pretty impressed and hope that I have some natural skill at this. Right now, I'm really looking forward to making a cake and using my new technique to create a real beauty, now I just have to find a reason to do so. Perhaps when that happens I will take step by step photos of my gumpasting process and try to post a tutorial, if you guys are interested! Until then enjoy these pretty confections!


Yellow Poppy

Gumpaste Yellow Poppy. , originally uploaded by miss.mallory.


Stargazer Lilly


Gumpaste Lilly. , originally uploaded by miss.mallory.


Gumpaste Stargazer. , originally uploaded by miss.mallory.

Wednesday, December 03, 2008

Getting Inspired - Gift Edition


A very good christmas. by missmallory

So, I've been damn smitten with all those gorgeous inspiration boards floating about in the blog-o-sphere. More often than not I have one pasted up as my computer wallpaper. They live up to their title, they truly are inspiring. Many include fashion, food, drinks, baubles, interior decor, and entertaining ideas. . . all things I simply couldn't live without. Unfortunately, I don't have photoshop, so I figured my dreams of creating my own inspiration boards were a thing of the distant future. That is, until I stumbled across Polyvore. It's a great site that allows you to create inspiration boards with items from all over the world wide web, and it's format is simple to use and easy to execute. Above is my first attempt. Clearly, it's not the best option out there (photoshop is clearly the winner when it comes to boundless creativity options), but it works well, and will be fun to play around with. Polyvore

I really enjoyed searching around and creating my own little inspiration board. Therefore, I've decided every hump day will be "Get Inspired Wednesday". They'll be boards with just about anything, links to recipes, gifts, music, books, decor, whatever strikes my fancy and things I'd like to share with my readers. This inspiration board is just a few of my favorite things. These would make great gifts, hostess or otherwise, and any would be a welcomed addition to any package under the tree I'm sure. Plus, I've purchased, tried, or worn nearly everything on the list, so they all come highly recommended by little old me! Plus, nearly everything here can be purchased for $25 or less. Here goes:

1. Au Revoir Simone - Verses of Comfort, Assurance & Salvation
I am a huge fan of Au Revoir Simone. They're a gorgeous group of three talented ladies, all who can lull you into a great calm, or get you dancing and twirling around the kitchen in your cutest apron. They are a must have for any music collection. Albums and other valuable au revoir links can be found at their website here.

2. Betty Crocker Classics
Now, I don't own this adorable box set, but I do have an old original orange and white betty crocker cookbook that once belonged to my grandmother. Old Betty is my go to whenever I need to get back to basics. When I wonder "how did I make that perfect pie crust again?" I refer to her pages. She may not be perfect, but it's a great jumping off point. The recipes in this book are straight from the pages of the original 1950's cookbook. A lot of comfort, in a cute package that most kitchen lovers would adore! Pick it up at Fred Flare

3. Whisky Bits
Okay, this one is purely selfish. I love signature pieces of jewelry. You know what I'm talking about, that necklace, ring or bracelet you wear so much it is basically a piece of you? Well, I'd like this guy, on a silver chain to be mine. I adore it because it's different (unlike a monogram, or horseshoe, which, yes, are lovely but not quite original anymore, right?) and it pays homage to my love of the kitchen and in particular, baking. This cute silver plated whisk charm is the only thing on the list I don't have or haven't tried. The jewelry kitchen, where this charm is sold, has a wide array of kitchen related charms. From kitchen-aid mixers, to pie, french presses and even a small silver jar of caviar. You're sure to find a unique and pretty charm for the foodie in your life. Check out the Jewelry Kitchen!.

4. Chanel Polish
There's just something about Chanel. I am giving a deep red shade to one of my best girlfriends this year. Great polish, gorgeous clean packaging, alluring label. Any girl would be proud to have a bottle tossed into their makeup bags, trust me. Plus, it's luxury for a good price, only $20. This cute bottle would make a great stocking stuffer. You can shop around for deals, but I'll send you straight to Chanel.

5. Lumiere - Honey Pear Candle
This is one of my very favorites on the list. The scent is so light, not overwhelmingly sweet or fruity, just clean. And it never makes me sneeze, which is a very good thing. Whenever I have this candle going in the kitchen, people walk in the house and say "It smells wonderful in here." Which opens the floodgates as I gush and gush about how in love I am with a candle. I want a drawer full, so I never run out! They're that good. And I'm not a big "scent" person, so that's saying A LOT! Go toLumiere, a truly amazing candle company. I believe that Anthropology is now carrying these candles. They cost $16, maybe a little pricey for most for a candle, but trust me, it's beyond worth it.

6. Bon Appetit
Ah, Bon Appetit. How I love the new look, it's modern font, alluring photography, clean layout. It's so appealing, looks great on the counter and offers a new slew of ideas and wonderful recipes every four weeks. I think magazines make the best gifts, they truly keep on giving, every few weeks the giftee receives a gift from you! There are many wonderful cooking magazines out there, but I do love bon appetit, there's something fresh and young about it. Plus, Molly Wizenberg aka Orangette has a column in there titled "Cooking Life", gotta love a magazine that's supporting the food blogging community (and one very talented lady). Here is a direct link to the subscription page. Just $12 for an entire year. Woot!

7. The Jutti
Screw flats, it's all about the Jutti. Well, okay, they're technically a flat shoe, I suppose, but they're so much more. Again, they're not your run of the mill flat. They're gorgeous, handmade, often boasting gorgeous hand embroidered designs that are one of a kind. If are planning a trip to India, then you can pick them up for pennies on the dollar. If not, it's best to and search google Inc. and look around the web. Fabulous with a pair of jeans, leggings or even a dress. I love the silhouette and the uniqueness of this shoe. Hopefully you'll find some that suit your fancy too!

8. Rosanna
Talk about unique, Rosanna Inc.offers some of the most beautiful and unique plate options out there. The gold crowns are my favorite, maybe it's because I'm a leo and while I hate to admit it sometimes, I have a slight royalty complex. I own a few crown plates, and they've been uber durable. They'll add sparkle and fun to any holiday table! However, this is the only thing on my list above $20, a set of four will run you $40 not including tax or shipping.

9. Sofia Blanc de Blanc
What holiday list would be complete without a bottle of my favorite champagne? There's just something about champagne, er, sparkling wine I should say. I prefer it above all others. The first place my mind goes in time of celebration is "champagne". It's romantic, flirty, fun, gorgeous, sophisticated and luxurious all at the same time. It makes ones mouth quite happy. I probably consume a bit too much of this good stuff over the holiday season, between birthdays, old friends I haven't seen in months or years, parties and christmas morning I become quite the champagne lush. For a girl who isn't a big drinker, that's saying something. And what would I prefer to have on my table? Sofia Blanc de Blanc. Made in Monterey County in California. It is unique in that it is a blend of pinot blanc, muscat, and sauvignon blanc. It is a very light champagne, and in my opinion shouldn't be mixed with juices or anything else. It's delicate and needs to be enjoyed "in the nude", so to speak. It's fruity, with notes of apricot and peach, it smells of lemon, cream and honeysuckle. It's bright, light, not too dry and simply amazing. Perfect for a holiday toast with close friends and family. In Washington, during the holidays this wine can be found at most grocers and is generally on sale for about $16.99. It normally retails in our part of the world for $23.99 and is well stocked on most supermarket shelves.

Sunday, November 30, 2008

U.T.D.D

No, that isn't an acronym for a new std.
It's the ultimate turkey day dessert.
(Ew. I'm apologizing now if those two sentences together were kind of gross or offended you, my reader. It's best never to compare food to any type of bodily function or issue. Strike that from the record.)

I've been dying to make salted caramel, anything salted caramel. I've also been itching to buy a few ounces of fleur de sel. Fleur de sel translated is simply flower of salt. Hand harvested, the salt is scraped from the top of salt pans before it sinks to the bottom. It is primarily collected in France but flor de sal is also available and is harvested in Portugal. I was lucky enough to come across Fleur de Sel de Guérande, which is found in salt marsh water in France and is apparently the most revered. It was a must, for thanksgiving I decided it was time to try my hand at this confection known as salted caramel. Unfortunately, now that I know how insanely easy it is I'm not sure I'm going to be able to stop myself from gorging on it. Gooey, sweet, slightly toasty, with crystals of tart, salty fleur de sel hiding throughout? Ooooooh. Since making and enjoying it, I'll lay in bed at night and imagine all the various things I could do with salted caramel. My next salted caramel project will be a cupcake I think. Perhaps I will celebrate my last week of fall quarter with a batch.

I adapted my recipe from the amazing post over at baking obsession.
Here is the link: http://www.bakingobsession.com/2008/11/24/milk-chocolate-and-salted-caramel-tart/#more-578

I played with the recipe a bit, but the biggest (yet smallest) difference was I topped my tart with a creamy layer of whipped honey cream.
I highly suggest giving the recipe a try, though it may take you hours (or days if you do ahead) to prepare.

Cheers!
(Turkey Day Post to follow)

Tuesday, November 18, 2008

tuesday morning.


tuesday morning., originally uploaded by razzieswirl.


Last year around this time I wrote a few posts raving about sweet meat squash. I'm not sure if it's only grown locally or if it's available in other parts of the country. I've tried googling it with less than stellar results, what turns up are sweet recipes for meat. But nothing about the squash. The point is, I've already written about it, at lengths I believe, because it was the first squash I ever liked eating. I was opposed to squash as a kid. I loathed it. I refused to eat it. I even hated sweet potatoes (yes, even the marshmallow kind at Thanksgiving). Remembering how much I hated it as a child, made me skeptical to try it as an adult. But, for some reason sweet meat drew me in, maybe it was it's gorgeous deep orange colored meat, or pretty light blue skin. Once I tried it, I was hooked. I ended up using it in several dishes last year and found myself sad to see it go in the spring. Last night was my first time buying a hunk of it this year. I roasted small chunks in the oven with olive oil, rosemary and thyme. I then mixed most of the squash with some smart pasta, roasted red peppers, isnerios italian chicken sausage and pecorino. Really simple, but soul meltingly good. Now that mind sound a bit extreme, but it really was. The flavors and textures complimented each other perfectly. It was like a lovely waltz in my mouth! And we devoured every last bit.

In the morning I noticed there was about 1/4 cup of the roasted squash leftover. I busied myself with work, cleaning, and managing the etsy store (something I failed to while while we were living away from home). Before I knew it 7am became 11am and my stomach was clearly not happy about being empty. Since we haven't been home, we don't really have much food in the fridge. Some eggs, a box of english muffins, and a few leftover herbs from last night. So I devised a quick plan in my head, and what resulted was a seriously delicious, on the fly, quickie breakfast recipe. Plus, I managed to capture a lovely picture of it! I felt good, I'd accomplished a lot and managed to make an amazing little meal. So here's the recipe, and much like the dish itself, pulled together.

Recipe: Roasted Sweet Meat Squash Cake with a Poached Egg drizzled with Herb Cream served on an English Muffin (whew)

Ingredients:

1/4 leftover squash
1/2 tablespoon butter
salt and pepper
one egg
1 tablespoon vinegar (to put into boiling water to poach egg)
1 tablespoon heavy creme
1 teaspoon each rosemary and thyme, chopped roughly
1 tablespoon of pecorino for sprinkling

Directions:

1. Hand form squash into a patty (like a burger)
2. Heat butter in small saucepan over medium-high heat
3. Add patty to hot pan and fry for 2 minutes (or until brown and crispy) the flip and repeat
4. Meanwhile, boil a pot of water
5. Add vinegar to water
6. Crack egg and place into a coffee mug or shallow dish
7. Quickly dip and dump the egg into the water
8. Cover pot, and turn off heat, let egg sit for 3-5 minutes
(above is how I poach my eggs, it works for me every time, so I hope it will work for you too)
9. Toast english muffin and assemble (muffin, squash cake, poached egg)
10. Drizzle with herbed cream and sprinkle with pecorino

And viola! That's it!
It's super delicious, and would even make an impressive dish for brunch on the weekend!
Place s

Sunday, November 16, 2008

It has begun!


Gorgeous Dinner Setting, originally uploaded by razzieswirl.


First of all, I'd like to apologize for my long delay in posting on this website. One thing that has kept me from this site has been the remodel going on in our lovely little home. For the last month and half we've had no bathroom. A little remodel, with a few upgrades, turned into a huge remodel. Because we had no toilet, shower or even walls we were forced to move out until a few of those things were replaced. So, Thomas and I packed up the pugs and some of our things and out to my mothers house we went. Although she lives in a fairly spacious house, I would say that after a few weeks even the closest mother and daughter (and their respective spouses) cease to get along so well. That and driving nearly half and hour back and forth up to up to three times a day wore on my mind, body and nerves. But, after a few struggles and what seemed like a year, we are back in our little abode. Unfortunately, we only have a floor, new walls and a toilet (no shower yet, which is remedied by the YMCA or Thomas' mother who lives close by), our house still reflects a construction site. I'm just happy to be home!

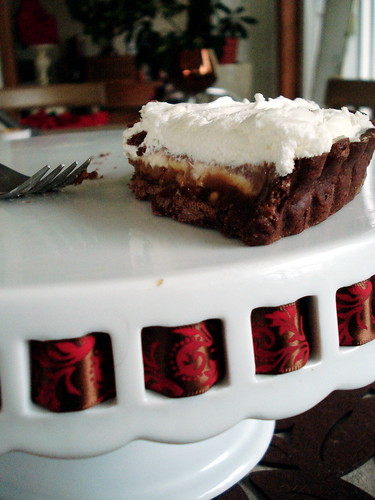
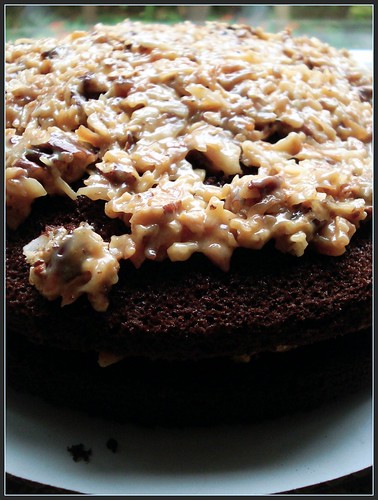
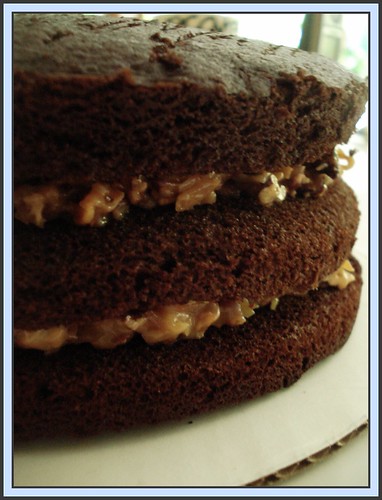
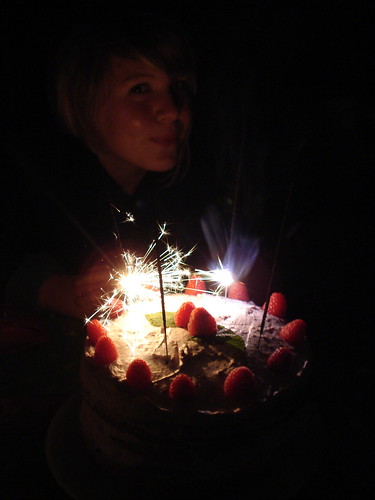
Months ago I started looking for people interested in a gourmet cooking group, or as some call it, a club. I thought it would be a great opportunity to meet some people who had the same passion for food as I do. Although I love all of my friends dearly, many of them aren't as invested in the magic of food as I am. So, eight people responded and we meet for wine a cheese. Then, appetizers. After that, a halloween dinner. For our halloween dinner we had a new member, Rachelle, whom I was most excited to meet, she seemed to have that same passionate spark that I do. When she emailed me, she even sent a picture of a cake she made, which as you know I loved, because I am a fan of all things sweet (and photographs of sweet things is just as wonderful). After our Halloween dinner she offered to host the next meeting at her place. Usually at the end of every meal we decide on a "theme" or come up with a concept. Many of us had wanted to try our hand at thai, korean or vietnamese so we decided to create dishes with a general asian theme. We also had a member that had cooked for dignataries in parts of Asia and seemed to know a lot about traditional food. Cooking with a general asian theme would provide some freedom for creativity and we would be left with dishes from all over, not just one region.

I had been planning on creating a special posting for each meeting. Offering my readers ideas, recipes and my ongoing experience with the group. Our first three meetings were very new, and, seeing as for part of it I wasn't at home (and couldn't find my camera battery charger) I didn't have the time or resources to photograph and post. But I was prepared this past Friday, and boy am I glad I was. Unfortunately, this post is missing over half the dishes that were supposed to be there. I say supposed to because five people cancelled last minute, all within an hour or two of dinner. This hadn't happened before and most of us left in the wake were all a bit stunned. We lost all of our sides, one dessert, and drinks (luckily I had a bottle of champagne in the fridge). We may have missed out on dishes, but most of those who ended up contributing really brought their A-game. Would it have been nice to have sides? Yes, of course. But Rachelle, created a stunning clay pot vietnamese pork main with toasted coconut rice. Ashley brought along an abundant amount of freshly made crab rangoon with her own sweet and sour. Layla brought a plate of edamame with kimchee (excuse me if my spelling is blatantly wrong). Michelle brought drinks. I supplied the cupcakes, with an asian flair of course. And here, in one post, you will get the recipes and my thoughts on each dish. I will not however be providing Laylas recipe (or Michelles because she brought a bottle of wine) simply because it was very simple. To recreate Laylas dish simply steam some edamame and serve with some store bought kimchee. That would make a good snack at home in the afternoon too!

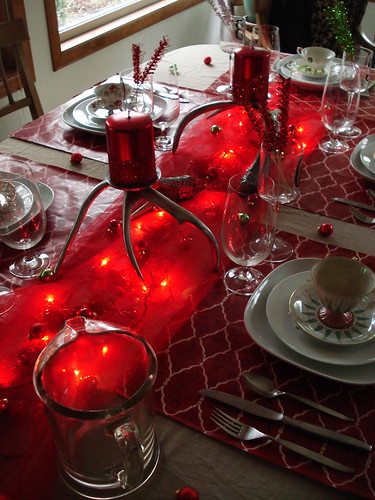
I felt terrible for Rachelle. She went all out, created such a lovely dining experience. The table was set with her wedding china, a full formal setting, with candles abound. A large pitcher of lemon and mint water flanked one side of the table. On each place setting sat a piece of vietnamese candy (Rachelle made a traditional vietnamese dish). As soon as I entered her apartment I was in love! It is me to a tee. It doesn't look like it belongs in bellingham, it's very parisian in nature. Large planked wood floors, high ceilings, wide crown molding, gorgeous lead cabinet built ins. I could go on and on for days, but I won't! It was simply lovely, and right away I could tell she put a lot of care into getting the place ready for us. As much as I was in awe, I immediately felt a twang of guilt, I know it wasn't my fault, but I felt so terrible that she had gone to so much effort and so many had canceled. I know how that feels too. Nonetheless we popped the bottle of champagne and ended up having the best evening we've had so far, truly.

So read on for some fantastic recipes!

Appetizer: Crab Rangoon with Homemade Sweet n' Sour made by Ashley


Ashleys Rangoon Bitten, originally uploaded by razzieswirl.


I loved this appetizer.
I probably consumed a few too many (not including the three we "tested" when she made them at my house!) But I knew there weren't going to be any sides by the time we arrived at Rachelles so we went a little crazy on these crispy crab pockets. Best of all they're baked, not fried, which means they are a bit healthier, but there's also a lot less mess!

Here is how Ashley did it:

Ingredients: Crab Rangoon

Package of won-ton wrappers
1 package cream cheese
2 cans of crab (I'd suggest dungeness)
4 scallions - chopped
small bowl of water
1/4 cup of oil

Directions: Preheat oven to 375

1. Lay out a few lines of wonton wrappers flat
2. Mix cream cheese, crab and chopped scallions into a mixing bowl and mix thoroughly.
3. Place 1 teaspoon (more if you can fit and fold it) into wrapper.
4. Seal wrapper with a little water on the edges of wonton wrapper and fold in half (it will look like a triangle now). If you like fold ends into middle of wonton to create what I call a "pocket" (as seen in picture).
5. Brush both sides with oil
6. Bake about 10 minutes, flipping half way through, or until golden brown. f

Sweet N' Sour Sauce - still waiting on Ashley's recipe:


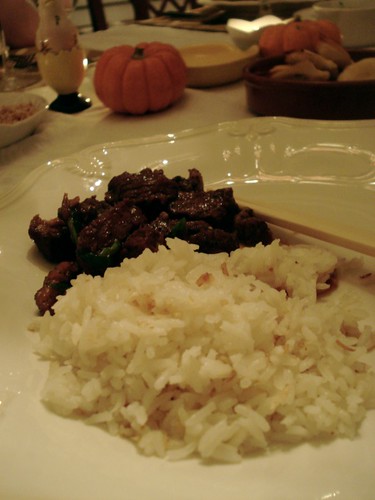
Main Plate


I highly suggest you try both of the dishes below. The pork melts in your mouth like butter, and although the flavor is extremely rich and a bit salty, paired with a crispy fresh side this would make an impressive meal. Best to make this on a weekend night or for your next dinner party!

Coconut Rice Made by Rachelle


Toasted Coconut Rice, originally uploaded by razzieswirl.


Now, this recipe is fairly easy. I'd say you could whip this together as an accompaniment to your next stir-fry or asian inspired dinner. Everyone at the table couldn't stop raving about it, and most of us had two servings (some even more!) This would make a great recipe to try on the kiddies too. The sweet, crunchiness of the coconut pairs well with the stickiness of the rice. The textures are a treat unto themselves, and paired with the spicy, salty, soft pork, ooooohhhh melt in your mouth perfection. I could go for some right now!

Recipe: Coconut Jasmine Rice

serves 4-6 as side dish

Ingredients:

1 tbl butter
1 tsp brown sugar
2 tsp kosher salt (omit if serving with Clay Pot Pork)
2 cups jasmine rice, washed and drained well
½ cup good, thick coconut milk (shake can to mix well before opening)
2 cups water
1/4 cup sweetened coconut flakes

Recipe:

1. Heat butter a medium sized, heavy saucepan over medium heat.
2. When butter is melted, add brown sugar and salt, stir until dissolved.
3. Turn heat to high, add rice and stir until all grains coated evenly.
4. Add coconut milk and water. Stir occasionally to prevent grains from sticking to bottom.
5. When boiling, immediately cover with tight fitting lid, turn heat to medium-low and simmer undisturbed for 20 minutes. 6. Remove pot from heat but do not open lid. Really, no peeking!
7. Let sit for10 minutes.
8. While rice is cooking, toast coconut flakes on a dry skillet over medium high heat. Stir frequently to avoid burning, remove from pan as soon as coconut is golden brown, about 2 minutes.

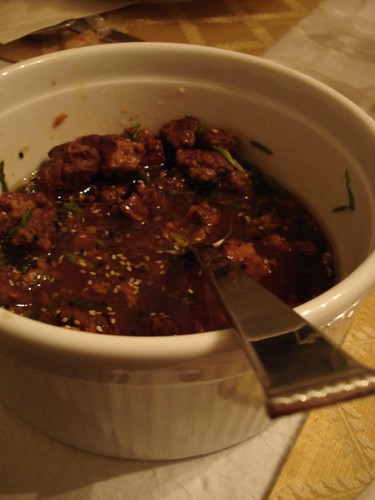
Clay Pot Vietnamese Pork Dish Main - Made By Rachelle


Vietnamese Pork, originally uploaded by razzieswirl.


I enjoyed the dish. Yes, it was a bit salty, but I think the coconut rice is supposed to balance the salty out a bit. I don't think it was so bad it shouldn't be made and experimented with. The flavor was good, the pork was like butter the salt just needed a little adjustment. Here are a few words Rachelle shared about the dish: It is extremely rare that I regard the product of one of these recipes with dismay, but Clay Pot Pork produced exactly that reaction.Too salty. Unbearably salty. This is inspired by Vietnamese cuisine, says the introductory paragraph, which often uses sweet and bitter together. The idea (and it's not posted on Epicurious so I can't show you) is to produce caramel by melting 1/3 c. sugar, then adding 1/3 c. fish sauce and 1 3/4 cup chicken stock. Then you add some other things (shallots, garlic, scallions) and cubed pork shoulder, which you braise for 2 hours. Don't skimp on the fish sauce, the recipe says. It's necessary for authentic flavor.

And now for the recipe:

Ingredients:

1/3 cup sugar
3/4 cup chicken stock or store-bought low-sodium broth or water
1/3 cup Asian fish sauce, preferably Vietnamese
3 shallots, thinly sliced
2 garlic cloves, thinly sliced
3 scallions, thinly sliced diagonally, white and green parts kept separate
1 lb trimmed boneless pork shoulder, cut into 1-inch cubes
1 teaspoon finely ground black pepper

Directions:

1. Cook sugar in a dry 3-quart heavy saucepan over moderate heat, without stirring, until it begins to melt. Continue to cook, stirring occasionally with a fork, until sugar has melted into a deep golden caramel.
2. Carefully add stock and fish sauce (caramel will harden and steam vigorously) and cook, stirring, until caramel is dissolved. 3. Add shallots, garlic, and white part of scallions and simmer, uncovered, stirring occasionally, for 4 minutes.
4. Toss pork with pepper in a bowl and stir into sauce. Bring to a simmer, then cover pan, reduce heat to low, and braise pork, stirring once or twice, until very tender, 1 1/4 to 1 1/2 hours.
5. Stir in scallion greens and serve with rice.


Honey Toasted Sesame Cupcakes, White Chocolate Green Tea Frosting topped with White Chocolate Dipped Fortune Cookie: Made by Mallory


I thought these were very good, the frosting didn't hold shape like I'd wanted, it was probably due to the sour cream in the recipe. The frosting was also a tad too gooey for me, not in a soft way, in a sticky/chewy kind of way. The little cakes were incredible though. I wanted to use toasted sesame like you'd use poppyseeds. My fear was that the seeds would end up being too noticeable, or that they'd be a nuisance and get stuck in your teeth easily. This wasn't the case, they just added a really interesting depth and flavor to a very light cake. I adapted the recipe from cheryl porro's honey cakes. Frosting was all my creation.

Recipe: Toasted Sesame Honey Cupcakes

1 cup + 1 tablespoon cake flour
1/4 teaspoon salt
3/4 teaspoon baking powder
3 tablespoons vegetable oil
2 tablespoons whole milk
3 egg yolks
1/3 cup whipped honey
4 egg whites
1/4 teaspoon cream of tarter
1/4 cup sugar
1/3 cup toasted sesame seeds (toss in a pan on low heat until evenly golden, the heavenly smell will tip you off that they're done)

Directions: Preheat to 350 - Makes 12 cupcakes

1. Sift flour, salt, and baking powder into the bowl of a standing mixer.
2. In a medium bowl, combine oil, milk, egg yolks, and honey. Stir to combine.
3. On a low setting, start to beat the dry mixture and slowly add the wet. Increase the mixer speed to medium and beat until incorporated.
4. Transfer mixture to another bowl. Wash and dry mixer bowl.
5. Whip egg whites with whip attachment on medium-high speed until foamy. With the mixer on medium speed, add cream of tarter and slowly add sugar. Beat on high speed until stiff peaks form.
6. Scoop a cupful of the stiff egg whites into the batter and stir to combine. This should lighten up the batter.
7. Fold sesame seeds into batter
8. Transfer the batter to the egg whites and gently fold until there are no more streaks of egg white
9. Fill cups nearly to the top, leaving about 1/4 inch

Recipe: Matcha (Green Tea) White Chocolate Cream Cheese Frosting

Ingredients:

4 oz. sour cream
4 oz. cream cheese
6 oz. white chocolate melted
3 rounded tablespoons of matcha (powdered green tea, very brilliant in color and strong in flavor)
1/2 cup powdered sugar (to stiffen a bit)

Directions:

1. Combine sour cream and cream cheese in mixer, mix thoroughly (about 3 minutes)
2. Slowly add white chocolate mix until combined
3. Add matcha and powdered sugar and mix thoroughly


And there you have it! There is my uber long post, chock full of ideas and recipes for your pleasure! Enjoy!

Wednesday, September 24, 2008

A Cupcake or A Muffin?


So, after a message from Deb over at Smitten Kitchen I realized I had never posted this recipe. Which is a travesty, because these cinnamon cheesecake crumble cupcakes (or muffins, however you want to look at it) are truly sensational. They are good to go, no frosting required. The swirl of cheesecake, mingled with the spicy cinnamon and topped with an incredible streusel is swoon worthy. In the spring and summer months these cakes are just beautiful (and even more delectable) topped with fresh berries. Since many may consider these 'muffins' due to their lack of frosting, no guilt required when you enjoy one (or two) for breakfast with your morning cup of coffee or tea.

If you're a cheesecake and streusel fan but don't pair them often, you will not be disappointed by this recipe. Give it a whirl!

Recipe: Cinnamon & Vanilla Cheesecake Streusel Cupcakes ( or Muffins):

Makes 12 large Cupcakes

Ingredients:

Cupcakes:

1 1/4 cup AP flour
1/2 teaspoon baking powder
1/4 teaspoon baking soda
2 tsp. cinnamon
1 egg
1 egg yolk
1 cup sugar
1 cup vegetable oil
1 tsp vanilla
1/2 cup whole fat sour cream

Cheesecake Swirl:

8 oz. cream cheese
1/3 cup sugar
1 large egg
1/2 teaspoon lemon zest
1 teaspoon vanilla extract

Streusel:

1/2 cup AP flour
1/3 cup dark brown sugar (packed)
pinch of salt
2 Tablespoon melted unsalted butter

Directions:

Cupcakes:

Preheat oven to 325 degrees Fo

1. Sift dry ingredients into a small bowl
2. In the bowl of an electric mixer beat egg, egg yolk, and sugar on medium speed until lightened and thickened appx. 3 minutes
3. Reduce speed to low and add oil, vanilla, and sour cream until blended.
4. Add flour and mix until just blended (do not over blend!)

Cheesecake & Streusel:

1. Line cupcake liner with cupcake papers.
2. To make cream cheese filling; beat cream cheese and sugar together with a hand mixer or in the bowl of an electric mixer until smooth, add egg, zest, and extract beat until thoroughly combined. Set aside in a small bowl.
3. To make streusel; in a small bowl, with a wooden spoon mix dry ingredients until well blended, dump in the melted butter and stir until the mixture crumbles.
4. To assemble cupcakes; fill liners half way with cake mixture, spread appx. 1 1/2 Tablespoons cream cheese mixture, top all of that with a overflowing Tablespoon of struesel
5. Bake in preheated oven for 25 minutes

The cheesecake mixture will melt into the batter, you'll be left with a moist cake, a thick cream cheese swirl and an unbeatably crunchy topping. For me, this is about as good as it gets for a cupcake!

Cooking Club.

I hosted the first cooking club meeting at my house last week.
A few members weren't able to make it, so it was just five girls.
It was nice meeting new people, and talking food.
I think that this endeavor is going to be a lot of fun, and I'm looking forward to our bi-weekly meetings.

Since a few people couldn't make it, and we hadn't discussed the layout of how the group would work, I invited the girls over for some wine a cheese. I made my honey gorgonzola crostini, L brought some cheese and A brought killer tarts. They were in a store-bought crust, which is understandable as busy as she sounds, but the filling was amazing. Not very sweet. Sweet, but not overwhelmingly so. We were all swooning over them! So, she divulged what she put in them. Equal parts sour cream, cream cheese and chunk of white chocolate. Really, really, simple too, gotta love that!

I'm going to be honest, I don't like working too much with white chocolate. First of all, it's not chocolate. It is composed of cocoa butter, sugar and milk. Here in the U.S. white "chocolate" must be at least 20% cocoa butter with a high content of milk solids and fat. Although, I've never had any problems with white chocolate (probably because I rarely use it and when I do it's for decor) there are some risks when baking with it. Because of the higher content in cocoa butter, the chocolate can separate more easily when melting it. If this happens it needs to be re-emulsified by adding additional butter or chocolate to this mix. Not fun. Plus, in this town, it's difficult to find anything better than a bag of Nestles white chocolate chips. And I'm an avid user of high quality ingredients, so not having options doesn't sit too well with me. On top of all of that, I don't much like the taste of it (on it's own at least) and neither do my closest friends and family. Therefore, I don't have reason to use it too often.

I must say that I am growing accustomed to it. I have been seeing it more and more in recipes and other baked goods about town and have grown more interested in using it in my kitchen. So after that heavenly filling A brought to our first meeting I decided I must try it for myself! When I first told Thomas about it he was v-e-r-y skeptical. He hates white chocolate. He gave me that face I get from him when I suggest something he's not all that fond of, but is trying to seem interested and positive. I know that face all too well. Often when I get that face, and I go ahead and do what I want anyways, he eats until he's sick. Needless to say, I've learned not to trust that face. These tarts were no different. They were a hit and a half. He claimed to enjoy the shortbread crust more, but he scarfed more of these than I can count. They were so, so good! I am going to incorporate the elements of this filling into a frosting. This white fluffy goodness on top of a moist chocolate cupcake would be heaven. Simple, but heaven.

I wish that these were topped with something more exciting than one lone strawberry. Unfortunately, our berry season in the Northwest was all around disappointing this year. We have a wonderful climate for berries, I guess that's why they grow like kudzu here. Raspberries and blackberries in particular can be very intrusive. Many of our sidewalks are lined with berry bushes. People will park their cars and just walk along the side of the road eating berries off the bush. But there wasn't much of that this year. I don't why. Perhaps because we didn't get enough sun this year, and the warm weather we did get was unusually hot, not mild. The berries haven't been as sweet, or as juicy. And thus, not an attractive choice for tartlette toppers. Berries are often the star of tartlettes, sitting prettily on top. Not so much this year. In my opinion, at least. I can be a bit of a berry snob, thanks to Norway!

For 8 to 10 tartlettes:

Filling:

4 oz room temp cream cheese
4 oz whole sour cream
2 oz heavy whipping cream
half bag of white chocolate

Directions:

1. Mix cream cheese and sour cream in a mixer until combined and smooth (appx. 2 minutes)
2. Melt white chocolate in microwave (I prefer to use a double boiler)
3. Cool slightly and add to cream cheese mixture with the mixer on slow/medium speed.
4. Add whipping cream and whip until fluffy and light.

*Note: I like this recipe less sweet. To sweeten it up a bit, add additional melted white chocolate.

For crust recipe search blog for "tartlette". A few to choose from. This is the shortbread recipe.

Enjoy!

Mini Cupcake Army

This is a simple post, sans recipes.
Just a quick note to say I (dessert) catered a small office birthday party and to show off these cute little gems. Here they are packed up and ready to go, 50 mini sour cream chocolate cupcakes topped with a killer coffee buttercream. Along with these I made 50 delicious mini scones with whipped cream and fresh fruit. They weren't displayed in this box, of course, but atop a few vintage cake stands. I hear they were a hit, rave reviews around the office!

I couldn't be more pleased!

Wednesday, August 27, 2008

Inside Out


Middle Layer Goodness., originally uploaded by razzieswirl.

testing testing one two three.

I apologize, this update has taken me quite some time to finish. But there's reason for it. Like always. Life's been a little too fast paced as of late. Although I've had a break from school for the last three weeks I've spent a lot of time either being sick (which always seems to happen after every quarter), catching up with friends, or celebrating birthdays. In fact, my mother and I just got back from a long weekend in Portland for her birthday. Even that seemed more stressful than relaxing. Why is it that vacations always end up that way?

I've also begun working on starting up my own little business, outside of etsy. Right now it's very grass-roots and I'm not even sure that it will go anywhere, but I'm toying with the idea. I'm getting a website (well, I should say a snazzy looking blogger account) set up and working on business cards. But it's really about time I get in the kitchen and start working on the actual product. Ultimately I'd like to work out of my kitchen this winter making cakes and goodies for the holidays for people here and there. But my ultimate goal is to find a commercial kitchen and be at the farmers market by this spring. Which has proven a bit of a challenge (I've been searching for one to no avail since June). So my mind has been pre-occupied by various ventures and thoughts. I like it that way, it's just been quite the juggling act the last couple of months. (P.S. Where did summer go? Here in the northwest we lost it sometime mid-august!)

Autumn is my favorite season. And I find myself drawn to the warmth, light and comfort of my kitchen on a daily basis. Although life is changing I'm hoping this aspect of it does not. My goal is to be back full force, creating, cooking, writing, photographing and blogging. You may see a vast array of sweet delights in the coming weeks and months as I begin to experiment with different recipes and decorating techniques. So, please stay tuned, I'm hoping autumn marks the beginning of something wonderful!


Assembled., originally uploaded by razzieswirl.


Onto the CAKE! What you've all been reading my ramblings for, right?
Nearly every year I make a german chocolate cake on August 24th. Why? Because it's Kevin's favorite (my mothers partner).
Generally his family throws a party for him and I bring the dessert. Last year I chose to make my "piece de resistance" cake, I was itching to do something different. Generally, I'll bake whatever a the birthday boy/girl wants, no matter how repetitive it is or not. But last year Kevin requested cheesecake, which I saw as license to create. So I did, an entire cheesecake in the center of a dense devils food chocolate cake. It fed nearly 40 people with leftovers to spare. Since last year I had free reign and there was no german chocolate in sight, I knew that would be the request this year. And I was right. Bored at the thought of making a "plain ol' cake" I decided to search for something a little bit different. After a short search on a few of my favorite websites I found a recipe for inside out german chocolate cake. After checking out the recipe I headed over to flickr to see if anyone had attempted this cake and what it looked like. I often check flickr out for ideas and recipes, because like bloggers, the reviews are straight from the general public. Plus, seeing what it looks like when a "regular joe" makes the cake and takes a picture vs. when a food stylists photographs it gives you a sense of what the recipe is really like (and how it can possibly be tweaked). So, after ample research I decided to try it out for myself. But before we go any further I am going to warn you, this cake takes the estimated 4-5 hours to make. Since I've been baking and decorating cakes on a weekly basis in my cake decorating class (and I've become quite the quickie pro) I figured this estimation was for people who don't make cakes as often. I thought I'd have the baby ready to go in an hour tops. Oh boy, was I wrong. There are several components to this cake, and these components take a while, no matter how good you are with a mixer and a stove. For example; the nuts and coconut have to be roasted, the caramel filling must bake in the oven in a water bath for about an hour and a half, and the frosting is applied in layers, at different cooling and re-heating temperatures. And in between all of this you whip up the batter, line the pans, and bake the cake. This is not a recipe for the weak of heart, or those short on time. I cut it a little too close myself and ended up applying the frosting in one gloppy coat, instead of a few at different temps. You will spend a lot of time in the kitchen with this recipe and you will have a bit of a mess to contend with afterwards.

So, the question remains, "is this cake worth it?"
Yes, and no.
This is not a german chocolate cake.
Why they call it that, I do not know.
Perhaps because the filling is the same as that which is traditionally found inside of a german chocolate cake.
However, the cake itself, is not made with german chocolate. It is made with unsweetened dutch-process cocoa powder.
The cake itself is fairly moist, airy and delicious and pairs well with the sticky, crunchy, roasted/caramel-y center. I'd be inclined to call it something else, but what, at the moment I'm not sure.

Unfortunately, because I ran out of daylight and time to frost the cake, the finished product did not get photographed.
If you'd like to see the finished product made by people outside of Gourmet magazine check out flickr, there are various lovely photographs of "Inside Out German Chocolate Cake" there.

So if you're looking to spend a peaceful afternoon in the kitchen, and are looking for a recipe a little different and very special then I suggest this cake. It got rave reviews from everyone at the party and was devoured in a matter of minutes. I guarantee you'll get praise for your time spent in the kitchen (which, in my opinion, makes it all worth it).


Recipe: Inside Out German Chocolate Cake from Epicurious.com

For cake layers
1 1/2 cups sugar
1 1/2 cups all-purpose flour
1/2 cup plus 1 tablespoon unsweetened Dutch-process cocoa powder
3/4 teaspoon baking powder
3/4 teaspoon baking soda
3/4 teaspoon salt
3/4 cup whole milk
6 tablespoons unsalted butter, melted
1 large egg
1 large egg yolk
3/4 teaspoon vanilla
1/8 teaspoon almond extract
3/4 cup boiling-hot water
For filling
7 oz sweetened flaked coconut
4 oz coarsely chopped pecans (1 cup)
14-oz can sweetened condensed milk
1 tablespoon vanilla

For glaze
2 1/2 sticks unsalted butter
10 oz fine-quality semisweet chocolate, finely chopped
3 tablespoons light corn syrup

Special equipment: 3 (9-inch) round cake pans

Preparation

Make cake layers:
Preheat oven to 350°F and oil cake pans. Line bottoms of pans with rounds of parchment or wax paper. Sift together sugar, flour, cocoa powder, baking powder, baking soda, and salt into a large bowl. Whisk together whole milk, butter, whole egg, yolk, vanilla, and almond extract in another large bowl until just combined. Beat egg mixture into flour mixture with an electric mixer on low speed, then beat on high speed 1 minute. Reduce speed to low and beat in water until just combined (batter will be thin). Divide batter among cake pans (about 1 1/2 cups per pan) and bake in upper and lower thirds of oven, switching position of pans and rotating them 180 degrees halfway through baking, until a tester comes out clean, 20 to 25 minutes total.
Cool layers in pans on racks 15 minutes. Run a thin knife around edges of pans and invert layers onto racks. Carefully remove parchment or wax paper and cool layers completely.

Make filling:
Reduce oven temperature to 325°F.

Spread coconut in a large shallow baking pan and pecans in another. Bake pecans in upper third of oven and coconut in lower third, stirring occasionally, until golden, 12 to 18 minutes. Remove pans from oven.

Increase oven temperature to 425°F.

Pour condensed milk into a 9-inch deep-dish pie plate and cover tightly with foil. Bake milk in a water bath in middle of oven 45 minutes. Refill baking pan with water to reach halfway up pie plate and bake milk until thick and brown, about 45 minutes more. Remove pie plate from water bath.

Stir in coconut, pecans, and vanilla and keep warm, covered with foil.

Make glaze while milk is baking:
Melt butter in a 3-quart saucepan. Remove pan from heat and add chocolate and corn syrup, whisking until chocolate is melted. Transfer 1 cup glaze to a bowl, reserving remaining glaze at room temperature in pan. Chill glaze in bowl, stirring occasionally, until thickened and spreadable, about 1 hour.

Assemble cake:
Put 1 cake layer on a rack set over a baking pan (to catch excess glaze). Drop half of coconut filling by spoonfuls evenly over layer and gently spread with a wet spatula. Top with another cake layer and spread with remaining filling in same manner. Top with remaining cake layer and spread chilled glaze evenly over top and side of cake. Heat reserved glaze in pan over low heat, stirring, until glossy and pourable, about 1 minute. Pour glaze evenly over top of cake, making sure it coats sides. Shake rack gently to smooth glaze.

Chill cake until firm, about 1 hour. Transfer cake to a plate.

Thursday, August 07, 2008

Incredible Oven Fries


Very Crispy Oven Fries, originally uploaded by razzieswirl.

I've always been slightly suspect of "oven fries". Most potatoes I've roasted in the oven turn out only slightly crispy, and although I love oven roasted potatoes I'd never rely on the oven to make the perfectly crispy fry. Yet, I've always yearned for a good oven fry, mostly because they're obviously much healthier than deep fried potatoes. These oven fries are super crispy on the outside. They almost have a crunch much like a potato chip, and are hot and soft on the inside. It's the perfect combination of crispy fry and oven roasted potato. You don't loose the hot soft potato essence yet the outside has a palatable crunch.

While the sun is still shining, and the weather is still hot, roast up a batch of these with a juicy barbecued burger and a tall glass of sun tea and simply sit and enjoy the lingering summer evenings.

Recipe Courtesy of Tyler Florence:

2 russet potatoes, cut in 1/2 lengthwise, halves cut lengthwise into fourths to make 16 big, fat wedges
1/4 cup extra-virgin olive oil
Kosher salt
2 tablespoons chopped parsley leaves
1/4 cup freshly grated Parmigiano-Reggiano
Preheat the oven to 425 degrees F.
Preheat a baking sheet in the hot oven for at least 5 minutes.

1. While the baking sheet is heating, toss the potatoes with the olive oil and 3/4 teaspoon salt in a large bowl.
2. Dump the potatoes out onto a baking sheet, spreading to a single layer.
3. Roast for 30 to 35 minutes, shaking the pan every now and then, until the potatoes are cooked through, brown and crispy.
4. Toss the fries in a big bowl with the parsley and cheese.

Thursday, July 24, 2008

Day& Night Cake


Night & Day Cake, originally uploaded by razzieswirl.

Something I created this week in cake class.
Chocolate transfer clouds, stars, sun & moon.
All you have to do to create a chocolate transfer is to melt down some candy melts, and pipe over a template. Check out the Whimsical Bakehouse Cookbook for great tips on how to create beautiful transfers.

Saturday, July 05, 2008

Clubbers Wanted!


Sarina Champagne Blur, originally uploaded by razzieswirl.

Cooking Clubbers that is!

I wish I could coral some of my lovely readers into coming over for a fabulous dinner or wine and cheese fest, but alas, I'm sure none of you are in Whatcom county.

Buuuut, if anyone who happens upon this is in Bellingham; I'm interested in starting a (Gourmet-esque) Cooking Club that would meet monthly for dinner (or something food related). I know it's slim shot but I figured what's the point of a website if you can't advertise this kind of thing!? So if you're interested, please, email me!

Friday, July 04, 2008

The Independence of One


The Cake One, originally uploaded by razzieswirl.

Wishing Rayne belated birthday wishes on the blog!
Here she is with her adorable self and the simple raspberry lemon cake (with raspberry whip cream "frosting") I made for her.
She turned 18 on June 18, 2008. She is legally an adult! Woot!

Independence for a sweet girl and independence for a country (today that is)! I hope everyone has the day off and is enjoying sunshine (it's grey here in the pacific northwest, of course!)

Eat something good and enjoy the fireworks!

xoxo
m.

Friday, June 27, 2008

Tartlettes


Raspberry Ganache Tarlette, originally uploaded by razzieswirl.

I heart tartlettes, not as much as I love cupcakes, but close!
I think I have an affinity for all things mini. In fact, sitting here typing I'm realizing I've had an obsession with tiny things since childhood, I loved polly pocket, my little ponies had to be of the small variety and and I was often obsessed (and I mean that quite literally) by small things the smaller it was the more I liked it. I remember I had this old Mickey Mouse book and in it he and his friends went on a picnic. For the picnic, Minnie Mouse made a chocolate cake with one small red cherry on top, I could care less about the book, but wanted to look at every page with the cake/cherry on it. I could probably give you an embarrassing number of examples but I'll stop there.

Onto the tartlettes. I really enjoyed these because I generally come across many recipes with strawberry/chocolate combinations, which, don't get me wrong, I love, but I wanted to try something new and different. Generally, I like to pair the flavor of raspberry with something light and citrus-y like lemon curd because I hate masking the flavor of raspberries with anything too overpowering, and I was afraid that chocolate would do just that. I got mixed reviews, I think it was a wonderful combination, a tartlette that was really not that sweet but extremely flavorful. Some agreed, others suggested a chocolate custard or pudding. I was happy with the results though, so I think I'll keep this recipe around.

I've got a a little something in the works, but I won't announce what just yet, in case it doesn't work out. It's sort of like being pregnant, you know, how women don't want reveal their pregnant until after the first quarter? I will say this, I recently catered a party and the reviews were overwhelmingly splendid and encouraging. It was great to hear people outside of my friends and family praise my culinary endeavors.

These tarts are simple, tasty and impressively beautiful. A light crumbly crust, a semi-sweet lightly kahlua spiked chocolate ganache filling, topped with tart fresh raspberries with a touch of sweet raspberry glaze.

Raspberry Tartlettes

Ingredients:

Tart Shells:

1 stick plus 1 Tb. butter, cut in small pieces
1 1/4 cups flour
1/4 cup almonds
1/2 cup powdered sugar
1 egg yolk


Filling:
8 oz highest quality chocolate
1/2 cup heavy whipping cream
1 Tablespoon Kahlua

Topping:

1 cup fresh raspberries
1/4 cup raspberry preserves
1 Tablespoon water

Directions:

For tart shells:

1. In a food processor, pulse all the dry ingredients.
2. Add the butter and pulse again.
3. Add the egg yolk and pulse until the mixture comes together in a ball.
4. Wrap ball in plastic and refrigerate while you prepare the filling.
5. Roll between sheets of plastic wrap and cut out circles larger than your tart shells.
6. Fit the dough into the molds and cut out the excess.
7. Bake at 350 for about 10-15 minutes or until golden brown.

The dough generally puffs up, so I usually take the shells out halfway through the baking process and pat the bottoms flat with the back of a spoon.

Filling:

1. Chop chocolate
2. Heat to heavy whip cream until hot and just boiling
3. Pour over chocolate and whisk to create a smooth chocolate filling
4. Add Kahlua (a splash of vanilla is optional as well)
5. Allow to cool a bit while tart shells bake

Topping:

1. Heat preserves and water in a pot until thickened
2. Assemble tarts, pour chocolate to fill, top with raspberries and then glaze raspberries with glaze.

Viola! A delectable dessert that's ready to serve!

Monday, June 16, 2008

The Godly "Egg Cup"


The Godly "Egg Cup", originally uploaded by razzieswirl.

This recipe is so easy, it's one of "those" recipes, if you can boil water you can surely make this. The amazing thing about it though, it tastes much better than boiled water, it's really flavorful, it tastes like something you would order for a lovely sunday brunch. However, it takes little to no work and bakes up quickly, making it a perfect choice for a rushed Tuesday morning breakfast, you can throw a few together put the muffin tin in the oven and have enough time to get dressed without worrying about what your going to eat before you leave the house. You can also make a batch of these and put any leftovers in the fridge for a later morning as they heat up fast and quickly. I place one egg cup on half of an english muffin that has been lightly buttered. So, so good! Even my boyfriend (who doesn't generally like eggs, unless it's crab cake eggs benedict) really enjoyed these.

So without further ado the recipe!

Egg Cups: (I am going to write this recipe for one egg cup, it's very simple so if you want to make five, just do this five times).

Ingredients:

One egg

One slice of deli ham (I used honey cured)

4 Tablespoons Cheese(s) of your choice (I used Asiago and Tintern a chive shallot cheese from England but swiss, cheddar, brie anything would be good)

Teaspoon chopped italian parsley

Directions: Preheat oven to 375 degrees

1. Place one slice on ham in a buttered muffin tin

2. Sprinkle a Tablespoon or two of cheese in the bottom of the ham cup (more if you like)

3. Crack and drop egg into the cup

4. Sprinkle with salt, pepper and additional tablespoon of cheese

5. Bake in preheated oven for about 15 minutes, until egg whites are cooked thoroughly and yolk is still a light yellow (longer if you want your egg yolk hard).

6. Remove from oven and top with a sprinkling of italian parsley.

Enjoy!

Thursday, May 29, 2008

Rollin' Roses


Roll-up Pink Fondant Roses, originally uploaded by razzieswirl.

I took a picture of the cake carcass, or remains, of Ashleys 24th birthday cake. We had a lovely, not so little, backyard dinner for her complete with fried chicken, wilted lettuce salad, mashed tatoes and of course this loverly cake. The theme was pink and green, thus the pink and green cake.

I'll post a few more party decor pictures after my homework is done this week!

To make fondant roses, simply whip up a batch of MMF (marshmallow fondant), dye it various shades of pink, roll thin strips out and roll up going left to right (or vice versa), it's very simple, but takes a little practice!

Enjoy!

Friday, May 09, 2008

Caught and Consumed

The Skagit Farmland has copious amounts of farm fresh produce, artisan cheeses, local wines, and yes, a ton of amazing fresh seafood. Many fishermen come through La Conner on their boats delivering the most beautiful seafood caught that day, including these gorgeous little gems. We don't get these shrimp up in Bellingham, unfortunately. They're so sweet, almost like lobster, but naturally salty because of the seawater they scuttle about in.

These shrimp also take me back. When I was a little girl I spent some time at my mothers friends cabin on Camano Island which was situated right on the beach. We'd all sit out in warmth of the sun and this little blue boat would float by, often we'd buy these shrimp right off the boat, they'd just throw a bag to shore and we'd all sit in a line popping the heads off and eating the sweet meat inside. I'm so lucky I got to spend parts of my childhood roaming the beach, eating the freshest seafood possible and sleeping under the stars listening to the waves roll. I have many fond memories of my time spent there and these shrimp are one of my favorites.

If you can locate these sweet tasty shrimp eat them as they come, they don't need anything at all, they just need to come out of their shell!