Friday, August 28, 2009

Around the Table : July : Barbecue

In case you haven't noticed, or in case I haven't said it enough, I'm really behind with my blogging. Case in point, the cooking clubs July dinner (yes, July, as in nearly two months ago). Considering we had our August dinner a week ago, and the fact that I want to share that with you in a few days I know I need to keep this post short and sweet. For the most part I am going to share with you what we ate. The one problem with our dinners is that we don't really exchange recipes. So aside from my own, and dishes that are fairly straightforward, or don't particularly need a recipe, I don't have much for you anyway. I've requested we share recipes after our dinners (partially because I'd love to recreate some of these dishes in my everyday eating life). That means, hopefully, in the coming months, I may actually have a full lineup of recipes for you when I put up these posts. Recently I've entertained the idea of starting an 'Around the Table' blog, even though both Rachelle over at Use the Good China and I both put up individual posts. You see, I'm biased, I believe our group is so unique, incredible, and delectable, I am starting to feel 'Around the Table' deserves it's own spotlight, you know? There are lots of food blogs out there, I likely don't have to tell you that. So many. 'Around the Table' seems like it might stand out from the crowd. Again, of course I think that, how could I not?

Enough babble, onto the July dinner.


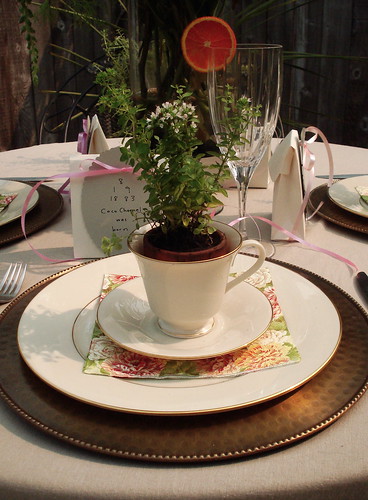
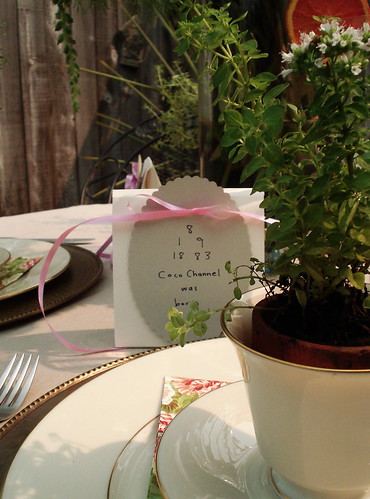
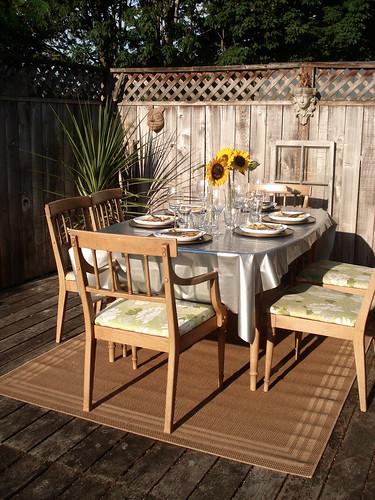
The table setting was very simple. Barbecues should not be fussy in the least. So, I used a fun, barbecue-y oil cloth tablecloth, in a metallic silver. Copper chargers. White square plates. Rosanna 'Kings Road' salad plates. A very colorful and bright orange, green, yellow napkin with a vintage inspired bird print. Large merlot glasses for the sangria. Three tall cylindrical skinny vases flanked the middle of the table, in each one sat a large, vibrant yellow and brown sunflower.


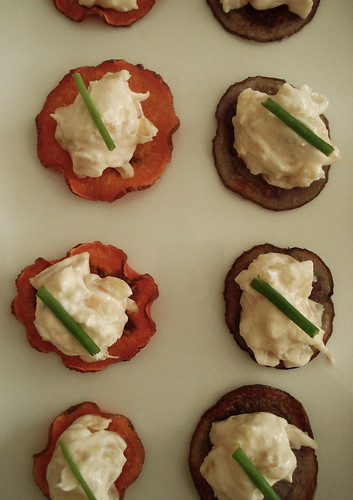
I had the appetizer dish. I wanted to stay within the barbecue realm and felt the need to make something slightly retro. Chips and dip was just far too blasé. I liked the idea of it, chips and dip, it's quite iconic. Served at many a barbecue, family reunion, backyard fete, and superbowl soiree. Yet, I never, ever, eat chips and dip. I hate the options out there for dip, as I am never inspired to make a bowl of mostly sour cream or mayonnaise mixed with a packet of this, or snippets of that. That was until I witnessed the one and only Ina Garten whip up her famous 'pan fried onion dip', or, the moniker I've dubbed it, 'caramelized onion dip'. Still, as creamy, spicy, sweet and altogether fabulous this dip is, how could I serve my gourmet girls a bowl of dip and chips? I couldn't. Solution: make your own chips, and create tiny chip and dip bites, the chip and dip version of bruschetta. These dinners generally create an easy excuse for me to buy something, whether it be a new set of dishes, new glasses, another set of barware, a fun tablecloth, or the right pieces for decor. The barbecue offered me the opportunity to purchase a mandoline, something I've wanted, but had yet to splurge on. So, armed with my nifty new kitchen tool, I set myself up in the kitchen the afternoon of our barbecue, with a slew of potato options, from yukons, to purple, to sweet, I was set. I slathered each batch with olive oil, salt and pepper, then baked them in the oven for about 8-10 minutes on 350 F. I ran out of my little chip and dip canapes so quickly that I ended up plating a bowl of chips and dip for the girls. I don't really think it mattered to them how I served it, both were gone in a flash.


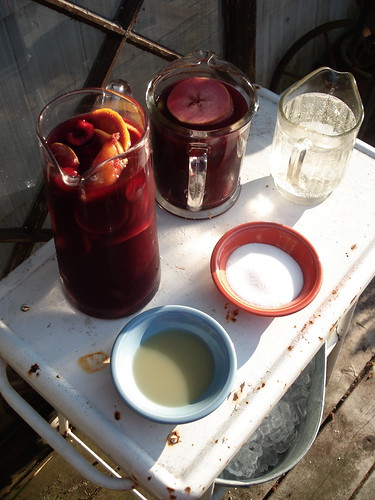
We washed our appetizers (and our dinners) down with Rachelle's incredible take on a classic summer drink; Sangria. Through the door she came with two giant buckets of Sangria. When I say buckets, I mean buckets, really, big ol' buckets. Two! Hmmm, I wondered what her intentions were with so much booze. After one glass it was apparent, those buckets were going to get slurped down rather quickly. Each was filled with a mixture of 'burgundy' wine, brandy, and a slew of fresh summer fruits, deep rouge cherries, bright juicy peaches, slices of tangy lemon and lime. She dipped the rims of glasses in lime juice, and dusted the wet edges in fine sugar. Into the glass went two large handfuls of ice, a generous amount of sangria, which was all topped off with a splash of sparkling water.

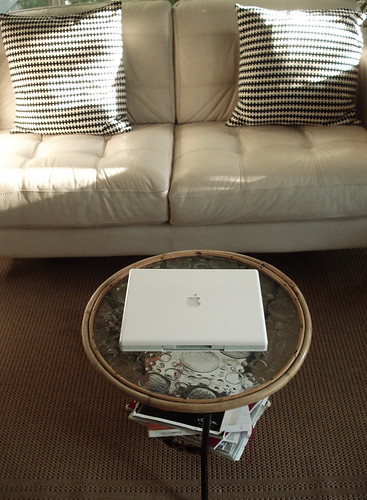
We set the 'sangria bar' up on one of my antique carts in the backyard. From here, the girls could ice, dip, sugar and pour their own drinks throughout then night.


Absolutely beautiful, no? The fruit really soaked up all of the brandy. My favorite of the bunch were the cherries, they were sweet but the alcohol gave the cherries a musky, floral flavor. Incredible! For a recipe, and Rachelles thoughts visit Use the Good China .

sangria, originally uploaded by miss.mallory.

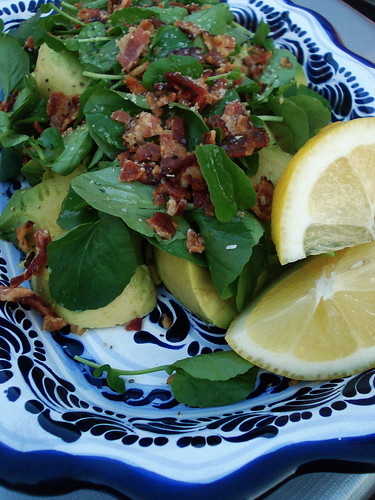
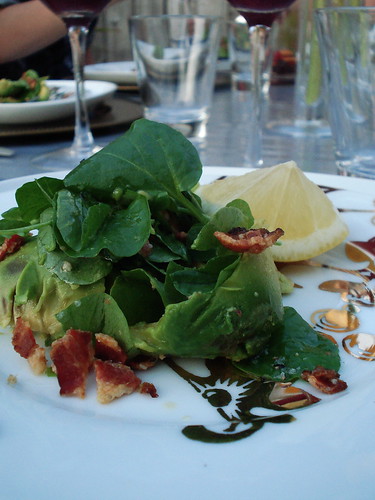
Laurel presented us with an out of this world green salad. So, so, simple. So, so delicious. The salad consisted of watercress, chunks of perfectly ripened avocado, crumbles of crunchy bacon, lemon, olive oil, and finally seasoned with salt and pepper. The most flavorful are often the least complicated. I loved this dish so much, I've thrust it into my weeknight dinner rotation.


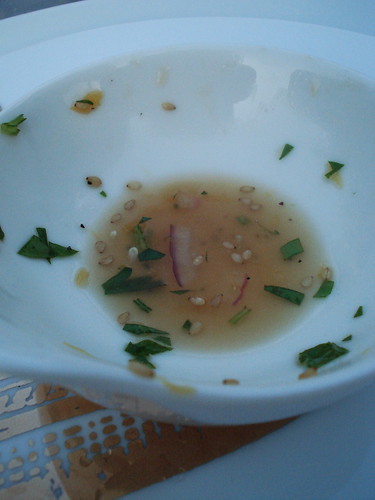
Annika is our newest member. I won't lie, it's always a bit nerve racking when a newbie attends her 'virgin' dinner. Will they fit in with the rest of the group? More importantly, will they bring it in the kitchen? For the most part, our girls, and their dishes are mind blowing. Better than a five course meal, as the dishes are served, I am constantly in awe and inspired by the ladies in this group. I'm extremely happy to report, Annika did not disappoint. In fact, she shone. Cucumber salad may sound boring to some, and trust me, I've had my fair share of questionable cucumber salad, but Annika hit it out of the park. I may be wrong here, but she paired her cucumber with something that I've never seen classically paired with it, radishes. This dish was definitely a labor of love, and a lot of tasting. Essentially, the salad consisted of cool chunks of cucumber, thinly sliced radishes, slivers of orange segments, diced red onion, and a sprinkle of toasted sesame flat leaf parsley. Where I lost Annika was in the dressing, this part is what I was referring to as the 'labor of love'. It sounds as though she combined half of her pantry in a bowl, tasted, adjusted, added, tasted, adjusted. . . you get the idea? Well, sort of. If I remember correctly it was a combo of soy sauce, brown sugar, sesame oil, rice wine vinegar, and probably a million other things I'm leaving out. A true artist in the kitchen cooks this way though, recipes be damed!

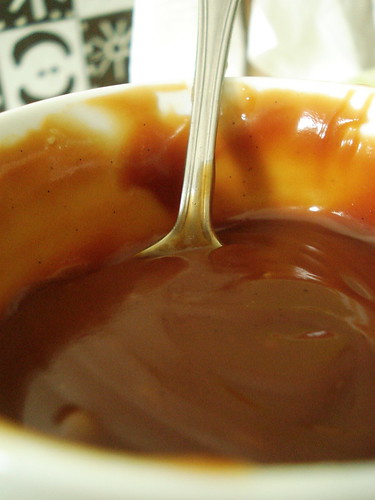
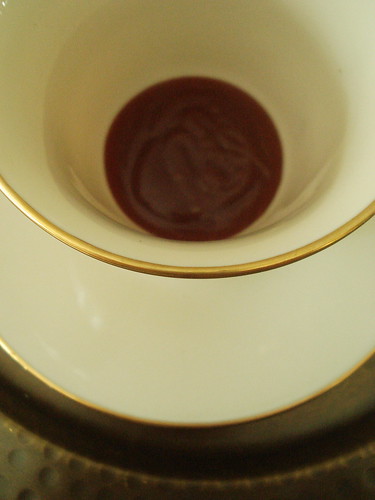
Here, is the leftover dressing in the bottom of my bowl. Perhaps, if you've got magic eyes, you'll be able to discern the secret ingredients collected in the bottom of this bowl.

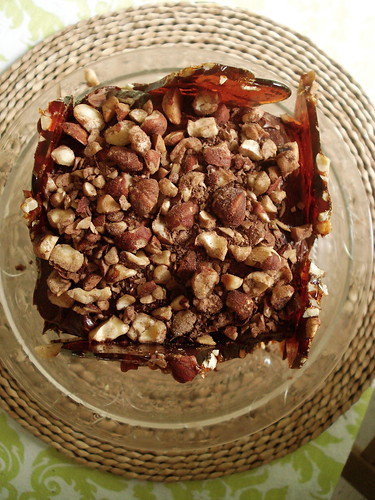
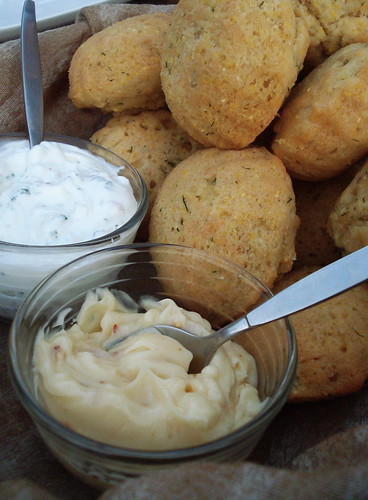
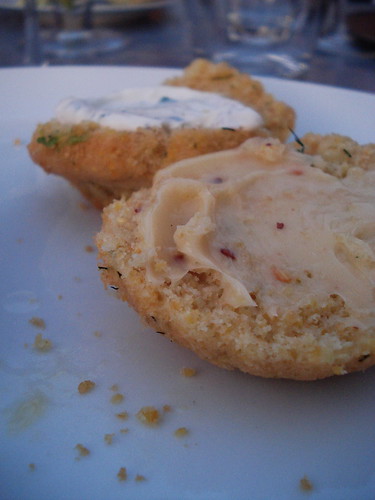
I have a feeling I won't be able to stop gushing about our dinners. I am constantly surprised, and delighted by the dishes. Case in point, I've been converted. I have never liked cornbread or cornbread type products. It's just not my thing. I liked the flavor alright I suppose, I just didn't much care for the texture, it's grainy crumb got old after a while. Even the best of the cornbreads out there left me feeling as though I'd eaten a terribly dry, crumbly bread confection. Little did I realize, cornbread doesn't have to be dry or grainy. Laurels corn muffins had me over the moon. They were so incredibly moist. They almost melted away in your mouth. And sweet! So, perfectly sweet. Fresh corn kernels strewn throughout imparted the right amount of sweetness. She baked them in shallow ramekins giving them the cutest muffin top quality, and served them with two spreads. One cool, creamy sour cream and chive. The other rich butter paired with honey and cayenne pepper. I couldn't pick just one to slather on my muffin, so I chose both. One bit of spicy sweet, the other of cool and creamy. Just the right balance, on the most heavenly of corn breads.


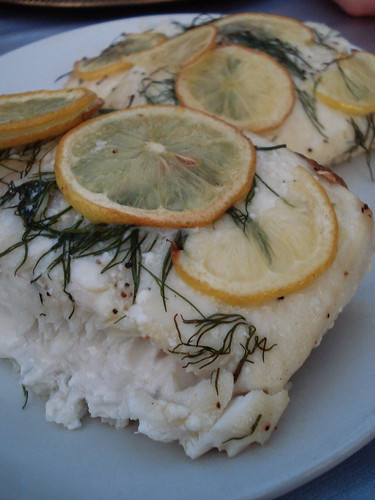
Sadly, we lost a member in July. Laura. She decided it was time for her to move on. She set sail, well, more likely packed up the car and headed for the freeway, headed down to Portland to live with her sister. She will be missed. Boy, did she leave with a bang. For our entree Laura kept the theme of the night which seemed to be gourmet simplicity. She toted along large chunks of fresh halibut dressed with thinly sliced lemon and fresh sprigs of dill, which she threw on the grill and barbecued slowly.

Once served hot off the grill we slathered the fish with chunks of herbed garlic compound butter. As the fish cooled, the butter melted and pooled around the fish, creating the creamiest sauce to dip the fresh fish into. Doesn't it just look mouthwatering? Well, it was. Laura left us with one of the best entree's we've had.


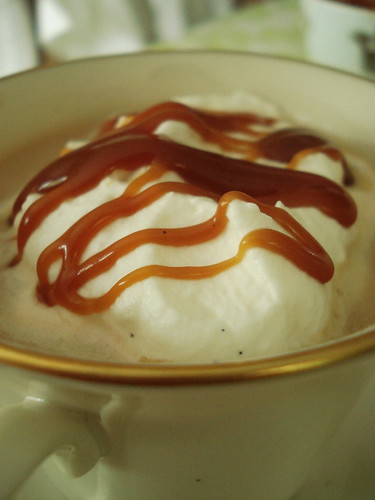
Unfortunately, I do not have a picture of dessert. It got so dark by the time we were finished with our meal, and ready for dessert, that there was no way I was able to take a decent picture of it in the backyard. Alexis provided dessert which was grilled juicy nectarines, with homemade mascarpone mixed with honey and candied walnuts. Yes, I said homemade mascarpone. Our little miss Alexis has been on quite the homemade cheese kick lately. You'll see what I mean soon!

I can't tell you how amazing being a part of a gourmet group is. Once a month I am treated to a five course meal, with drinks, that blow most high end restaurants out of the water, for the price of one dish. Not only that, I get to spend hours chatting with a group of intelligent, kind, funny women.

Thursday, August 27, 2009

The Daring Dobos


DSC03985, originally uploaded by miss.mallory.


It's official, I'm a daring baker! This is pretty exciting for me. I always thought that becoming a daring baker was something that a.) you needed to be invited to do, like some exclusive club. And tat b.) it would likely never happen for me. I'm pretty sure that when it started it was an exclusive, invite-only club situation, but now, you can go to thedaringkitchen.com and submit a request to become either a daring baker or a daring cook. I was accepted about three months ago. However, due to the insanity this summer has thrown my way (which is apparent by the lack of content on this little blog), I had to opt out of the last two challenges. I was so excited when I knew I could participate this month. Perfect timing in fact. Summer quarter ended Thursday of last week, giving me just a bit more time to spend in the kitchen.

Some of you may be wondering, what the heck are you talking about, what is a 'daring baker', anyway? Quick and simple explanation for those of you who may not be familiar with the daring bakers. They, er, we, are a group (now quite a large group) of individuals who are presented with a baking challenge once a month on the first. Most of us are bloggers, but even if you don't blog, you're welcome to participate, they have an area where you can post your completed challenge to the group. We keep whatever our challenge is a secret from the rest of the blogging world most of the month. At the end of the month, usually the 27th, we reveal our experiences, pictures, and recipes with you! For me it's a great way to break out of my baking box. Someone gives me a recipe to attempt, and interpret, usually with components or ingredients I've never tried. This is a large reason I love my cooking group. For me, the daring bakers is another reason to push myself and hopefully learn something new, every month.

So, aren't you dying to know what you see above? What the August Daring Bakers challenge was? The Dobos Torte. Admittedly, I had never, in my life, heard of a Dobos Torte. However, this cake is quite famous, primarily in Europe and in Hungaria, it's country of origin. In my repertoire I only have one rotating (savory) hungarian recipe, I suppose, now I have two. The Dobos was named after famous confectioner Jozsef C. Dobos. Dobos created both the chocolate buttercream and spongecake recipes. The frosting was of great note back in the late 1800's because most cakes during that period of time were frosted with pastry or whipped cream. This decadent, rich, chocolate buttercream was so wildly different that the cake rocketed to popularity throughout Europe. Regardless of it's popularity, Dobos traveled and cooked this cake rather than sharing the recipe, it took him years after it's unveiling to share any component with another chef. Interesting, no?

I followed the recipe to a t. I generally practice one of my only rules in the kitchen; try a recipe word for word once, tweak if need be the second time around. I did, however, change a few things, primarily only with my presentation of the cake. I found the buttercream to be quite 'loose'. Classically, the side of this cake is packed with nuts, generally hazelnut or almond, and the top is covered in wedges of thin spongecake covered in caramel. Due to the softness of the frosting I decided to pack the top with nuts, and layer the sides with hardcrack caramel embedded with toasted hazelnuts. So, while my presentation may not be classic, I used all the components of the recipe, the soft, light spongecake, the rich chocolatey frosting, the toasted nuts, and the caramelized sugar. I didn't get any pictures of the inside which is a huge shame, because the layers were just gorgeous. I made the cake during the day, took pictures. We were having family over for dinner that night, so I had to wait to cut into it until after dark (and my camera simply won't cooperate in the darkness). Check out some other daring baker posts from his month for a peek at the inside. Simply stunning! If you're looking for a cake that's a bit time consuming, gorgeous, and will surely impress your guests both in presentation and flavor, then I would gladly suggest this cake. It can be made a variety of ways, some of my fellow daring bakers used white instead of dark chocolate, some filled theirs with fresh peach jam, some used various forms of nuts, and many decorated their cakes in unique ways, from mini's to giants. I encourage you to check out their posts as well. One of the greatest things about these challenges is that we all come to the table with different experiences, interpretations, and outcomes.

I couldn't be happier to have participated this month. I look forward to the months ahead fellow bakers (and readers!)

Angela from A Spoonful Of Sugar, and Lorraine of Not Quite Nigella chose and hosted this months events. Here is the recipe they provided the bakers with. It might seem long, but give it a try, you won't be disappointed:

Sponge cake layers
• 6 large eggs, separated, at room temperature
• 1 1/3 cups (162g) confectioner's (icing) sugar, divided
• 1 teaspoon (5ml) vanilla extract
• 1 cup plus 2 tablespoons (112g) sifted cake flour (SUBSTITUTE 95g plain flour + 17g cornflour (cornstarch) sifted together)
• pinch of salt
Chocolate Buttercream
• 4 large eggs, at room temperature
• 1 cup (200g) caster (ultrafine or superfine white) sugar
• 4oz (110g) bakers chocolate or your favourite dark chocolate, finely chopped
• 2 sticks plus 2 tablespoons (250g) unsalted butter, at room temperature.
Caramel topping
• 1 cup (200g) caster (superfine or ultrafine white) sugar
• 12 tablespoons (180 ml) water
• 8 teaspoons (40 ml) lemon juice
• 1 tablespoon neutral oil (e.g. grapeseed, rice bran, sunflower)
Finishing touches
• a 7” cardboard round
• 12 whole hazelnuts, peeled and toasted
• ½ cup (50g) peeled and finely chopped hazelnuts

Directions for the sponge layers:
The sponge layers can be prepared in advance and stored interleaved with parchment and well-wrapped in the fridge overnight.

1.Position the racks in the top and centre thirds of the oven and heat to 400F (200C).
2.Cut six pieces of parchment paper to fit the baking sheets. Using the bottom of a 9" (23cm) springform tin as a template and a dark pencil or a pen, trace a circle on each of the papers, and turn them over (the circle should be visible from the other side, so that the graphite or ink doesn't touch the cake batter.)
3.Beat the egg yolks, 2/3 cup (81g) of the confectioner's (icing) sugar, and the vanilla in a medium bowl with a mixer on high speed until the mixture is thick, pale yellow and forms a thick ribbon when the beaters are lifted a few inches above the batter, about 3 minutes. (You can do this step with a balloon whisk if you don't have a mixer.
4.In another bowl, using clean beaters, beat the egg whites until soft peaks form. Gradually beat in the remaining 2/3 cup (81g) of confectioner's (icing)sugar until the whites form stiff, shiny peaks. Using a large rubber spatula, stir about 1/4 of the beaten whites into the egg yolk mixture, then fold in the remainder, leaving a few wisps of white visible. Combine the flour and salt. Sift half the flour over the eggs, and fold in; repeat with the remaining flour.
5.Line one of the baking sheets with a circle-marked paper. Using a small offset spatula, spread about 3/4cup of the batter in an even layer, filling in the traced circle on one baking sheet. Bake on the top rack for 5 minutes, until the cake springs back when pressed gently in the centre and the edges are lightly browned. While this cake bakes, repeat the process on the other baking sheet, placing it on the centre rack. When the first cake is done, move the second cake to the top rack. Invert the first cake onto a flat surface and carefully peel off the paper. Slide the cake layer back onto the paper and let stand until cool. Rinse the baking sheet under cold running water to cool, and dry it before lining with another parchment. Continue with the remaining papers and batter to make a total of six layers. Completely cool the layers. Using an 8" springform pan bottom or plate as a template, trim each cake layer into a neat round. (A small serrated knife is best for this task.)

Directions for the chocolate buttercream:
This can be prepared in advance and kept chilled until required.

1.Prepare a double-boiler: quarter-fill a large saucepan with water and bring it to a boil.
2.Meanwhile, whisk the eggs with the sugar until pale and thickened, about five minutes. You can use a balloon whisk or electric hand mixer for this.
3.Fit bowl over the boiling water in the saucepan (water should not touch bowl) and lower the heat to a brisk simmer. Cook the egg mixture, whisking constantly, for 2-3 minutes until you see it starting to thicken a bit. Whisk in the finely chopped chocolate and cook, stirring, for a further 2-3 minutes.
4.Scrape the chocolate mixture into a medium bowl and leave to cool to room temperature. It should be quite thick and sticky in consistency.
5.When cool, beat in the soft butter, a small piece (about 2 tablespoons/30g) at a time. An electric hand mixer is great here, but it is possible to beat the butter in with a spatula if it is soft enough. You should end up with a thick, velvety chocolate buttercream. Chill while you make the caramel topping.
Lorraine's note: If you're in Winter just now your butter might not soften enough at room temperature, which leads to lumps forming in the buttercream. Male sure the butter is of a very soft texture I.e. running a knife through it will provide little resistance, before you try to beat it into the chocolate mixture. Also, if you beat the butter in while the chocolate mixture is hot you'll end up with more of a ganache than a buttercream!

Directions for the caramel topping:

1.Choose the best-looking cake layer for the caramel top. To make the caramel topping: Line a jellyroll pan with parchment paper and butter the paper. Place the reserved cake layer on the paper. Score the cake into 12 equal wedges. Lightly oil a thin, sharp knife and an offset metal spatula.
2.Stir the sugar, water and lemon juice in a small saucepan. Bring to a boil over a medium heat, stirring often to dissolve the sugar. Once dissolved into a smooth syrup, turn the heat up to high and boil without stirring, swirling the pan by the handle occasionally and washing down any sugar crystals on the sides of the pan with a wet brush until the syrup has turned into an amber-coloured caramel.
3.The top layer is perhaps the hardest part of the whole cake so make sure you have a oiled, hot offset spatula ready. I also find it helps if the cake layer hasn't just been taken out of the refrigerator. I made mine ahead of time and the cake layer was cold and the toffee set very, very quickly—too quickly for me to spread it. Immediately pour all of the hot caramel over the cake layer. You will have some leftover most probably but more is better than less and you can always make nice toffee pattern using the extra to decorate. Using the offset spatula, quickly spread the caramel evenly to the edge of the cake layer. Let cool until beginning to set, about 30 seconds. Using the tip of the hot oiled knife (keep re-oiling this with a pastry brush between cutting), cut through the scored marks to divide the caramel layer into 12 equal wedges. Cool another minute or so, then use the edge of the knife to completely cut and separate the wedges using one firm slice movement (rather than rocking back and forth which may produce toffee strands). Cool completely.
Angela's note: I recommend cutting, rather than scoring, the cake layer into wedges before covering in caramel (reform them into a round). If you have an 8” silicon round form, then I highly recommend placing the wedges in that for easy removal later and it also ensures that the caramel stays on the cake layer. Once set, use a very sharp knife to separate the wedges.

Assembling the Dobos

1.Divide the buttercream into six equal parts.
2.Place a dab of chocolate buttercream on the middle of a 7 1/2” cardboard round and top with one cake layer. Spread the layer with one part of the chocolate icing. Repeat with 4 more cake layers. Spread the remaining icing on the sides of the cake.
3.Optional: press the finely chopped hazelnuts onto the sides of the cake.
4.Propping a hazelnut under each wedge so that it sits at an angle, arrange the wedges on top of the cake in a spoke pattern. If you have any leftover buttercream, you can pipe rosettes under each hazelnut or a large rosette in the centre of the cake. Refrigerate the cake under a cake dome until the icing is set, about 2 hours. Let slices come to room temperature for the best possible flavour.

Storage

I am quite happy to store this cake at room temperature under a glass dome, but your mileage may vary. If you do decide to chill it, then I would advise also using a glass dome if you have done. I should also note that the cake will cut more cleanly when chilled.

Variations

Shape: The traditional shape of a Dobos Torta is a circular cake, but you can vary the shape and size if you want. Sherry Yard in Desserts By The Yard makes a skyscraper Dobos by cutting a full-size cake into four wedges and stacking them to create a tall, sail-shaped cake. Mini Dobos would be very cute, and you could perch a little disc of caramel on top.
Flavour: While we both love the dark chocolate buttercream and this is traditional, we think it would be fun to see what fun buttercreams you all come up with! So, go wild! Or, you could brush each layer with a flavoured syrup if you just want a hint of a second flavour. Cointreau syrup would be divine!
Nuts: These are optional for decoration, so no worries if you're allergic to them. If you don't like hazelnuts, then substitute for another variety that you like.

Egg concerns
The cooking process for the buttercream will produce lightly cooked eggs. If you fall into a vulnerable health group then you may wish to use an egg-less buttercream.


DSC04000, originally uploaded by miss.mallory.

Tuesday, August 25, 2009

Meatloaf Pie


Meatloaf Pie, originally uploaded by miss.mallory.


I'm not making any promises, or committing to a weekly schedule, but I do intend to create a casserole dish, once a week, at least through the fall. Again, that doesn't mean I can get it together enough to share it with you weekly (I have a feeling some won't be successful enough, so I may just save you, my reader the hassle of reading a post about a dish you won't have any interest in making anyhow). I realized recently how fond of casseroles I truly am. For the most part I'm one of those eaters who enjoys mashing everything together. At Thanksgiving I basically swirl everything together in one giant pile, the turkey, mashed potatoes, green beans, gravy, cranberry sauce. . . you get the idea. What better time of year to get into casseroles than during the fall? (Okay, maybe I'm jumping the gun by a few weeks here, I know it's not fall, but in the Northwest it's cold, and frankly, I'm ready for it, bring on the clouds!) To me casserole spells comfort food, rib stickin, and warm, perfect for blustery wet September eve's.

I'm not so fond of posting this as the first casserole recipe. I had higher hopes for this casserole. It was good, not great. It wasn't as nice looking as I wanted it, that's likely a lot of the reason I am hesitant to post this here. But, you might like it, or find a way to make it better. Perhaps you have an incredible meatloaf recipe that will blow my simple version out of the loaf pan. I'm unsure your mashed potatoes could beat mine, but maybe they can. This recipe came out looking very 1970's to me, I think what might take it over the retro visual top is if I threw in some bright orange cubed carrots and a giant blob of ketchup on it (although I will admit, I ate my slice of meatloaf casserole with ketchup, but I didn't photograph it with ketchup, meatloaf without ketchup is wrong). To me, the retro, almost awful look of it is part of the fun with this dinner.

Let's proceed with the pseudo recipe.

Before you start: Caramelize one onion. To do so, slice onion thinly, add to heavy saute pan with one tablespoon of butter on high heat. After five minutes, when onions have become slightly translucent, season with salt and pepper. Turn heat to very low and allow onions to cook, stirring every once and a while, until golden brown.

Layer One: Meatloaf. I usually use turkey when I make meatloaf. I was so impressed with the organic beef I bought for the pimento burgers last week, that I was tempted to buy it again. I think I might do turkey if I make this again. Perhaps I just prefer it. I keep it simple (like I do with my burgers), 1 lb,. ground meat (whichever you choose) salt, pepper, 3 cloves garlic, a few tablespoons of ketchup, sprinkle of dark brown sugar, a few splashes of worshteshire. Place your mixed up meatloaf in a 9x5 bread pan. Bake at 350 F for about 20 minutes.

In the Meantime: While your meatloaf is baking, boil 4 medium sized yukon gold potatoes. I prefer skin on, I like potato skins in my mash. When they've finished (if you stick a fork into the potato and lift, it should slide off easily) drain and throw in 4 Tablespoons of butter, place lid on potatoes and allow butter to melt. Once butter has melted, mash well, throw in a few Tablespoons of high fat milk (1/2 and 1/2, whole milk, cream etc.), continue to mash and season with salt and pepper.

Layer Two: Evenly slather caramelized onions on top of cooked meatloaf.

Layer Three: Place one cup (perhaps more) of fresh, or frozen, baby peas.

Layer Four: Pile the mashed potatoes up to the hilt (the top of the pan). If you really want to get decadent, throw a few pads of butter onto the top of the potatoes. Bake in the same heated oven, 350 F, for about 10 minutes, until meatloaf casserole/pie is heated through.

I inverted the casserole on a plate straight out of the oven and allowed everyone to slice a portion off of the casserole loaf. No matter how retro, ugly, or odd this may be it is a fun way to serve a weekday classic.


Meatloaf Pie, originally uploaded by miss.mallory.

Monday, August 24, 2009

Not Quite Autumn


Caramel Macchiato Coffee, originally uploaded by miss.mallory.


The seasons aren't quite ready to change. Although, a few neighborhoods in Bellingham are already sporting amber and scarlet colored leaves, and as these late August evenings roll to a close, the sun sets a little lower a bit earlier, meaning cooler evenings. My kitchen windows, which have all remained wide open each sunny day this summer, are closing a bit earlier now. Therefore I've decided to share one of my easiest, favorite, weekend fall treats; caramel macchiatos. A perfect sweet treat for a cold, slow sunday morning, or a special occasion.

First, you'll need to make the caramel. Homemade of course. Trust me on this one. It will make or break this coffee, you are not allowed to buy caramel. In fact, I'm of the belief that you shouldn't be purchasing this gooey confection period. It's impossibly easy to make, and you only need a few ingredients. One batch will last a week or two in the fridge. Outside of this coffee you can slather it on brownies, pour it on ice cream, or spoon it directly into your mouth. There is almost nothing better than the taste of sweet gooey burnt sugar. Don't fret. I promise you it's easy, and fairly cheap. Don't be scared.


Caramel Macchiato Coffee, originally uploaded by miss.mallory.


So, what will you need to make your own caramel?

1/4 cup of water
1 cup of granulated sugar
6 Tablespoons of butter (this might sound sacriligious to some, but I like to use high quality salted butter)
1/2 cup heavy whipping cream
1 vanilla bean split

To make the caramel place your water and sugar into a heavy, high sided saucepan and turn onto medium heat. Let sugar dissolve. At this point you can stir the mixture with a wooden spoon. Once the sugar dissolves and the mixture begins to boil do NOT stir. However, you can swirl. For example, my gas range cooks the sugar more and less in certain places. If I just let it sit, it would burn. So, as the mixture begins to amber, I pick up the pan by both handles and gently swirl the mixture around, so that sugar mixture settles in different places. It will take your mixture, as it simmers, about 5-10 minutes to begin to turn amber (depending on how your stovetop cooks). In the end, you want it to be a nice deep amber color (like the picture). There is an art to this, but it's not complex. My first ever batch a few years ago I burned completely. The next batch I was anxious about burning and I didn't caramelize the sugar enough. It may take you a few tries to get it right. But trust me, once you've got it, you're golden (in more ways than one!) Just buy a quart of heavy whipping cream, a box of butter, and have plenty of sugar on hand, and practice (if you need to) until perfect. I hope that doesn't sound daunting. I know I can give you the logistics of how to do it, if you're anything like me though, you'll just have to play around with it until it's right. While you're waiting for the sugar to amber (don't take your eyes off for too long), scrape the vanilla bean into your heavy cream and cut your butter into small cubes. As soon as the sugar turns deep amber turn off the heat and whisk in the butter. The mixture will bubble up considerably, be careful (that's why you want to use a high walled pot). As soon as you've incorporated the butter (happens quickly) pour in the cream/vanilla bean mixture and whisk. Let the mixture cool in the pot, when it's cooled enough pour it into a bowl or jar. Recipe will make about one cup.

Now that you've mastered caramel, and you've got a bowl waiting patiently on your countertop you're ready to wake up in the morning and whip up your caramel macchiato.


Caramel Macchiato Coffee, originally uploaded by miss.mallory.


First, brew a very strong pot of coffee, or enough espresso for your drink. I french pressed a mixture of strong coffee with a tablespoon of espresso. Pour about one (to two, depending on how sweet you'd like your coffee, and how big your cup) tablespoon of caramel into the bottom of your cup.

Then fill your cup 3/4 full with your coffee, or one or two shots of espresso, whichever you've chosen.


Caramel Macchiato Coffee, originally uploaded by miss.mallory.


Top off your coffee with (I prefer organic) half and half.


Caramel Macchiato Coffee, originally uploaded by miss.mallory.


Time for the freshly whipped cream. I like to use a local creamery's heavy cream. You will likely have heavy cream left over from your homemade caramel adventure. Whip that up with a bit of your vanilla bean, and a couple of tablespoons of honey. Scoop a generous portion of this mixture atop your coffee.

Finally, drizzle plenty of your caramel all over the top. Relax, sip, and enjoy, perhaps during the late hours of this dying summer, or perhaps, during the coming weeks of a sure to be chilly autumn.


Caramel Macchiato Coffee, originally uploaded by miss.mallory.

Sunday, August 23, 2009

A Change


A 'New' Sofa in the Kitchen, originally uploaded by miss.mallory.

Since this blog is called 'A Sofa in the Kitchen' I feel it's only right to share. The sofa in the kitchen has changed. In fact, the whole kitchen has a new look. Well, not entirely new. Same table. Just an entirely new layout to go with the new sofa. The feedback from friends, family and visitors have been positive. Not only do I saute, whisk, bake, roast, and create in the kitchen. I also read my favorite gourmet magazines, edit my pictures, and write posts here on this little white sofa. Except for our dinner clubs italian dinner last night, I haven't really left the kitchen (except to sleep) all weekend. I just can't get enough of my new sofa, and what feels like, an altogether brand new kitchen!

Stay tuned this week for vanilla bean whipped cream stuffed strawberries, as well as homemade caramel macchiato recipe, aaaand my first daring bakers post!!


A 'New' Sofa in the Kitchen, originally uploaded by miss.mallory.


A 'New' Sofa in the Kitchen, originally uploaded by miss.mallory.

Wednesday, August 19, 2009

A Very Happy Birthday to an Amazing Woman


Birthday Brunch Table, originally uploaded by miss.mallory.

I was honored when the talented and gorgeous Rachelle over at Use the Good China requested I create a lovely brunch for her birthday morning (which is today!) She and I have eerily similar taste for all things lovely in life from decor and food to what we deem a 'good time' (which varies a lot from many in their twenties). This is my idea of a good time. Planning and executing little events like this one. If I could do it for a living, I would. I get so into jotting down ideas, making lists, dreaming of placemats, tableclothes, placecards, flower arrangements, dish settings, colors, design, you name it. . . Granted, to do it professionally I'd likely need a gaggle of amazingly organized assitants to get events like this done without a lot of stress (and loss of sleep). Currently I clean, cook, assemble favors and decorate into the wee hours before and the morning of a party. Still, to me, there is nothing more rewarding than showering the one's I love with an incredible soiree! This brunch was spot on. Many of the dishes I whipped up can be found elsewhere on A Sofa in the Kitchen, many of them right here. The table however, was uniquely created for Rachelle's birthday. If you like this table setting, and would like to recreate it, I'll attempt to break it down for you piece by piece.


Birthday Brunch Table, originally uploaded by miss.mallory.


The color palate I was going for was primarily neuteral with little accents of vibrant color. The birthday queen adores creams, golds, and pinks. I wanted to set a table that would reflect her style and personality. So, I started by dressing the table with a very classic khaki colored linen tablecloth. The first layer of place setting consisted of four hammered copper chargers. Similar chargers can be found at your favorite home decor store, or even on the internet. I found a similar set of six at this website. For the dishes, I was lucky enough to borrow some of my mothers Lennox cream and gold wedding china (harken back to the birthday girls favorite color combo). First a dinner plate directly on the charger. Then, a large floral paper napkin with lots of green, pink, and white. On top of the napkin sat the saucer and coffee cup. Layering a napkin between the larger and smaller plates (particularly since they match) adds dimension, color and a bit of texture, as opposed to stacking one dish on top of another. It brought a pop of color to an otherwise monochromatic setting. I planned to serve homemade caramel macchiatos in the coffee mugs, but I also had a large pitcher of fresh squeezed citrus juices and champagne chilling in the refrigerator. For that I needed tall, stemmed glasses. On a recent trip to TJ Maxx I scored a set of four gorgeous, heavy, etched Kate Spade wine glasses that were perfect for this table. On the rim of each I placed a candied orange slice. One glass sat to the right of each setting. The oranges looked a bit like stained glass and brought the most vibrant color on the table. Finally, I crowned the table with a large bouquet of flowers and greens, from white mums, to pink roses, verigated green and white leaves to green buttons as well as a few giant white lilies, all of which were placed in a footed round vase.


Birthday Brunch Table, originally uploaded by miss.mallory.


I don't always incorporate 'favors' on my tables, but for birthdays or showers, it's fun, especially when you're not hosting a large group. For Rachelle's brunch I wanted to have things that also represented her. So, inside of the coffee mugs I placed a miniature clay pot freshly planted with herbs. Two pots had lemon thyme (an herb that can be used both in savory and sweet dishes), the other two flowering oregano. The birthday girl is a gourmet goddess, so something that could be used in the kitchen was a must. When it comes to favors, especially for birthdays, it's thoughtful to include things the guest of honor is fond of. Sitting just to the left of the setting I placed the second favor. On a recent trip to Bellevue I ran across one of my favorite entertaining spots, PaperSource, and found these fabulous DIY cream colored pocketbook boxes. Just big enough for a bit of tissue and a little treat. If you'd like to use these easy to assemble boxes for yourself they can be found online at PaperSource in a variety of colors. I also scored these fun little 'tags' of paper with scalloped edges at PS. On these I wrote an 'on this day' fact, so that everyone could learn a little more about the date of Rachelle's birthday, and secured each one with a pink ribbon. Inside the boxes were small french guest soaps that she loves, of different varieties, from green tea to pamplemousse. Each soap was delicately wrapped in black and white floral tissue paper before being placed inside the box. The guest of honor also got a few extra gifties (naturally), including a set of gold bangles and a travel tube of Lollia hand cream (I really love Lollia products, plus, they seemed to fit in with the whole theme of the morning).

We feasted upon slowly roasted potatoes anna, king crab savory waffle benedict, sweet and spicy oven roasted bacon, whipped cream stuffed strawberries and a large fig and peach salad. Although we had quite a few bee visitors, likely interested in the candied oranges, sweet meat, and fuits galore, we relaxed, and enjoyed the sun and spread set before us. Rachelle was quite nearly speechless and over the moon.

This is a simple setup, perfect for any backyard soiree. I hope that I've inspired you, even just a bit, to whip together something similar!


Birthday Brunch Table, originally uploaded by miss.mallory.

Monday, August 17, 2009

It's a Very Orange Monday.


Pimento Cheese Sliders, originally uploaded by miss.mallory.

Well, ladies and gents, it's been a while. My camera is still working (when it wants to), but I won't lie, I've had a rough couple of weeks, when I look back, it's been a rough couple of months actually. Nothing major, I've just been 'off' for a while. You know what I mean?

Still, here I am with an incredible, and simple recipe straight from this evening. It was so good I knew I had to share it, immediately I guess. I was inspired by a recipe in this months burger edition of saveur (which I just got a subscription to thanks to the ever lovely Rachelle). I did not follow the recipe due to the fact that I didn't have a few of the staple ingredients in my fridge I should. So, here's my take on 'Pimento Cheeseburgers'. Thomas wanted the traditional burger size, I opted for 'sliders'. I'm sure you know what a slider is, if not, it's a simply a burger miniaturized. Small patty, small buns. (I'm a huge fan of mini versions of big food, don't know why). These burgers are topped with a healthy dose of pimento and sharp cheddar while they finish on the grill. I've never actually had pimentos before. They're most commonly found in green olives. I'm not a fan of olives in any form, but I must say, I really loved the pimentos. It's as if a carrot and a red pepper had a baby and pickled it. Tangy, rich, sweet. Delish.

To make my hamburger patties I buy clean organic beef, season it heavily with salt and pepper and grill for about 5 minutes on each side. Every burger is perfect. I prefer to keep my meat simple and the toppings delicious. Sure you can add almost anything to your beef, but to me, a clean simple meaty taste pairs best with the endless gaggle of toppings you can slather on top. This burger got a generous scoop of pimentos mixed with sharp cheddar, a spread of caramelized onion, and fresh watercress. All of this got piled into a sweet mini bun. To orange it up even further I served these with slices of fresh orange pepper and sweet potato fries sprinkled with salt and cayenne.

This burger pairs perfectly with a warm summer evening, no wonder it's a southern burger staple (okay, probably minus the watercress and caramelized onion).

Pimento Cheese

Mix together:

1 cup shredded super sharp cheddar cheese
3 Tablespoons of finely chopped pimentos

*I just had a thought. Wouldn't sharp cheddar and pimento make an incredible grilled cheese?!


Pimento Cheese Sliders, originally uploaded by miss.mallory.


Pimento Cheese Sliders, originally uploaded by miss.mallory.