Tuesday, April 20, 2010

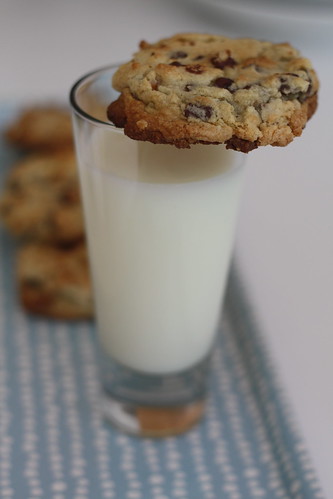
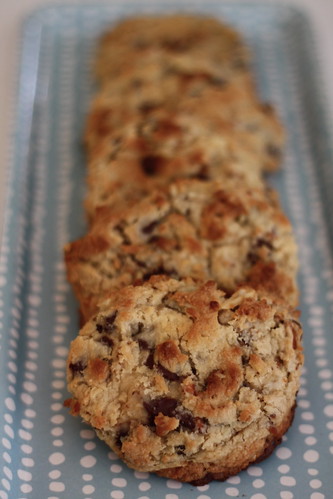
Momofuku Milk Bar Compost Cookie

It's official. My all time favorite dessert, the one sweet that will bring me to my knees time and time again, is hands down an incredible cookie (or two, or three). Stating that fact makes me feel a bit simple. What does that say about me? Of all the amazing desserts out there, out of all the combinations, techniques, flavors, and textures, my ultimate weakness lies in the hands of a good cookie? Really? Don't get me wrong, I love cake, I'm enamored with pie, I'm pretty fond of a good frozen dessert too, but none has won my heart like the cookie. Maybe this harkens back to my childhood. My earliest memories in the kitchen are of my grandmother and I, me on a little blue stool at her kitchen counter, big wooden spoon in hand stirring up a batch of nestle chocolate chip cookies. I remember begging her (nearly on a daily basis I believe) to make cookies with me. In complete honesty, I don't think it was all about getting to eat the cookies as they came out of the hot oven, I think I enjoyed being in the kitchen with her more than anything else. That smell, cookies baking in the oven, still reminds me of her and all the time we spent together in her kitchen.


Understandably, give me a reason to bake up a new cookie recipe, dominately of the chocolate chip variety, and I'll jump at it. And although I have yet to find the holy grail, the journey sure has been fun (and delicious). Momofuku Milk Bar's Compost Cookie could reign as my new favorite. I believe if I had allowed them to chill in the back of my fridge for 36+ hours (a la the NYT chocolate chip cookie) they would've been pure perfection. I stumbled upon them by chance over at 'the amateur gourmet' (damn fine food blog my friends). You see, I've started a new tradition here at 1313, 'Sunday Supper', every Sunday I cook up a meal for my closest friends and family, we sit, eat, drink, talk and enjoy. In my eyes, a meal simply wouldn't be complete without dessert, but, in an effort to keep my sanity and part of my Sunday free before supper, I seek out simple, no fuss desserts, this cookie being one of them. At the end of the night I baked up a fresh batch, served warm cookies and a tall glass of cold milk. So classic. Guests kind of went nuts. One tried to walk out the door with the rest of the cookies (even though I made care packages with cookies to go). I'm not kidding, he scooped up everyones package and away he went! (I caught him of course.) There are two things that really make this cookie different. 1. Whipping the butter/sugar/egg combo on high for 10 minutes. Essentially dissolving the granulated sugar and creating a light, shiny butter mixture to which you add the rest of your ingredients. This creates a light as air cookie dough that is hard to resist devouring straight out of the mixer bowl. 2. The 'throw-in's' or the 'compost' part. Another Sunday Supper guest had caught the particular Regis & Kelly that featured this cookie. She said they threw in all sorts of things from standard chocolate chips, to Rolos, to Goldfish crackers. Per Adams suggestion I kept it pretty standard, throwing in chocolate chips and a mixture of crushed pretzel and potato chip. But frankly, I don't think you can do any wrong throwing in whatever suits your fancy from candy to salty snacks. Although I mentioned it earlier, I don't think it's necessary to chill these for a day and a half. They're simply delicious the day of, right out of the oven, I sure didn't hear any complaints from any of the guests. . . So, if you're a cookie fiend like me, or simply on the same quest for the ultimate chocolate chip cookie, I implore you to try your hand at the compost cookie. And if you do, let me know what you throw in the mix! I have a sneaking suspicion these cookies will catch fire much like the NYT chocolate chip cookies did a few years ago, because they are that good.


Momofuku Milk Bar Compost Cookie

via Amateur Gourmet


Ingredients:


1 cup butter (two sticks)

1 cup granulated sugar
3/4 cup light brown sugar
1 Tbsp corn syrup
1 tsp vanilla extract
2 large eggs
1 3/4 cups all purpose flour
2 tsps baking powder
1 tsp baking soda
2 tsps Kosher salt

1 bag (I used one cup) chocolate chips
1 1/2 cups your favorite baking ingredients/junk food (ie pretzels, goldfish, twix, rolos, potato chips, you get the idea)


Directions:

(preheat oven to 400 F after cookies have chilled out in the fridge)


1. To the bowl of an electric mixer add butter, granulated & brown sugar as well as the corn syrup. With the paddle attachment beat on medium speed until well incorporated and creamed together. Appx. 3 minutes.

2. Reducing the speed a notch or two, add eggs (one a time, until incorporated about 30 seconds after each egg), and vanilla. Scrape down the sides to ensure everything is incorporating well.

3. Here comes the long haul! Increase speed to medium/high (I set my speed pretty high!), set your timer for 10 minutes, and walk away. At the end of this time the mixture should become a very pale yellow, nearly white, double in volume and will be quite shiny.

4. When your ten minutes are up, decrease speed to low and add in your flour/baking soda/powder/salt and mix until just combined (being careful not to over mix). Once the dry has mixed well with the wet, on the same low speed, add your 'junk food' or 'compost' (same thing here, until just incorporated, you don't want to over-mix the cookie dough).

5. Using an ice cream scoop, scoop equal amounts of dough onto silpat-ed cookie sheet (or wax paper). I fit about eight cookies per sheet. Then refrigerate cookies for at least one hour (apparently, because of the light dough, skipping this step will result in a mess of cookie goo/soup on your baking sheet).

6. Once they've chilled, throw cookies in hot oven and bake for 9-11 minutes. They may look a little doughy in the middle, this is ok, once you take them out they will continue to cook to gooey perfection on the hot sheet.

7. Devour! (Cold milk highly recommended).


Friday, April 16, 2010

Grilled Cheese Pageant : Holy Cheese Bacon-man!


Holy Cheese Bacon Man, originally uploaded by miss.mallory.
It's that time of year again, grilled cheese pageant time! Last year my roasted butternut squash/jarlsberg combo landed in the category of best swimsuit. So much for last year! Introducing the most ridiculous and delicious grilled cheese I've ever made: homemade cornbread slices packed with roasted jalapeno mayo, a ton of sharp cheddar speckled with pimento, and to top it all off strips of crispy fried bacon. As if that wasn't enough I skipped the butter on the outside and fried each sandwich in the grill pan filled with hot bacon fat. Oh yes, I just typed that. This sandwich is the antithesis of last years. Basically a heart attack waiting to happen. This sandwich wouldn't be caught dead in a bikini (or likely a one piece for that matter!) So wrong. But. Oh. So. Good. Spicy, sweet, gooey, cripsy, and above all, baconlicious (I think I just made that word up. . .) entirely worth the calories. Trust me on this one. Paired with a tall glass of ice cold beer? Simply a match made in heaven.


Holy Cheese Bacon Man, originally uploaded by miss.mallory.
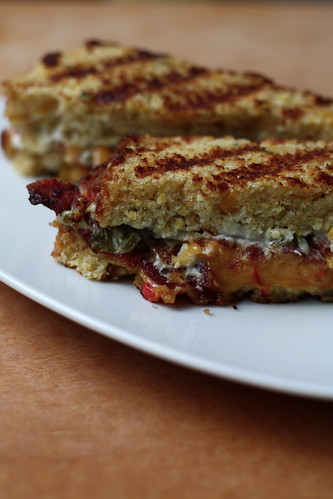
I likely don't need to give you a recipe for this sandwich, it's a grilled cheese. But, in an effort to make it that much easier for you to recreate here's how I did it: To make jalapeno mayo simply oil up some spicy green jalapeno chiles, grill on a bbq or over open flame, sweat in a bag, scrape off burned bits, chop flesh, throw into a few tablespoons of mayo (homemade is always best of course!) Laurels cornbread baked in a loaf pan makes the best bread. The pimento cheddar couldn't be simpler. And viola! Only a few steps more (bacon) and you've got one serious gut busting sandwich on your hands. Your swimsuit might not, but your tastebuds will thank you.


Holy Cheese Bacon Man, originally uploaded by miss.mallory.

Monday, April 12, 2010

The Best Corn Muffin


The Best Corn Muffin, originally uploaded by miss.mallory.
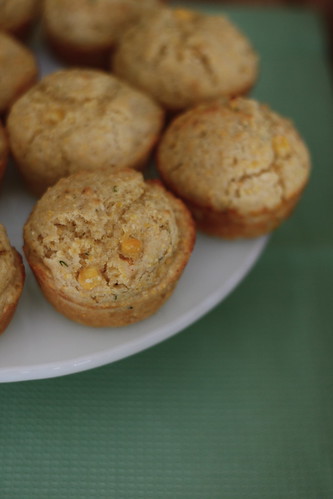

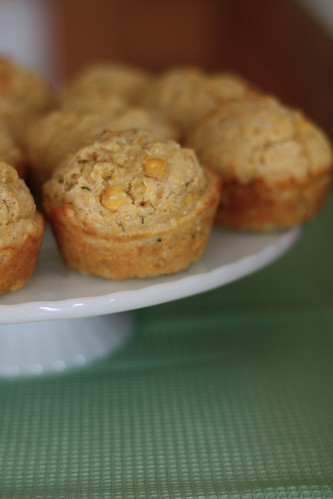
First off, I have to send a big thank you to miss Laurel-lou for this divine recipe. As some of you may know I'm the creator of a small, all female gourmet cooking club here in Bellingham. Miss Laurel is one of our most talented members. She's one of those girls who takes something that's undoubtedly fabulous and delicious to begin with and makes it, somehow, better. She often leaves me lusting after seconds or thirds of her concoctions (and that's saying a lot considering the amount of food we eat in a night). Problem is she's a kitchen artist. What I mean by this is (as it seems to me when I inquire after a recipe) she has whipped up whatever I've just been in heaven eating sans a recipe. She'll look here and there for inspiration, but she seems to whip up her dishes armed simply with her culinary wit and skill. Case in point, the best cornbread I've ever had. That's a hefty statement for a girl who's never been a big fan. Laurel brought these golden gems to our Barbecue Dinner nearly a year ago. Many a moment since that hot sunny day spent in the backyard has passed that I've found myself thinking back on their texture and flavor. Moist mini cakes speckled with sweet bits of corn kernel that pop in your mouth as you chew. Wispy strands of dill that lend a fresh bite. All warm and smothered in soft butter laced with sweet honey. Ohhhh. Heaven. Just describing them again is making my mouth water. Even if you're not a fan of cornbread, I encourage you to give these cakes a try, I doubt you'll be disappointed after biting into one. Trust me.

Laurels Luscious Corn Bread

1 1/2 cups flour
1 cup yellow cornmeal (I used medium grind but ground it further for less grit)
2 tsp baking powder
1/4 teaspoon baking soda
1 cup buttermilk
1 cup frozen corn
1/4 cup light brown sugar packed
2 large eggs
1 stick of butter, melted and cooled
pinch of salt, pepper, and cayenne
1 Tablespoon fresh dill chopped

Directions:

1. Preheat oven to 400. Prepare (oil) a 12 muffin cupcake pan.
2. Mix all dry ingredients together, flour through baking powder.
3. Mix all wet ingredients together buttermilk through butter (including corn). Season wet mixture with salt, pepper, cayenne and dill.
4. Fold wet mixture into dry, careful not to over mix.
5. Using a standard ice cream scoop, fill each prepared muffin cup with one scoop of cornbread mixture.
5. Place in preheated oven and bake for 10-12 minutes, or until a toothpick inserted comes out mostly clean. Drying out your cornbread spells murder for it's success. Be sure that they're not overcooked!
6. Drop some honey into your butter dish, mix, slather warm muffins and prepare your tastebuds for cornbread nirvana.


The Best Corn Muffin, originally uploaded by miss.mallory.
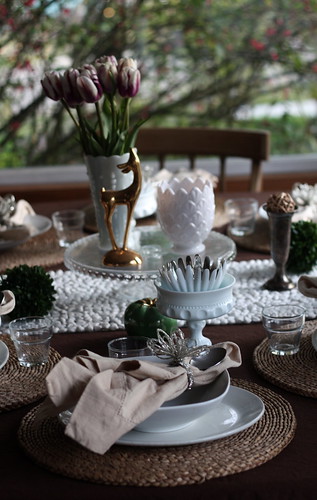
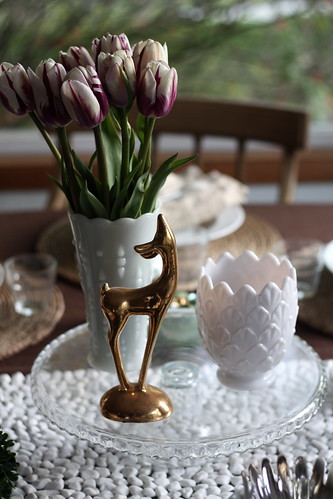
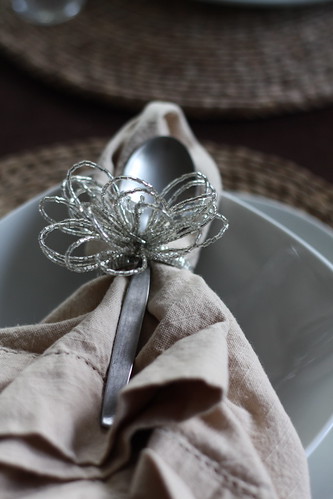
(Belated) Snapshot Sunday : Sunday Supper Table


Monday, April 05, 2010

Easy Street : Chocolate Capped Macaroons


Chocolate Capped Macaroons, originally uploaded by miss.mallory.
Macaroons are one of those things I used to make as a preteen/teenager. Why? Because they're ridiculously simple. Most recipes require you to crack a few eggs, separate the whites, pour them into a bowl with a bit of sugar, coconut, on occasion flour, mound them, then bake. Not many ingredients needed, not much time required, and in less than an hour, viola, a crispy, chewy, mountain of sugary heaven. A combination almost deadly for a young girl with the sweetest tooth this side of the Mississippi.

When I realized I was both hosting Easter dinner, and still wanting to whip up a few Easter baskets for my loved ones I knew almost immediately what needed to be the homemade treat packed into each green plastic basket, macaroons. Last year each basket was packed full of these adorable easter nests, but I didn't have the time for any muss or fuss. I knew that Easter dinner prep would keep me busy most of Saturday evening, and surely Sunday afternoon. I wanted something that both embodied the Easter holiday, and that was reminiscent of Spring. As many times as I may have made macaroons growing up, it had (honestly) been years since this little oven had seen the coconut mountains. No longer did I have my trusty, easy recipe either. I knew my pantry had everything I needed, and even a little something extra, a bit of luscious bittersweet chocolate leftover from the New York Times Chocolate Chip Cookie adventure. After a bit of food blog surfing I stumbled across one of the most revered and trusted food blogs out there, Orangette. Here it was, exactly what I needed, macaroons covered with a dollop of oozing chocolate. I was planning on drizzling, but once I stumbled upon this recipe decided against it. I wanted my Easter basket receivers to get both a serious dose of the quality chocolate along with coconut. The boys here with me that night will tell you I was none to pleased about the process this recipe puts you through. It's not hard by any means, it just wasn't what teenage me was used to (my fluctuating hormones played a major role in my frustration as well I suspect). It required me to do just a little more than crack, separate, mix, mound and bake. The end result was pretty close to macaroon heaven. Not sure if they were all that much better from the childhood recipe, the easy peasy recipe, but boy were they good, and I'm pretty sure each receiver of an Easter basket was pleasantly and deliciously delighted. I know Easter has come and gone, but these could be made for any occasion any time of the year, from summer picnics to your Christmas cookie platter. Macaroons are a classic kind of cookie, simple, but guaranteed to put a smile on the face of any sweet tooth.


Chocolate Capped Macaroons, originally uploaded by miss.mallory.
Chocolate-Covered Coconut Macaroons
Via Orangette Adapted from Bon Appétit (September 2002) and the Marigold Kitchen of Madison, Wisconsin


3 cups (lightly packed) sweetened shredded coconut
¾ cup granulated sugar
¾ cup egg whites (about 5 or 6 large)
1 ½ tsp pure vanilla extract
¼ tsp almond extract
8 ounces bittersweet or semisweet chocolate, finely chopped
3/4 cup heavy cream


Place the first three ingredients in a large, heavy saucepan, and stir to combine well. Cook over medium-low heat, stirring regularly, about 10-12 minutes, until the mixture is pasty but not dry. (The uncooked mixture will look sort of granular at first, then creamy as it heats, and then it will slowly get drier and drier. You want to stop cooking when it no longer looks creamy but is still quite gluey and sticky, not dry.) Remove from heat. Mix in vanilla and almond extracts. Spread out the coconut mixture on a large baking sheet. Refrigerate until cold, about 30 minutes.

Preheat oven to 300 degrees Fahrenheit. Line another baking sheet with parchment paper or a Silpat baking mat. Using a ¼-cup measuring scoop, scoop and pack the coconut mixture into domes, and place them on the baking sheet. You should wind up with about a dozen. Bake the macaroons until golden, about 30 minutes. Transfer to a rack and cool.

Set cookies on rack over a rimmed baking sheet. Place the chopped chocolate in a medium bowl. Heat the heavy cream in a small saucepan until it is very hot and steamy (not boiling), remove from the heat, and pour it over the chocolate. Whisk until the mixture is smooth and the chocolate is thoroughly melted. Spoon the glaze over the macaroons, covering them almost completely and allowing the chocolate to drip down the sides. [You will have leftover glaze, which can be refrigerated or frozen.] Refrigerate the macaroons until the glaze sets, at least 2 hours. Transfer the macaroons to an airtight container, and refrigerate or freeze.

Yield: 12 macaroons


Chocolate Capped Macaroons, originally uploaded by miss.mallory.
Sunday, April 04, 2010

Snapshot Sunday : Easter 2010


Easter 2010, originally uploaded by miss.mallory.
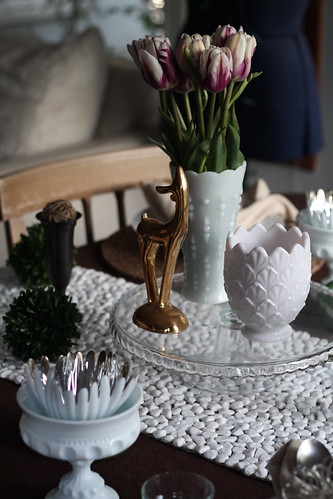


Easter 2010, originally uploaded by miss.mallory.


Easter 2010, originally uploaded by miss.mallory.


Easter 2010, originally uploaded by miss.mallory.


Easter 2010, originally uploaded by miss.mallory.
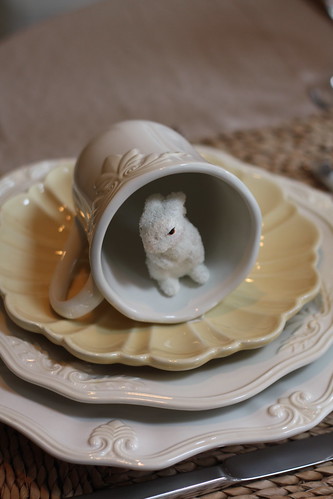


Easter 2010, originally uploaded by miss.mallory.
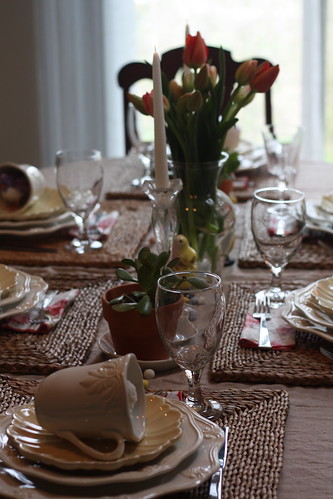


Easter 2010, originally uploaded by miss.mallory.
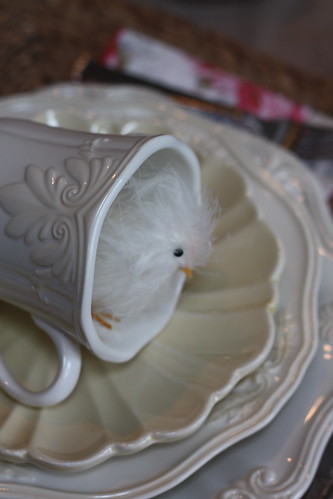


Easter 2010, originally uploaded by miss.mallory.



Easter 2010, originally uploaded by miss.mallory.
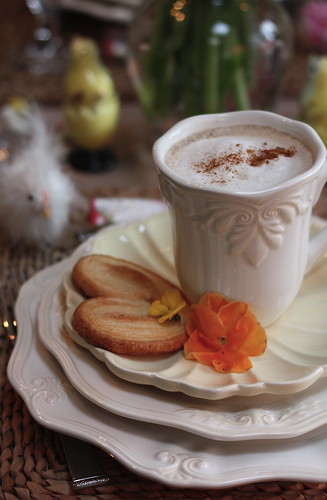


Easter 2010, originally uploaded by miss.mallory.


Easter 2010, originally uploaded by miss.mallory.
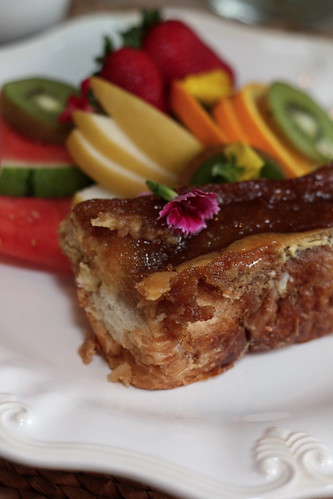


Easter 2010, originally uploaded by miss.mallory.


Easter 2010, originally uploaded by miss.mallory.