Sunday, March 28, 2010

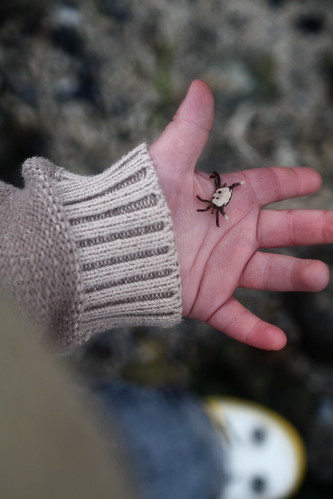
Snapshot Sunday : Charles on the Beach


Charles on the Beach, originally uploaded by miss.mallory.


Charles on the Beach, originally uploaded by miss.mallory.


Charles on the Beach, originally uploaded by miss.mallory.


Charles on the Beach, originally uploaded by miss.mallory.


Charles on the Beach, originally uploaded by miss.mallory.


Charles on the Beach, originally uploaded by miss.mallory.


Charles on the Beach, originally uploaded by miss.mallory.


Charles on the Beach, originally uploaded by miss.mallory.


Charles on the Beach, originally uploaded by miss.mallory.


Charles on the Beach, originally uploaded by miss.mallory.

Saturday, March 27, 2010

Daring Bakers : March 2010


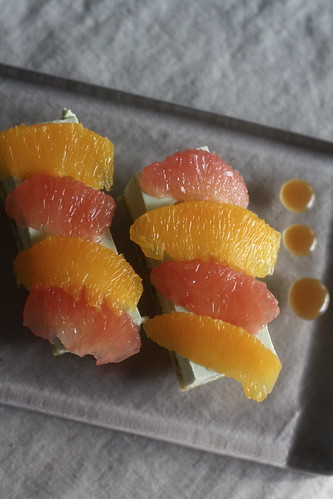
Daring Bakers : March 2010, originally uploaded by miss.mallory.


The 2010 March Daring Baker’s challenge was hosted by Jennifer of Chocolate Shavings. She chose Orange Tian as the challenge for this month, a dessert based on a recipe from Alain Ducasse’s Cooking School in Paris.

This is going to be an uber quickie post, so, don't be offended, it has nothing to do with the dessert itself, I'm just super tired and frankly, not feeling much up to writing/posting. As you read above, Jennifer chose Orange Tian for this months DB challenge. Something I have never even heard of (is that a shocker?) nevertheless attempted to make. Funny enough, this challenge was due the same day as my cooking clubs Fusion dinner with an Asian theme. I knew I didn't have the patience for two desserts (though in the end I did end up with both this and a strawberry/wonton napoleon) therefore I needed to meld this challenge with my dessert for that night. Two birds, one stone. My take on the Orange Tian; layers of jasmine and matcha filling, topped with sectioned navel oranges & texas red grapefruit on top of a pistachio pate sablee (although, I used a different pate sablee recipe than the one Jennifer provided because I wanted the pistachio flavor, I cannot attest it's a true sablee). Hope you enjoy my take on this months challenge, my version may be a bit 'out there' compared to the original, but, it was fun and tasty and I couldn't be more pleased with the way it turned out!

For the Pate Sablee:

Ingredients U.S. Imperial Metric Instructions for Ingredients
2 medium-sized egg yolks at room temperature
granulated sugar 6 tablespoons + 1 teaspoon; 2.8 oz; 80 grams
vanilla extract ½ teaspoon
Unsalted butter ¼ cup + 3 tablespoons; 3.5 oz; 100 grams ice cold, cubed
Salt 1/3 teaspoon; 2 grams
All-purpose flour 1.5 cup + 2 tablespoons; 7 oz; 200 grams
baking powder 1 teaspoon ; 4 grams

Directions:
Put the flour, baking powder, ice cold cubed butter and salt in a food processor fitted with a steel blade.

In a separate bowl, add the eggs yolks, vanilla extract and sugar and beat with a whisk until the mixture is pale. Pour the egg mixture in the food processor.

Process until the dough just comes together. If you find that the dough is still a little too crumbly to come together, add a couple drops of water and process again to form a homogenous ball of dough. Form into a disc, cover with plastic wrap and leave to rest in the fridge for 30 minutes.
Preheat your oven to 350 degree Fahrenheit.

Roll out the dough onto a lightly floured surface until you obtain a ¼ inch thick circle.

Using your cookie cutter, cut out circles of dough and place on a parchment (or silicone) lined baking sheet. Bake for 20 minutes or until the circles of dough are just golden.

For the Marmalade:

Ingredients U.S. Imperial Metric Instructions for Ingredients
Freshly pressed orange juice ¼ cup + 3 tablespoons; 3.5 oz; 100 grams
1 large orange used to make orange slices
cold water to cook the orange slices
pectin 5 grams
granulated sugar: use the same weight as the weight of orange slices once they are cooked

Finely slice the orange. Place the orange slices in a medium-sized pot filled with cold water. Simmer for about 10 minutes, discard the water, re-fill with cold water and blanch the oranges for another 10 minutes.

Blanch the orange slices 3 times. This process removes the bitterness from the orange peel, so it is essential to use a new batch of cold water every time when you blanch the slices.

Once blanched 3 times, drain the slices and let them cool.

Once they are cool enough to handle, finely mince them (using a knife or a food processor).

Weigh the slices and use the same amount of granulated sugar . If you don’t have a scale, you can place the slices in a cup measurer and use the same amount of sugar.

In a pot over medium heat, add the minced orange slices, the sugar you just weighed, the orange juice and the pectin. Cook until the mixture reaches a jam consistency (10-15 minutes).

Transfer to a bowl, cover with plastic wrap and put in the fridge.

For the Orange Segments:

For this step you will need 8 oranges.

Cut the oranges into segments over a shallow bowl and make sure to keep the juice. Add the segments to the bowl with the juice.

[See YouTube video in the References section below for additional information on segmenting oranges.]

For the Caramel:

Ingredients U.S. Metric Imperial Instructions for Ingredients
granulated sugar 1 cup; 7 oz; 200 grams
orange juice 1.5 cups + 2 tablespoons; 14 oz; 400 grams

Place the sugar in a pan on medium heat and begin heating it.

Once the sugar starts to bubble and foam, slowly add the orange juice. As soon as the mixture starts boiling, remove from the heat and pour half of the mixture over the orange segments.

Reserve the other half of the caramel mixture in a small bowl — you will use this later to spoon over the finished dessert. When the dessert is assembled and setting in the freezer, heat the kept caramel sauce in a small saucepan over low heat until it thickens and just coats the back of a spoon (about 10 minutes). You can then spoon it over the orange tians.

[Tip: Be very careful when making the caramel — if you have never made caramel before, I would suggest making this step while you don’t have to worry about anything else. Bubbling sugar is extremely, extremely hot, so make sure you have a bowl of ice cold water in the kitchen in case anyone gets burnt!]

For the Whipped Cream:

Ingredients U.S. Metric Imperial Instructions for Ingredients
heavy whipping cream 1 cup; 7 oz; 200 grams
3 tablespoons of hot water
1 tsp Gelatine
1 tablespoon of confectioner's sugar
orange marmalade (see recipe above) 1 tablespoon

In a small bowl, add the gelatine and hot water, stirring well until the gelatine dissolves. Let the gelatine cool to room temperature while you make the whipped cream. Combine the cream in a chilled mixing bowl. Whip the cream using a hand mixer on low speed until the cream starts to thicken for about one minute. Add the confectioner sugar. Increase the speed to medium-high. Whip the cream until the beaters leave visible (but not lasting) trails in the cream, then add the cooled gelatine slowly while beating continuously. Continue whipping until the cream is light and fluffy and forms soft peaks. Transfer the whipped cream to a bowl and fold in the orange marmalade.
[Tip: Use an ice cold bowl to make the whipped cream in. You can do this by putting your mixing bowl, cream and beater in the fridge for 20 minutes prior to whipping the cream.]

Assembling the Dessert:

Make sure you have some room in your freezer. Ideally, you should be able to fit a small baking sheet or tray of desserts to set in the freezer.

Line a small tray or baking sheet with parchment paper or a silicone sheet. Lay out 6 cookie cutters onto the parchment paper/silicone.

Drain the orange segments on a kitchen towel.

Have the marmalade, whipped cream and baked circles of dough ready to use.

Arrange the orange segments at the bottom of each cookie cutter. Make sure the segments all touch either and that there are no gaps. Make sure they fit snuggly and look pretty as they will end up being the top of the dessert. Arrange them as you would sliced apples when making an apple tart.

Once you have neatly arranged one layer of orange segments at the bottom of each cookie cutter, add a couple spoonfuls of whipped cream and gently spread it so that it fills the cookie cutter in an even layer. Leave about 1/4 inch at the top so there is room for dough circle.

Using a butter knife or small spoon, spread a small even layer of orange marmalade on each circle of dough.

Carefully place a circle of dough over each ring (the side of dough covered in marmalade should be the side touching the whipping cream). Gently press on the circle of dough to make sure the dessert is compact.

Place the desserts to set in the freezer to set for 10 minutes.

Using a small knife, gently go around the edges of the cookie cutter to make sure the dessert will be easy to unmold. Gently place your serving plate on top of a dessert (on top of the circle of dough) and turn the plate over. Gently remove the cookie cutter, add a spoonful of caramel sauce and serve immediately.


Daring Bakers : March 2010, originally uploaded by miss.mallory.

Wednesday, March 24, 2010

Getting Fresh : The Simplest Asparagus

As I aptly covered in my last post, Spring is officially here. Many aspects of this fact render me giddy. Picnics. Outdoor markets. Fresh produce. Sunshine. Longer days. Warm weather (not too warm mind you). The sweet smell that hangs in the air. Rhubarb. Asparagus. Sorry, those last couple were simply fresh Spring produce. So, basically, repeats. But, two things I cannot wait to get my hands on and cook up come Spring.

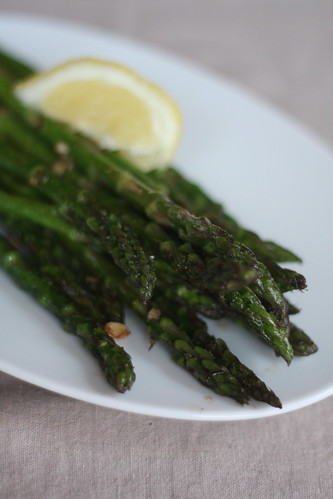
Sunday night I baked Julia Childs cheese souffle for dinner. Naturally, I needed a good green veggie side. While perusing the produce section at the grocery store, there it was, the first beautiful bundle of long, stalky asparagus, it's pointy little heads staring up at me. Finally! For me, asparagus is one of those things that needs to remain simple, enhanced only by a few ingredients, and a method of cooking. So, I give you a short post, and a simple recipe. Grilled asparagus. Salty, tangy, and a bit buttery. It's easy, quick, and delicious. Sorry Julia, but, the asparagus might have been even better than those perfectly golden souffles. Ok, maybe not. Maybe I'm just overly excited about asparagus. It's really that good though. Really.

Butter Lemon Asparagus

Ingredients:

1 pound asparagus
1 Tablespoon Olive Oil
2 Tablespoons Butter
2 cloves garlic minced
Half a lemon
Generous pinch of sea salt
Sprinkle of Pepper

Directions:

1. Heat olive oil and butter in a grill pan on medium high heat on the stove top.
2. Arrange asparagus evenly in grill pan. Cook for 2-3 minutes, then flip.
3. Once you've made the flip, sprinkle with garlic (I throw it in the pan at this point so it doesn't burn, I find if I put in when I put the asparagus in the garlic burns). Grill an additional 3 minutes. When finished the asparagus should have caramelized grill marks on either side.
4. Squeeze with lemon juice, generously season with sea salt and pepper. Remove from pan. Serve hot.

Sometimes it doesn't get much better than something so simple.


Saturday, March 20, 2010

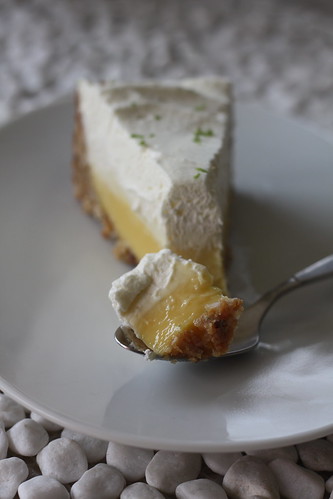
The First Day of Spring & Layers of Key Lime Pie


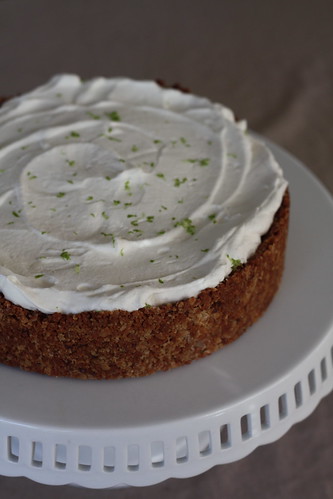
Key Lime Pie, originally uploaded by miss.mallory.
I doubt I can express how utterly, deliriously happy I am Spring is finally here and that Winter is officially over. Last Sunday we got an extra hour of daylight, a telltale sign the first official day of Spring is just right around the corner. As happy as I am about this season switch I have this terrible sinking feeling that after spring has come and gone summer will charge in like a raging bull, far hotter and more torturous than last year. You see, since mid January we've had suspiciously mild weather here in Bellingham, not the onslaught of gray, cold, dark, heavily rainy days we usually experience for months on end. It's been nice. What's more, it likely means our spring will be a bit warmer, sweeter, and bluer. While I can't complain about an extra lovely Spring, I have a feeling come July, I may be singing a different tune. I'm afraid it goes something like this; mild winter, sweeter spring, boiling summer. I'm going to forget about what may be on the horizon season wise, and enjoy the one (that has just arrived) at hand. Spring & Autumn are battling at the top of my favorite season list.


Key Lime Pie, originally uploaded by miss.mallory.
There couldn't be a better dessert than 'Layered Key Lime Pie' to share with you on this, the first day of Spring. A dessert has not been baked and eaten so quickly in this house in a very long time. It's divine. Yes, I just typed that. D-i-v-i-n-e. Tart. Creamy. Thick. Light. Crunchy. In other words, incredible. This is a Bon Appetit recipe I stumbled upon a while back when I finally got rid of many of the magazines piling up in my pantry, and by got rid of I mean read through and tore out every recipe I may want to make, and tossing the much thinner magazine carcass in the recycling bin. I should say this was a recipe featured in Bon Appetit years ago as I've made quite a few changes, restructuring one of the layers entirely. I'm going to give you my version, because I can't testify to the deliciousness of the original, but I can to this. This Layered Key Lime Pie would end any spring fling, dinner, party, or day sweetly. I promise you, it will also garner rave reviews from all who eat it. The crust is perfect. I'm so in love I think my next cheesecake will have to be wearing this crust like a coat. The addition of blended granola (I used a flax granola, yum!) and coconut to the plain old graham cracker dust of years past crusts makes all the difference. It comes out golden, crunchy, sweet, and a bit chewy. If I had to make one suggestion to future creators of this pie, it would be to add a bit more lime juice to both layers. Some thought the tartness in this pie was perfect, others would've preferred a bit more, I would say after it sat in the fridge overnight and the flavors intensified it was just about perfect. But, a bit more key lime juice never hurt anyone and surely will not hurt this pie. So I say, welcome spring, please stay a while (a long while) I've been waiting for you and I very much look forward to mild warm days, open toed shoes, and working in the garden. Oh, and if you get a chance, please tell your sister season Summer not to be out of control hot in a few months, I'd love to sing her praises too. Thank you!


Recipe: Layered Key Lime Pie

Ingredients:

For the Crust: (I roughly doubled the crust to get extra high sides on my pie)

3/4 cup granola without any fruit, or nuts (I used a very crunchy kind with bits of flax seed mixed in, I like the flavor)
3/4 plain graham crackers
1/4 shredded sweetened coconut
1/3 cup melted salted butter
4 Tablespoons of sugar

For the Custard Layer:

1 14 oz. can of sweetened condensed milk
1/2 cup of freshly squeezed key lime juice
3 egg yolks
3 Tablespoons of sugar
zest from one key lime

For the Chilled Layer:

1 8 oz. package of cream cheese, room temperature
1/4 extra thick whole fat sour cream (I used Amy's)
4 Tablespoons heavy cream
1/4 cup lime juice
5-6 Tablespoons of sugar
1 teaspoon vanilla

Directions:

Crust: Preheat oven to 350 F. In the bowl of a food processor (or, I used the mini food processor that came with my hand blender) pulse granola until roughly ground up (you don't want dust, but not giant chunks either). Pour granola into medium sized bowl. Now, pulse graham crackers in food processor as well, until coarsely blended. (If you do not have a food processor a large plastic bag and a few good whacks with a rolling pin or other heavy object will do the job just fine). Transfer to bowl with granola. Add the coconut, butter and the sugar then mix well. Press into 9 inch springform baking pan (like a cheesecake pan, which is what I used). Bake for 8 minutes, the crust will just begin to turn a shade of golden. Remove from oven and allow to cool.

Custard Layer: While the crust is cooling, juice your limes and make your custard. Super easy. Pour your lime juice, sweetened condensed milk, sugar, egg yolks, and zest into a bowl. Whisk until well incorporated, pour evenly over crust and bake for an additional 15 minutes, until custard has set. If need be, cover the top edges of your crust with tin foil. Remove from oven and allow to come to room temperature completely.

Chilled Layer: In the bowl on an electric mixer, or using handheld beaters, combine the cream cheese, sour cream, sugar, and vanilla (leaving out the heavy cream), and mix until smooth and completely incorporated. While on medium speed, slowly pour in heavy cream. Once pie has come to room temp. spread chilled layer evenly over the custard layer. Cover and chill at least three hours.

To Serve: Whip up some of your leftover heavy cream with a bit of honey and spread on top of the whole shabang. I also garnished this with a light dusting of key lime zest. Cut into large pieces, and enjoy (trust me, you will!)


Key Lime Pie, originally uploaded by miss.mallory.

Sunday, March 14, 2010

Snapshot Sunday : San Juan Island


Lighthouse Fence., originally uploaded by miss.mallory.


IMG_4719, originally uploaded by miss.mallory.


Sit., originally uploaded by miss.mallory.


Gate to the Mancave., originally uploaded by miss.mallory.


Ranger Mailbox., originally uploaded by miss.mallory.


Crown., originally uploaded by miss.mallory.


Homestead., originally uploaded by miss.mallory.


Winding Path., originally uploaded by miss.mallory.


IMG_4787, originally uploaded by miss.mallory.


IMG_4773, originally uploaded by miss.mallory.


Beach Hut One., originally uploaded by miss.mallory.


Side of Hut Three., originally uploaded by miss.mallory.


IMG_4821, originally uploaded by miss.mallory.


Inside Hut Three., originally uploaded by miss.mallory.


IMG_4876, originally uploaded by miss.mallory.


IMG_4883, originally uploaded by miss.mallory.


IMG_4928, originally uploaded by miss.mallory.


IMG_4911, originally uploaded by miss.mallory.


, originally uploaded by miss.mallory.


Lime Kiln., originally uploaded by miss.mallory.


Another Hungry Tree., originally uploaded by miss.mallory.


The Right of a Rainbow, originally uploaded by miss.mallory.

Friday, March 12, 2010

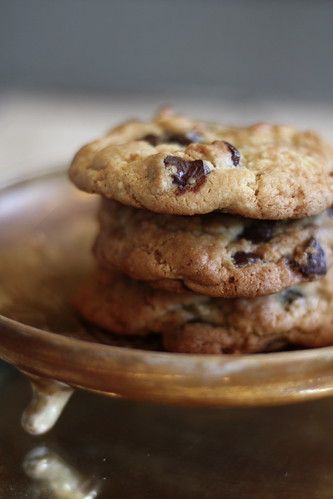
Legendary : The New York Times Chocolate Chip Cookie

I probably don't need to tell most of you about the New York Times Chocolate Chip Cookie. It's been floating around the internet, and the food blog-o-sphere since it's publication in the summer of 2008. For me, it doesn't really get much better than a really good (warm) chocolate chip cookie and a gold glass of milk. My love for these babies border on, actually on second thought probably is, an obsession. Don't set a plate of these fresh out of the oven in front me, I lose nearly all willpower. When it comes to dessert it doesn't get much better than this simple American staple.

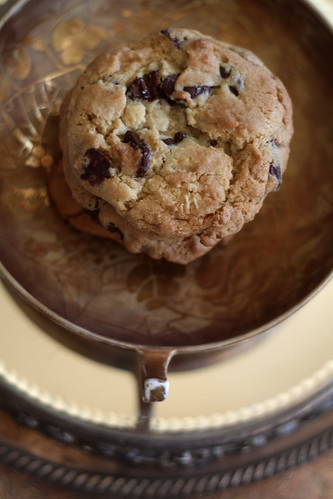
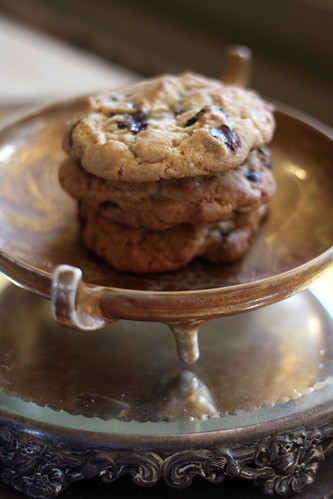
This recipe might test your patience, and your self control. You see, they're not a bake immediately recipe. Apparently, the original chocolate chip cookie recipe, created by a woman named Mrs. Ruth Wakefield, an owner of the Toll House Inn, were refrigerated overnight. The NYT recipe takes this a bit further, suggesting to refrigerate for at least 36 hours. I learned something about myself during this process. As previously mentioned, I don't have chocolate chip cookie self control. After about an hour in the fridge (and after a few half spoonfuls of cookie dough) I had to make a cookie. Just one. Afterall, in search of the perfect chocolate chip cookie the author also tested his batter in intervals, immediate, 24, then finally 36 hours. 36 hours is the clear winner. Something about the dry ingredients slowly soaking up the egg, the butter, and the vanilla. It makes a cookie so caramel colored it may even cause you a bit of concern at first. I thought I was, for sure, close to burning tray after tray. I wasn't. They're just a gorgeous deep shade of cookie amber. The key is to cook them until they are just about done, not completely cooked (the middles will still look a bit gooey), then, let them cool for up to 10 minutes on the sheet. They will finish cooking, and once you peel them from their hot metal (or stone) bed, they'll be just about perfect. My dough, oddly enough, remained in the fridge for days. I took the advice of one of the bakers in the article, if you eat a cookie, you generally want a warm or freshly baked cookie, right? Not a day old. So, everyday (after 36 hours mind you) a tray was baked, each one quickly devoured by friends, family, the boyfriend and the roommate. Now, I used both bread and cake flour. Next time I may be inclined to use AP. Because of the cake (and likely bread flour) these had a bit of a thick 'cakey-ness' to them that I wasn't too fond of. Not enough for me to turn them away, by any means. But, based on some of the hype (not all, there are various opinions out there), I was expecting angels to sing out from the heavens when I ate these. They were not the holy grail of the chocolate chip cookie I was hoping for. Probably one of my favorite recipes so far, I'm just curious what difference AP flour (and perhaps, dare I say it, some shortening) might make. One thing is certain, the salt sprinkles are irreplaceable. Sea salt is this cookies bff. Don't be afraid of it.


Infamous NYT Chocolate Chip Cookie, originally uploaded by miss.mallory.

All in all, if you are as much of a chocolate chip cookie fanatic as I am, and you haven't yet, I encourage you to give this famous little recipe a try. I know the recipe has been shared by many a blogger, and is floating all over the internet, but, I'm still a bit wary and unsure of posting the recipe in it's original form here. I didn't tweak it one bit, as many others did. So, I'm going to send you directly to it. Also, if you give it a shot, or already have, I would love to know what you think, and what alterations, if any, worked for you.