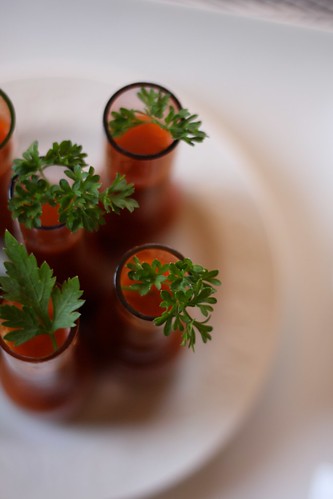
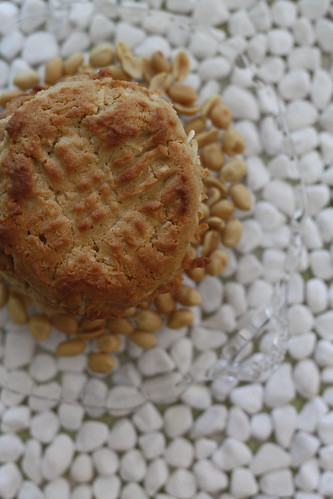
Thursday, May 27, 2010

Daring Failure : Daring Bakers May 2010


The May 2010 Daring Bakers’ challenge was hosted by Cat of Little Miss Cupcake. Cat challenged everyone to make a piece montée, or croquembouche, based on recipes from Peter Kump’s Baking School in Manhattan and Nick Malgieri.

Oh boy, did I screw this one up! Everything that could possibly go wrong, went wrong. Guess that's what happens (or perhaps is more likely to happen) when you put things off to the last minute? There really isn't a whole lot to say, beyond the fact that this failure stings a bit more than it normally would because I used to be the champion choux baker back in high school. Weird statement I know, but it's true. One day my best girlfriend growing up, Katie, and I stumbled upon a choux/cream puff recipe, it was so easy to make that we often whipped up a batch and filled each puff with sweetened whip cream ( knowing us it was likely whipped cream from a can), our very own version of the cream puff. A simple way to get a sugar fix if we weren't in the mood to bake a batch of cookies.

So, what happened today? The choux didn't puff enough, and before it had an opportunity to dry out enough in the oven, it got to dark and had to be pulled out. The cream filling curdled, despite my babying it over the lowest flame possible. The caramel was soft. Stick a fork in me, I'm done. Sometimes we just have to accept defeat and move on. I hate even posting it here on my little blog. I think it's quite possibly one of the most hideous creations I've ever whipped together, but, I'm a daring baker, meaning I'm daring enough to share my failure. May it soon be forgotten. . .

(I still encourage you to try this recipe, it's not fairly complicated, but quite impressive, when you get it right that is! Go check out some of my fellow DBs, they'll show you how it's really done!)

You will need approximately 10 minutes to prepare the puff pastry, 10 minutes to pipe and about 30 minutes to bake each batch. The crème patissiere should take about 10 minutes to cook and then will need to be cooled for at least 6 hours or overnight. The glazes take about 10 minutes to prepare.

Equipment required:

• several baking sheets
• parchment paper
• a whisk
• a pastry brush (for the egg wash)
• a pastry bag and tip (a plain tip or no tip is best for piping the puff pastry; you can use a plain or star tip to fill the puff pastry with the cream)
• a flat surface such as a baking sheet or cake board/stand on which to assemble your piece montée
• some of the items you may want to use to decorate your piece montée include ribbons, Jordan almonds, fresh flowers, sugar cookie cut-outs, chocolates, etc.
Pate a Choux (Yield: About 28)
¾ cup (175 ml.) water
6 Tbsp. (85 g.) unsalted butter
¼ Tsp. salt
1 Tbsp. sugar
1 cup (125 g.) all-purpose flour
4 large eggs
For Egg Wash: 1 egg and pinch of salt
Directions:
Pre-heat oven to 425◦F/220◦C degrees. Line two baking sheets with parchment paper.
Preparing batter:
Combine water, butter, salt and sugar in a saucepan over medium heat. Bring to a boil and stir occasionally. At boil, remove from heat and sift in the flour, stirring to combine completely.
Return to heat and cook, stirring constantly until the batter dries slightly and begins to pull away from the sides of the pan.
Transfer to a bowl and stir with a wooden spoon 1 minute to cool slightly.
Add 1 egg. The batter will appear loose and shiny.
As you stir, the batter will become dry-looking like lightly buttered mashed potatoes.

t this point that you will add in the next egg. Repeat until you have incorporated all the eggs.
Piping:
Transfer batter to a pastry bag fitted with a large open tip (I piped directly from the bag opening without a tip). Pipe choux about 1 inch-part in the baking sheets. Choux should be about 1 inch high about 1 inch wide.
Using a clean finger dipped in hot water, gently press down on any tips that have formed on the top of choux when piping. You want them to retain their ball shape, but be smoothly curved on top.
Brush tops with egg wash (1 egg lightly beaten with pinch of salt).
Baking:
Bake the choux at 425◦F/220◦C degrees until well-puffed and turning lightly golden in color, about 10 minutes.
Lower the temperature to 350◦F/180◦C degrees and continue baking until well-colored and dry, about 20 minutes more. Remove to a rack and cool.

For the Vanilla Crème Patissiere (Half Batch)
1 cup (225 ml.) whole milk
2 Tbsp. cornstarch
6 Tbsp. (100 g.) sugar
1 large egg
2 large egg yolks
2 Tbsp. (30 g.) unsalted butter
1 Tsp. Vanilla
Directions:
Dissolve cornstarch in ¼ cup of milk. Combine the remaining milk with the sugar in a saucepan; bring to boil; remove from heat.
Beat the whole egg, then the yolks into the cornstarch mixture. Pour 1/3 of boiling milk into the egg mixture, whisking constantly so that the eggs do not begin to cook.
Return the remaining milk to boil. Pour in the hot egg mixture in a stream, continuing whisking.
Continue whisking (this is important – you do not want the eggs to solidify/cook) until the cream thickens and comes to a boil. Remove from heat and beat in the butter and vanilla.
Hard Caramel Glaze:
1 cup (225 g.) sugar
½ teaspoon lemon juice
Combine sugar and lemon juice in a saucepan with a metal kitchen spoon stirring until the sugar resembles wet sand. Place on medium heat; heat without stirring until sugar starts to melt around the sides of the pan and the center begins to smoke. Begin to stir sugar. Continue heating, stirring occasionally until the sugar is a clear, amber color. Remove from heat immediately; place bottom of pan in ice water to stop the cooking. Use immediately.
Assembly of your Piece Montée:
You may want to lay out your unfilled, unglazed choux in a practice design to get a feel for how to assemble the final dessert. For example, if making a conical shape, trace a circle (no bigger than 8 inches) on a piece of parchment to use as a pattern. Then take some of the larger choux and assemble them in the circle for the bottom layer. Practice seeing which pieces fit together best.
Once you are ready to assemble your piece montée, dip the top of each choux in your glaze (careful it may be still hot!), and start assembling on your cake board/plate/sheet. Continue dipping and adding choux in levels using the glaze to hold them together as you build up. (You may want to use toothpicks to hold them in place – see video #4 below).
When you have finished the design of your piece montée, you may drizzle with remaining glaze or use ribbons, sugar cookie cut-outs, almonds, flowers, etc. to decorate. Have fun and enjoy! Bon appétit!


Friday, May 21, 2010

Something So Simple : Sgroppino


IMG_8143, originally uploaded by miss.mallory.
It's Friday! Because we've come to the end of our week I'm going to keep this post incredibly short and simple. You probably want to sip on a glass of something delightful, maybe nosh on a few nibbly bits, kick up your feet, and look forward to the weekend ahead. You probably don't want to sit here reading paragraph after paragraph, so I'll get to it.

What you do want (trust me on this) is to make this cocktail, now!
'Sgroppino' was made for our cooking club last weekend by the ever lovely Rachelle over at Use the Good China (who, as a side note might I add has returned to food blogging, hooray!). To be completely honest I've made it twice since my first taste last Saturday. No I'm not a lush. I promise. We've had friends/family over for dinners twice this week, for which I wanted to serve a cocktail, and this simple spirit has me smitten, clearly. I have a weakness for just about anything champagne, cocktails, cupcakes you name it! On top of the champagne you add a hefty cup of vodka and 1/2 pint of slightly sweet, tart lemon sorbet. Mix all the ingredients in a gorgeous glass pitcher and that's it, viola! Simple, quick, and assured to be a crowd pleaser (or a Friday night delight). Garnish with whatever your heart desires; raspberries, citrus, edible flowers, you get the idea. This simple concoction can be modified to suit whatever your tastebuds desire with the switch of sorbet flavors. You could use just about any kind of sorbet you'd like, perhaps a homemade rhubarb, or a good store bought raspberry? The possibilities are only limited by your imagination (or the sorbet available in your grocers freezer)! This cocktail does come with a warning though: DO NOT attempt to share this with any less than four or you'll be sorry the next morning, one or two martinis pack quite the punch!

Happy Friday all, I wish you a relaxing weekend filled with lots of sunshine, relaxation, food and fun!

Sgroppino

Ingredients:

1 cup vodka - ice cold
1 bottle of champagne - super chilled
1/2 pint sorbet of your choice (lemon traditionally)

Directions:

1. In a large pitcher combine vodka and sorbet. Whisk until both are incorporated and mixture is a bit frothified.
2. Slowly pour your champagne into the mixture, stir gently to combine.
3. Serve in chilled champagne or martini glasses with the garnish of your choice.

Chin Chin!


IMG_8150, originally uploaded by miss.mallory.

Wednesday, May 19, 2010

The Trappings of a Perfect Evening : Sweet Pea 'Pesto' Pasta


IMG_8284, originally uploaded by miss.mallory.
Seeing old friends is something incredibly comforting for me. Like your favorite set of sheets. As soon as you slip in, you breath an immediate sigh of relief and relax. Being able to lounge about your candlelight kitchen with a dear friend (whom you don't get to see but a handful of times a year) hour after hour, drinking champagne cocktails, eating good food and listening ambient music* is a rare occurrence these days. Last night I had the pleasure to spend my entire night, from sundown to the wee hours, doing just that.


IMG_8292, originally uploaded by miss.mallory.
Bean (a nickname I gave her I can't even remember when, Elementary school? High school? I'm unsure still but nonetheless many years ago) is quite possibly the dearest of them all. Perhaps it's the fact that we always have plenty of catching up to do, lots to discuss. Or maybe it's the fact that she whole heartedly adores my little house and my little life. She's one of those people who is constantly complimentary, in a sincere way. She never fails to make me realize just how good I really have it, and that my efforts to create a slice of lovely in this world hasn't gone unnoticed. She swoons. That's the best way to put it. Always over one thing or another, but she positively swoons. It never fails to put a smile on my face and warm my heart. I think each of us needs someone (if not more than one) in our lives like Bean.


IMG_8304, originally uploaded by miss.mallory.
The night Bean came over I had decided it was time for me to experiment a little for dinner. Nothing wild mind you, just something I'd never tried (or seen a recipe for). Last Saturday for 'Around the Table's' Appetizer dinner I whipped together a batch of sweet pea crostini. Something I'd seen here and there before, something I was curious about, and something that was simple (a far cry from my original plan of homemade flatbread pizzas). While the crostini were only so-so (not the star of the evening that's for certain), as I munched away on them I thought to myself, 'hey, tossed with a pot of freshly boiled pasta, this pea puree could make one simple but delightful meal'. And it did. It was pretty much everything I hoped for. Incredibly springy and fresh. Quick, simple, inexpensive, and downright easy. A simple puree (or pesto as I've dubbed it) of ricotta, lightly boiled peas, basil, and garlic, tossed with a pound of hot penne. Paired with fried pancetta sprinkles, frizzled (caramelized in pancetta fat) shallots, and plenty of shaved Romano, this bowl of pasta was a little slice of heaven on a blustery May day. Serve alongside a pitcher of Sgroppino and you've got the trappings of a good night on your hands. Of course, don't forget to light up a surplus of tealights, turn on the radio, and open the kitchen windows wide so as to catch the sweet spring breeze (and listen to the bamboo and birch tree leaves ruffle against it). In my world it doesn't get much better than that, lovely surroundings, good food, dazzlings drinks, and most importantly hours on end spent with a fabulous friend.


IMG_8289, originally uploaded by miss.mallory.

Sweet Pea Pesto Pasta

Ingredients:

2 cups frozen sweet petite peas, boiled just until warmed through
1 1/4 cup ricotta (whole milk or skim, whatever you prefer)
2 cloves of fresh garlic (or 3-4 roasted garlic, both are delish)
4 large basil leaves
4 Tablespoons parmesan/ramano/pecorino
Sea Salt and Pepper to taste
1 lb. penne/rigatoni etc. boiled

Garnish:
4 discs of pancetta fried (reserve fat in pan to sautee shallots)
1 large shallot thinly sliced, sauteed until soft in pan with pancetta fat
Freshly shaved parmesan/ramano/pecornio
S&P

Directions:

1. Place peas, ricotta, garlic, basil, and cheese of choice in the bowl of a food processor (I used my hand blender/smartstick 'chopper' attachement because it's less cumbersome) and puree until thoroughly mixed/blended.
2. Toss your pea pesto in the pot with your drained, hot, boiled pasta of choice. Season with salt and pepper. Plate, and sprinkle with your garnishes; pancetta, cheese, frizzled shallots, and perhaps a few leaves of fresh basil.
3. Sit & savor!


IMG_8299, originally uploaded by miss.mallory.


* Discovered that I love Mirah radio on Pandora (an amazing mix of Cat Power, Mirah, Feist, The Be Good Tanyas etc.). It was the perfect late night blend. Check it out!

Monday, May 17, 2010

A Day in the Life : Frystekake


Frystekake, originally uploaded by miss.mallory.
I've dubbed this post 'a day in the life' simply because this series of photos vary drastically from one to the next. A couple were taken during the day as I baked this traditional Norwegian cake up, rolling out lattice, whipping up filling, and plastering dough to the inside of my tart pan. Others were taken as the sun started to set (and as my guests readied their already full bellies for a tasty treat). Generally, as most food bloggers do, I like my photos to have a cohesive look. But I like how most of these photos show the process of Frystekake from delicious beginning to end.


Frystekake, originally uploaded by miss.mallory.
First, let me say happy Syttende Mai! Or, 17th of May. While this may be just any day for the masses, it was a big deal growing up in my (and particularly my grandmothers) household. It's Norway's day of independence from Sweden. Every year as a child my grandmother would spend the days leading up to this holiday baking her heart out. A dear friend of hers owned the Norwegian gift shop in Ballard, Washington (Seattle) an area that celebrates the 17th of May each year with a giant parade and large crowds of people. They would meander around Ballard, noshing on the Norwegian delecacies offered at the gift shop made my grandmother, or on a variety of other Norwegian treats sold by vendors on the street (one of my favorite being brats smothered with onions and norwegian mustard stuffed into a large square of potato lefse, popular on commuter trains in Norway). It was such a special day for her, and remains so for me. In honor of both, we whipped up a meal she would've been proud of today. Large steaks of halibut lightly dusted with salt, pepper, and flour, fried in copious amounts of salted brown butter. A pot full of skin-on creamy mashed potatoes. Freshly steamed sweet petite green peas. And of course, a bowl full of caramelized onion. Heaven.


Fyrstekake, originally uploaded by miss.mallory.
My grandmother was known for her baked goods. Particularly her Norwegian treats. There was a reason she was asked to bake up a large variety year after year. So understandably, it was hard for me to choose which to make. Frystekake is something I've missed over the years. Sweet, crumbly, a bit dry, but filled with the softest, chewiest, downright tastiest almond goo you could imagine (with a bit of cinnamon and cardamom thrown in for good measure, of course!) A perfect mate to a large black cup of coffee. In fact, thinking on it now as I sit here and write, I'd dub it the Norwegians take on coffee cake. It's not that complicated to pull together either. I think it would make a great Sunday morning treat. Something to savor while you enjoy the paper and your caffeine in the morning. All I know is for a split second as I took my first bite, it was almost as if I was in my grandmothers little yellow house, sun filled kitchen, waiting anxiously to leave the house while she packed up goodie after goodie.


Fyrstekake, originally uploaded by miss.mallory.
Frystekake

Ingredients:

1 1/2 cups flour
1/2 cup sugar
1 tsp baking powder
10 Tablespoons of butter, cold, cut into pieces
1 egg
1 cup of almonds
1 cup powdered sugar
2 egg whites
1/4 teaspoon almond extract
healthy pinch of cinnamon
healthy pinch of cardamom


Directions:
Preheat oven to 375 F

1. Sift dry ingredients, flour, baking powder, and granulated sugar into the bowl of a food processor. Add butter and blend until the it 'peas', ie, turns into pea sized granules. This will take a matter of seconds.
3. With the food processor running, add your egg. Wait a minute or so until it all comes together into a ball of dough. Remove from the processor, wrap with plastic wrap and place in the fridge to chill. Move onto filling as the dough chills.
4. Wipe down your processor, or wash completely, it's up to you.
5. Place almonds and powdered sugar into the processor bowl fitted with the blade. Pulse until the almonds are chopped finely.
6. Add egg whites, cinnamon, and cardamom, mix well.
7. Remove dough from fridge. Eyeing it, remove about a quarter of the dough from the ball placing it back in the refrigerator. Roll out the 3/4 that remains and press into a 9inch springform (or in my case a tart pan, something with a drop bottom).
8. Fill the shell with the almond filling.
9. Remove the small ball of dough from the fridge. Now you can roll it out and cut about 8 - 1/2 inch wide, 8 inch long strips. I however rolled 8 long 'snakes' (think play dough). Press each one onto the top, lattice style, crimping the edges.
10. Bake in the oven until golden brown, between 22-25 minutes.
11. Serve warm, or room temperature. My grandmother never did, but we had a scoop of delicious vanilla bean ice cream on top dressed with a sprinkle of cinnamon.

Nyt!


Fyrstekake, originally uploaded by miss.mallory.

Sunday, May 16, 2010

Snapshot Sunday : Around the Table


IMG_7528, originally uploaded by miss.mallory.


IMG_7573, originally uploaded by miss.mallory.


IMG_7639, originally uploaded by miss.mallory.


IMG_7631, originally uploaded by miss.mallory.


IMG_7536, originally uploaded by miss.mallory.

Sunday, May 09, 2010

Yo' Mama : Peanut Butter Coconut Cookies

I can't believe I just titled this post 'yo mama'. I absolutely loathed when that phrase caught on like some sort of wild fire in high school. All of a sudden classmates were using it at the end of nearly every sentence or as the answer to every question. I just didn't get it. It was purely annoying to my ears. But, this post has nothing to do with that. I chose to use the phrase I loathed so completely only a few years ago to illustrate a point: These peanut butter cookies are not 'yo mama's' pb cookies. The addition of coconut adds a little something different, dare I say exotic (do I have the authority to dub coconut 'exotic'?) They're also not exactly what I had in mind when I began this kitchen endeavor.


mise en place, originally uploaded by miss.mallory.
Peanut butter cookies always seem to come out of the oven in two ways. Option one, they're thick and a bit dry, but crispy like a shortbread. Option two, completely cakey. These cookies are option two, cakey. What I was after was the chocolate chip cookie version of a peanut butter cookie. Crispy shell, gooey chewy innards. For this recipe I completely winged it. I just couldn't find a recipe that had all the qualities I was looking for. Plus, I knew I wanted to add coconut, and if I thought finding the right peanut butter cookie recipe was a challenge, try finding one with coconut. Nearly impossible. Is the combination that odd? I understand that adding ingredients to cookie dough isn't rocket science. If I didn't understand it before, the compost cookie taught me that all you really need is a good dough base. From there you can let your imagination and baking cupboard go wild. For some reason, peanut butter + coconut sounded like a heavenly combination to my taste buds. The dough I used is almost identical to a chocolate chip cookie, except for the peanut butter and coconut. Regardless of my efforts the end result was cake-city. Don't get me wrong, they're pretty darn delicious. Strong peanut butter flavor, a little twang of salt, plenty of sweet, and the chewy coconut lends a lovely texture to the whole shebang. The edges are crispy, and hold up well when dipped into cold milk, while the core of the cookie remain soft. That's really nothing to complain about. But, despite it's strengths it was not the perfection I sought out to create that afternoon. Cookies can be quite deceptive. For as simple as they may seem, finding sheer perfection is quite a process, if not impossible (much like the hunt for the perfect swimsuit-ha!). When it comes right down to it though, who in their right mind would complain about or turn down a delightfully delicious homemade cookie? Not this girl, that's for sure.

Peanut Butter Coconut Cookies

Ingredients:
2 3/4 cups ap flour
1/2 tsp baking soda
1 tsp baking powder
1/3 tsp sea salt
2 sticks unsalted butter, softened
1 cup dark brown sugar
1/2 cup white granulated sugar
1 cup peanut butter
2 eggs
2 tsp vanilla
2 Tablespoons dark corn syrup (optional)
2 cups shredded sweetened coconut

Directions:
Preheat oven to 375 F
Yield : Appx. 2 dozen good sized cookies (give or take a few)

1. Mix all dry ingredients in small/medium sized bowl.
2. Place butter, brown sugar, granulated sugar, and peanut butter into the bowl of an electric mixer fitted with a paddle attachment. Beat on medium speed for 3-5 minutes, scraping down the sides of the bowl as needed to assure everything is incorporating well.
3. Now, one at a time, on a lower setting, add your eggs. Beat at least 3o seconds between each egg.
4. Next, add your vanilla and corn syrup (if you're choosing to use it).
5. Taking a cue from the compost cookies, I beat the dough at this stage on high for about 5-7 minutes to encourage some of the sugar to dissolve.
6. On a very low speed add your flour and mix 30 seconds or until just incorporated thoroughly. Do not overmix, this will give you a dense cakey cookie, not a tender one.
7. Finally, toss in your coconut and mix briefly so that the coconut incorporates.
8. Using an ice cream scoop, equally measure out mounds of cookie dough onto a prepared cookie sheet, or baking stone. Press each cookie down a bit with the back of a fork (also gives you that traditional peanut butter cookie pattern).
9. Refrigerate 30 minutes.
10. Bake in oven for 12-15 minutes. Until just golden brown.
11. Remove from oven, transfer to wire cooling rack.
12. Pour a giant glass of cold milk and devour your work!
Happy Mothers Day!

Thursday, May 06, 2010

Roasted Sweet Potato Peanut Bisque

This rarely ever happens, I'm sharing with you what I had for dinner. . . tonight. Yes, only a few hours ago. I think I've done this maybe twice in my three years of blogging. I don't want to say this soup was so insanely delicious I just couldn't help myself, only because you may not agree, it may not be your cup of tea, er, bowl of soup. Because as far as soup is concerned it's more on the exotic end of the scale than the safe. It's not your garden variety chicken noodle or cream of spinach. It's sweet, smoky, salty, and rich. Exactly what I was after this evening (clearly, because here I sit writing about it)!

The base consists of a bit of tomato juice, lots of broth, peanut butter, and loads of salty oven roasted sweet potato. There's a bit of spicy green chile, garlic, and some sauteed onion as well. It really doesn't get much simpler either. The most taxing part, if you could even consider it to be taxing, is peeling and roasting the sweet potato. I started this soup around 7:30 and was sitting down to eat just before 8:00. You may not like it in the end, but come on, with an eet (estimated eating time) of less than half an hour, how can you not give it a try? Rachel Ray would be proud (if I cared). Plus, (yes there's more) it's incredibly healthy! In a cup and a half there are less than 300 calories and about 8 grams of protein. Lordy! There's a foodie trinity! Simple, tasty and good for you! Top it all off with a few salty roasted peanuts and plenty of freshly chopped cilantro. Cilantro makes this soup, I can't really explain it, but it's key, trust me on this. And if you do decide to try this recipe, let me know what you think. I'm really curious if others will think it's as delish as the boyfriend and I thought it was.

Roasted Sweet Potato Peanut Bisque
(adapted from Eating Well)

Ingredients:

Two VERY large sweet potatoes peeled and cut into cubes
1 Tablespoon olive oil
salt, pepper

2 small white onions, chopped
2 cloves of garlic
4 oz. can spicy green chile (or mild if you're not up for the heat)
1 cup tomato juice (V8)
3 cups of chicken broth (I'll admit I use water and bouillon, I like it, shoot me)
1/3 cup smooth peanut butter
s&p to taste (I didn't use any, the salty V8 and bouillon did it for me in the seasoning dept.)

Directions:
Preheat Oven to 400 F

1. Throw (or place gently) your sweet potato cubes on a cookie sheet, drizzle with olive oil and season with salt and pepper. Put sheet in the oven and cook until fork tender and mashable. Mash your potatoes when they're finished. About 20 minutes.
2. On medium heat, drizzle a bit of olive oil in the bottom of a dutch oven or heavy bottom saucepan, then add your onion and garlic. Saute 5 minutes.
3. Add your chiles, then tomato juice, and broth. Heat to a boil.
4. Add peanut butter and mashed roasted squash.
5. Remove from heat temporarily and puree with a hand blender, or, place in food processor/blender (be careful when blending hot liquids, it tends to pop the top off of blenders, use a towel to cover) until smooth.
6. Place back on burner and heat thoroughly.
7. Garnish with peanuts and cilantro.

Now eat it up!

Monday, May 03, 2010

Simply Classic : Triple Chocolate Pudding Pie


Triple Chocolate Pudding Pie, originally uploaded by miss.mallory.
It doesn't get much more classic than chocolate pudding. It's like slipping on a pair of your favorite fuzzy slippers. Comforting, decadent, and silky. I've even heard some say chocolate is at it's best in pudding form. Not sure I entirely agree with that. But throw that decadent smooth mixture on top of a crunchy chocolate cookie crust, finish with a dollop of freshly whipped cream and I may be persuaded into puddings corner.


Triple Chocolate Pudding Pie, originally uploaded by miss.mallory.
This pie is a mixture of recipes. Smitten Kitchen's chocolate pudding pie inspired by a recipe at Gourmet.com, along with my favorite (laughably simple) chocolate cookie crust. I really debated on which chocolate pudding recipe to use. I settled on SK's because it was just so simple, cornstarch based (not egg yolk based). A few ingredients and steps then viola, you've got a decadent, rich, dark chocolate pudding. Plus, it's made for pie, meaning, it won't ooze out every which way when you slice into it.


Triple Chocolate Pudding Pie, originally uploaded by miss.mallory.
If you're looking for a simple dessert that will satisfy any chocolate craving, or perhaps put a smile on your mom's face this mothers day, might I suggest this gorgeous chocolate gem of a dessert?

Triple Chocolate Pudding Pie

Pudding Filling:

1/4 cup of cornstarch
1/3 cup sugar
3 Tablespoons of cocoa powder
1/4 teaspoon salt
3 cups of whole milk
4 oz. chocolate (no more than 60%)
1 teaspoon vanilla
1 cup chilled heavy cream
1 Tablespoon honey (to sweeten whip cream)

Crust:

1 box of chocolate teddy grahams (crushed)
5 Tablespoons butter, melted
1/4 cup granulated sugar

Assemble:

Pie crust first:

Preheat oven to 350 F. Mix crumbs, butter, and sugar together in a bowl. Press firmly into a nine inch spring form pan. Bake for 15-20 minutes, until crust it crispy and cooked.

Now for the filling:

1. Whisk cocoa, cornstarch, sugar, and salt into a heavy bottom medium sized saucepan.
2. Over low heat slowly whisk the milk in. Increase heat to medium/high and bring mixture to a boil, whisking constantly.
3. Once the mixture has come to a boil, continue to whisk, and allow to cook for 3 (I let it cook for closer to 5) minutes until mixture thickens.
4. Pour into cooled pie shell.
5. Chill in refrigerator for at least four hours (I found it was much better overnight, I ate a piece that night, but the 'next day' slice was richer, and the crust had softened a bit, in a pleasant way of course!)


Triple Chocolate Pudding Pie, originally uploaded by miss.mallory.